Photos, notes and attachments
How to mark up job photos in the Online Dashboard
Learn how to add drawings, shapes, and text to a job photo and save a marked-up copy in ServiceM8.
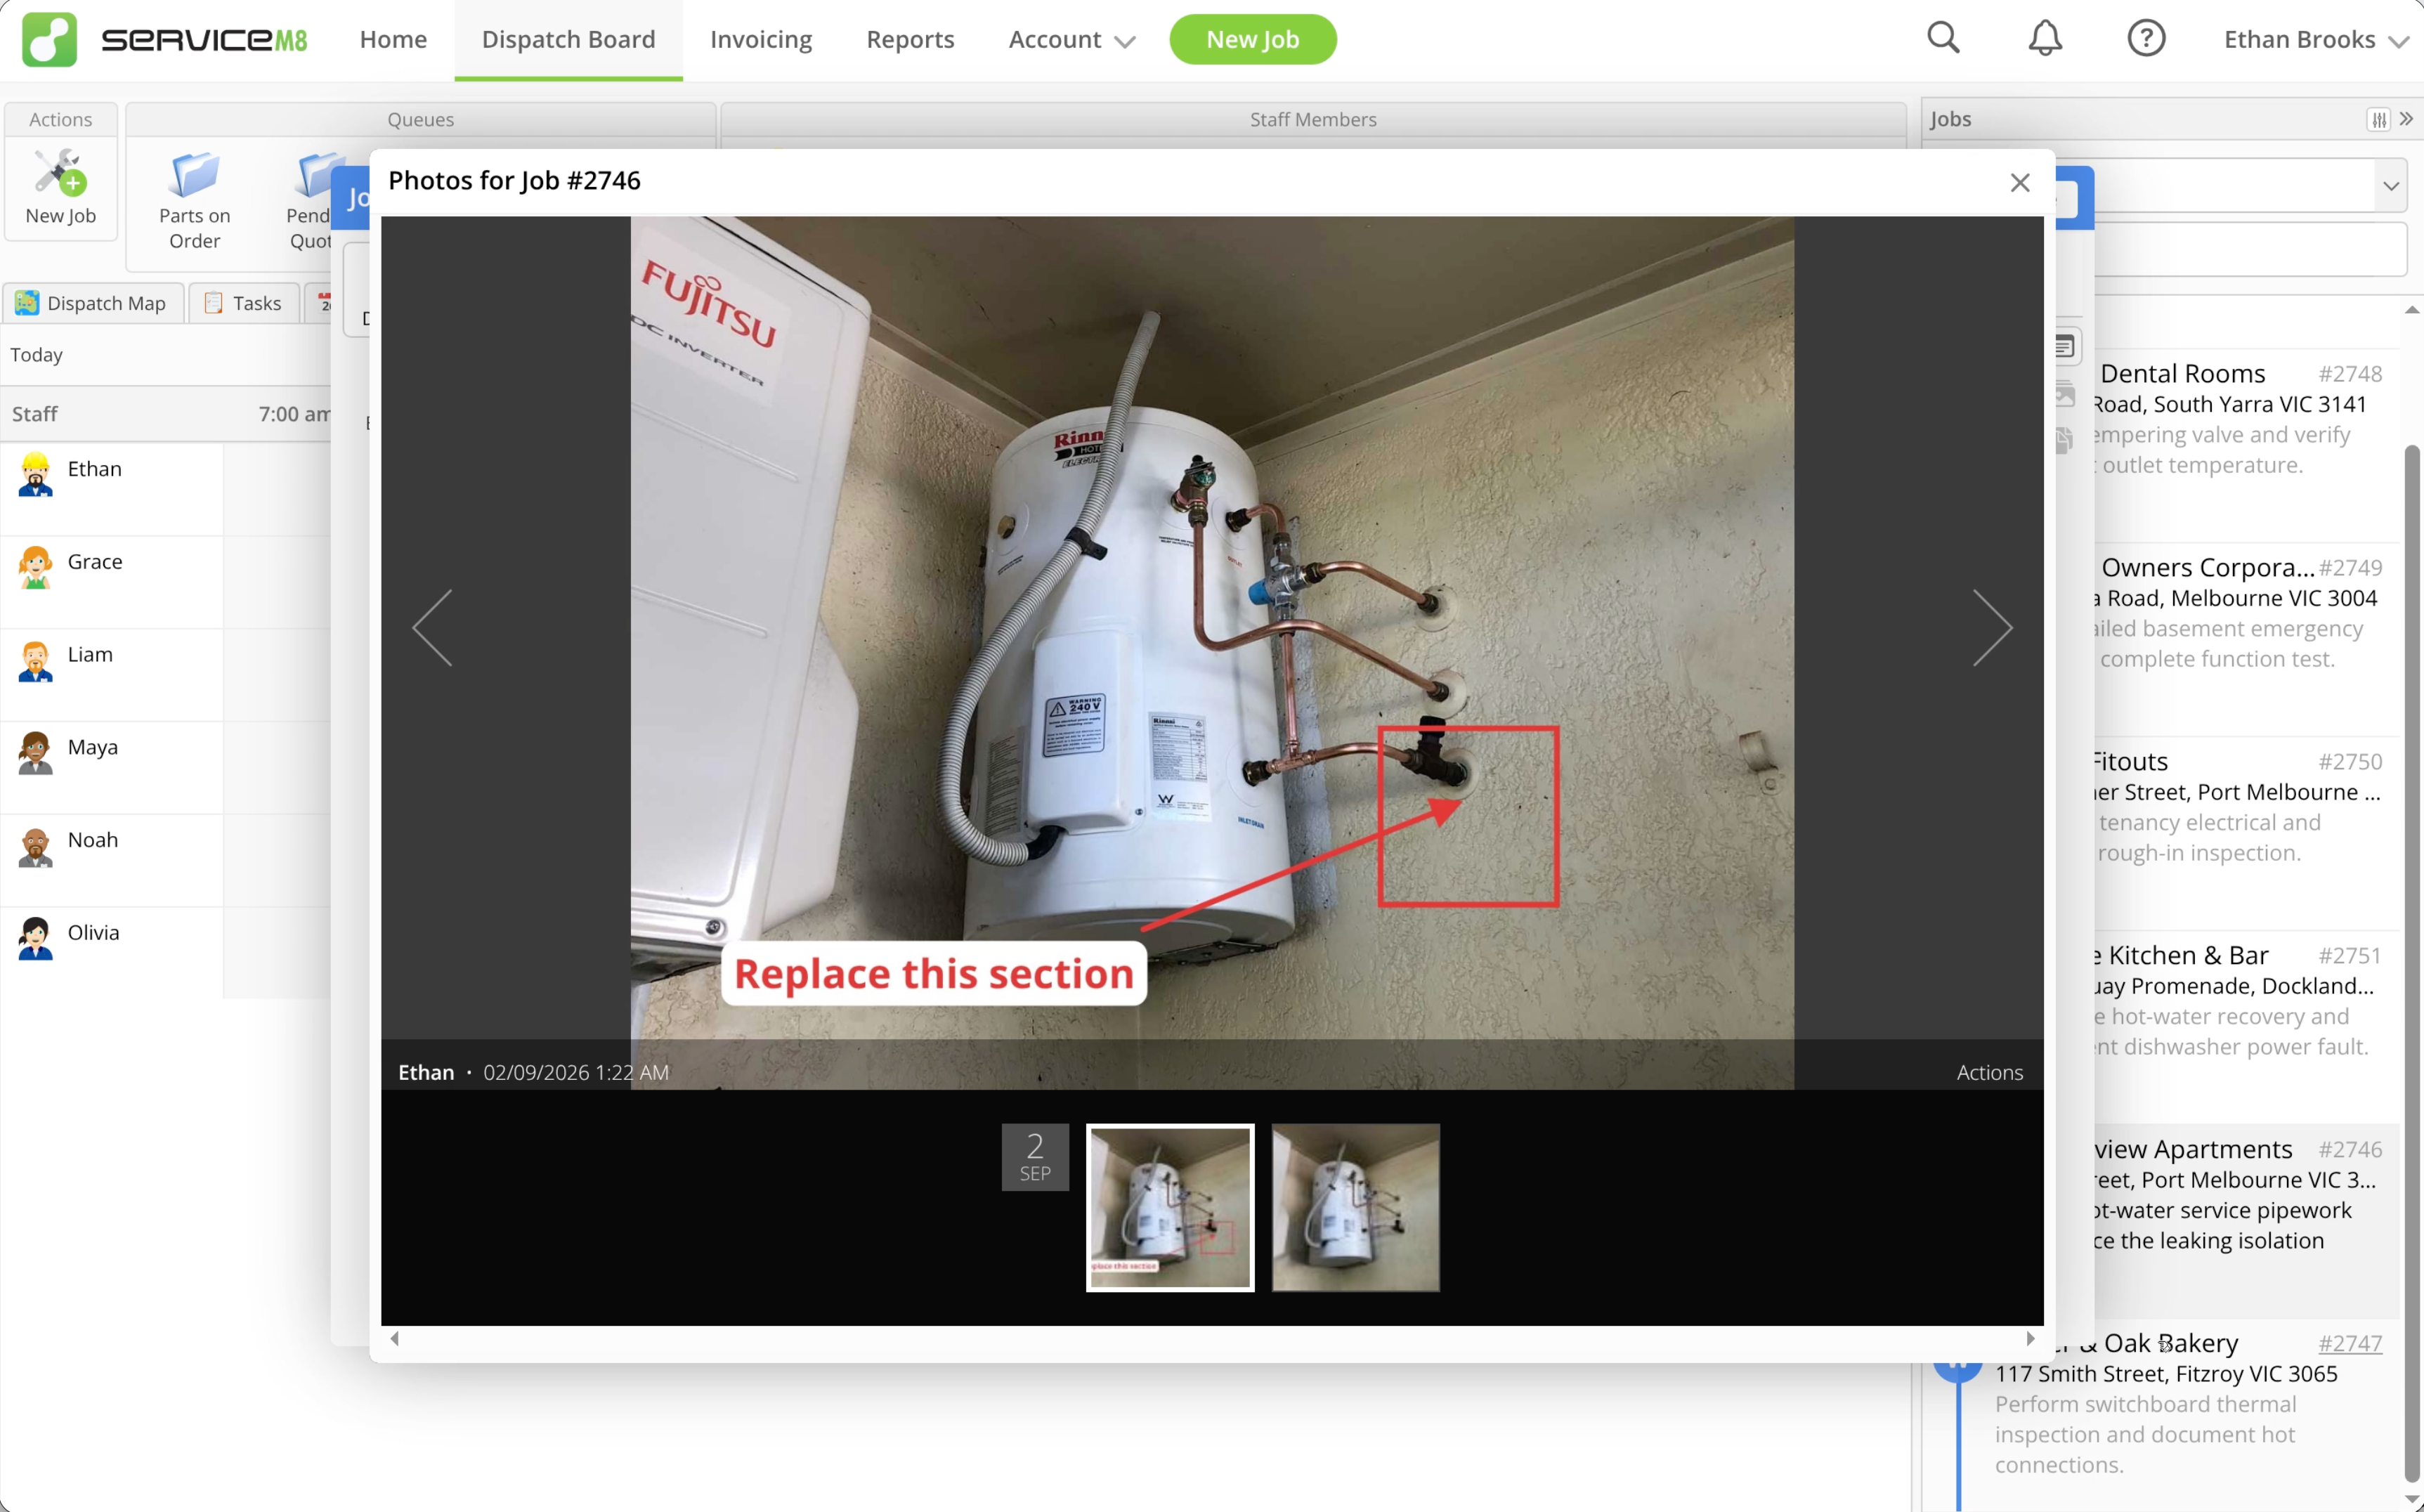
Photo markup helps you highlight work requirements, measurements, issues, or findings on a job photo. You can add drawings, shapes, and text without changing the original photo.
Mark up a job photo
-
Open the Dispatch Board in the Online Dashboard.
-
Open the relevant Job card.
-
In the Job Diary, open the photo you want to mark up.
-
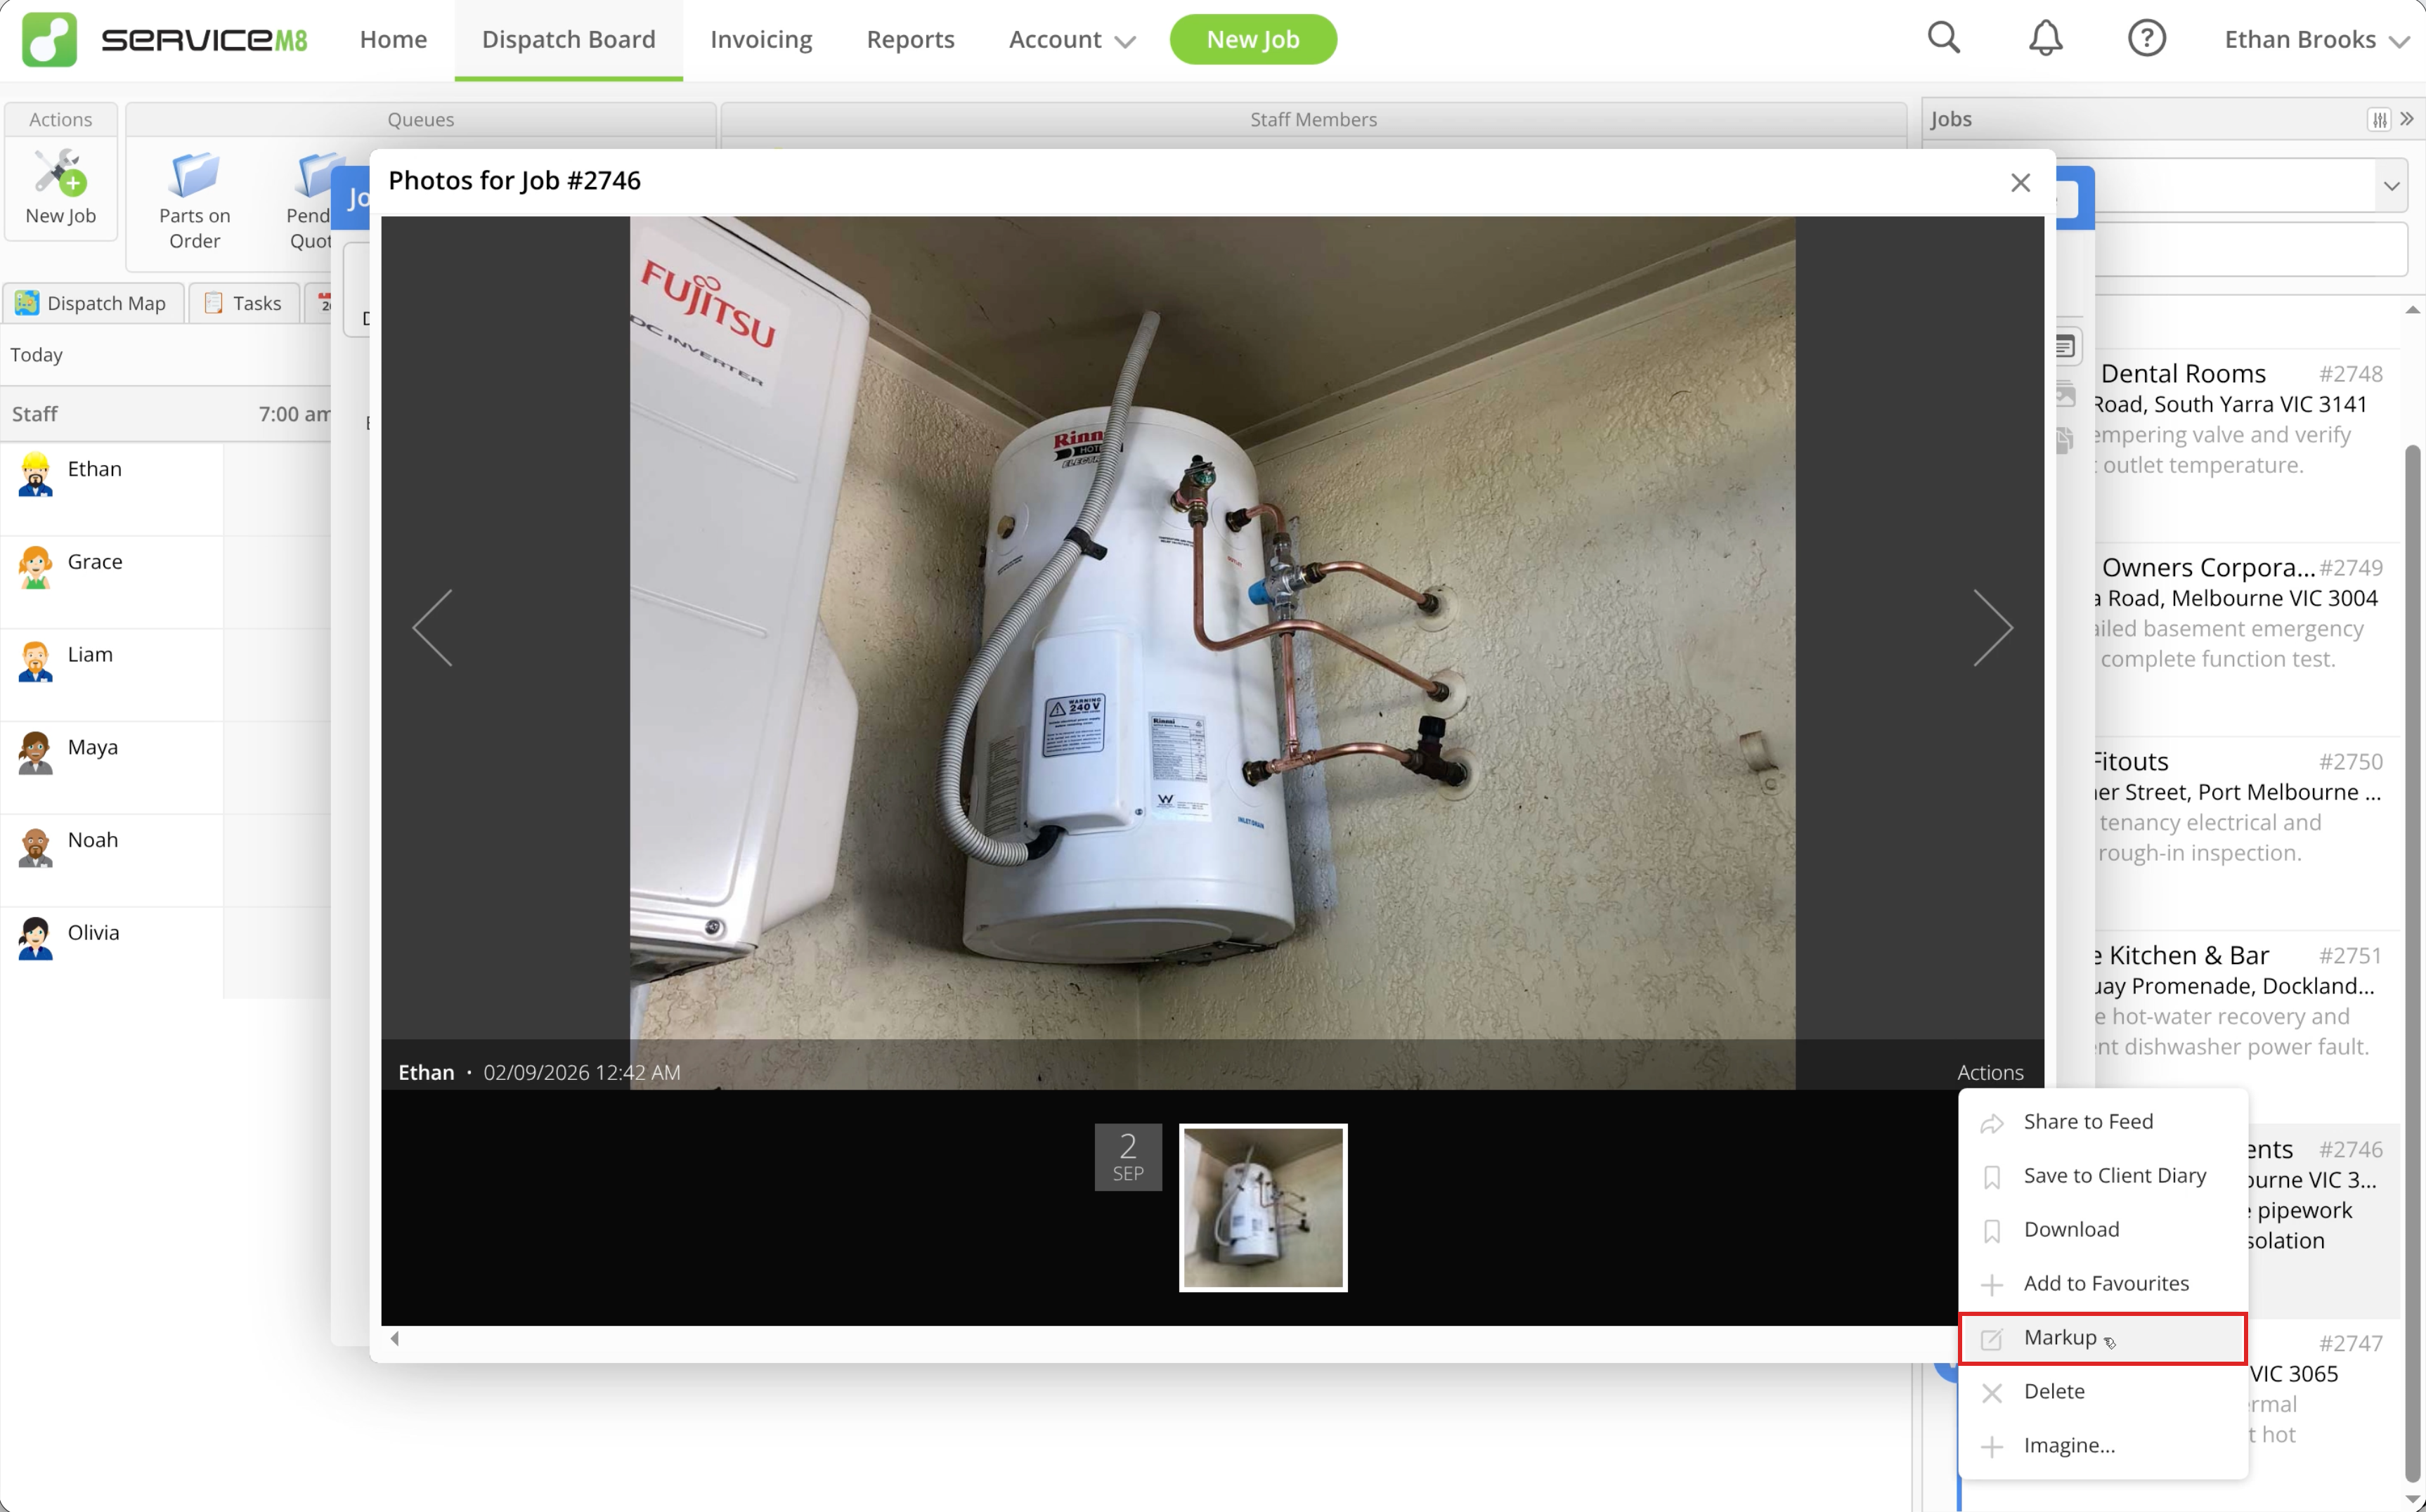
Click Actions > Markup.
-
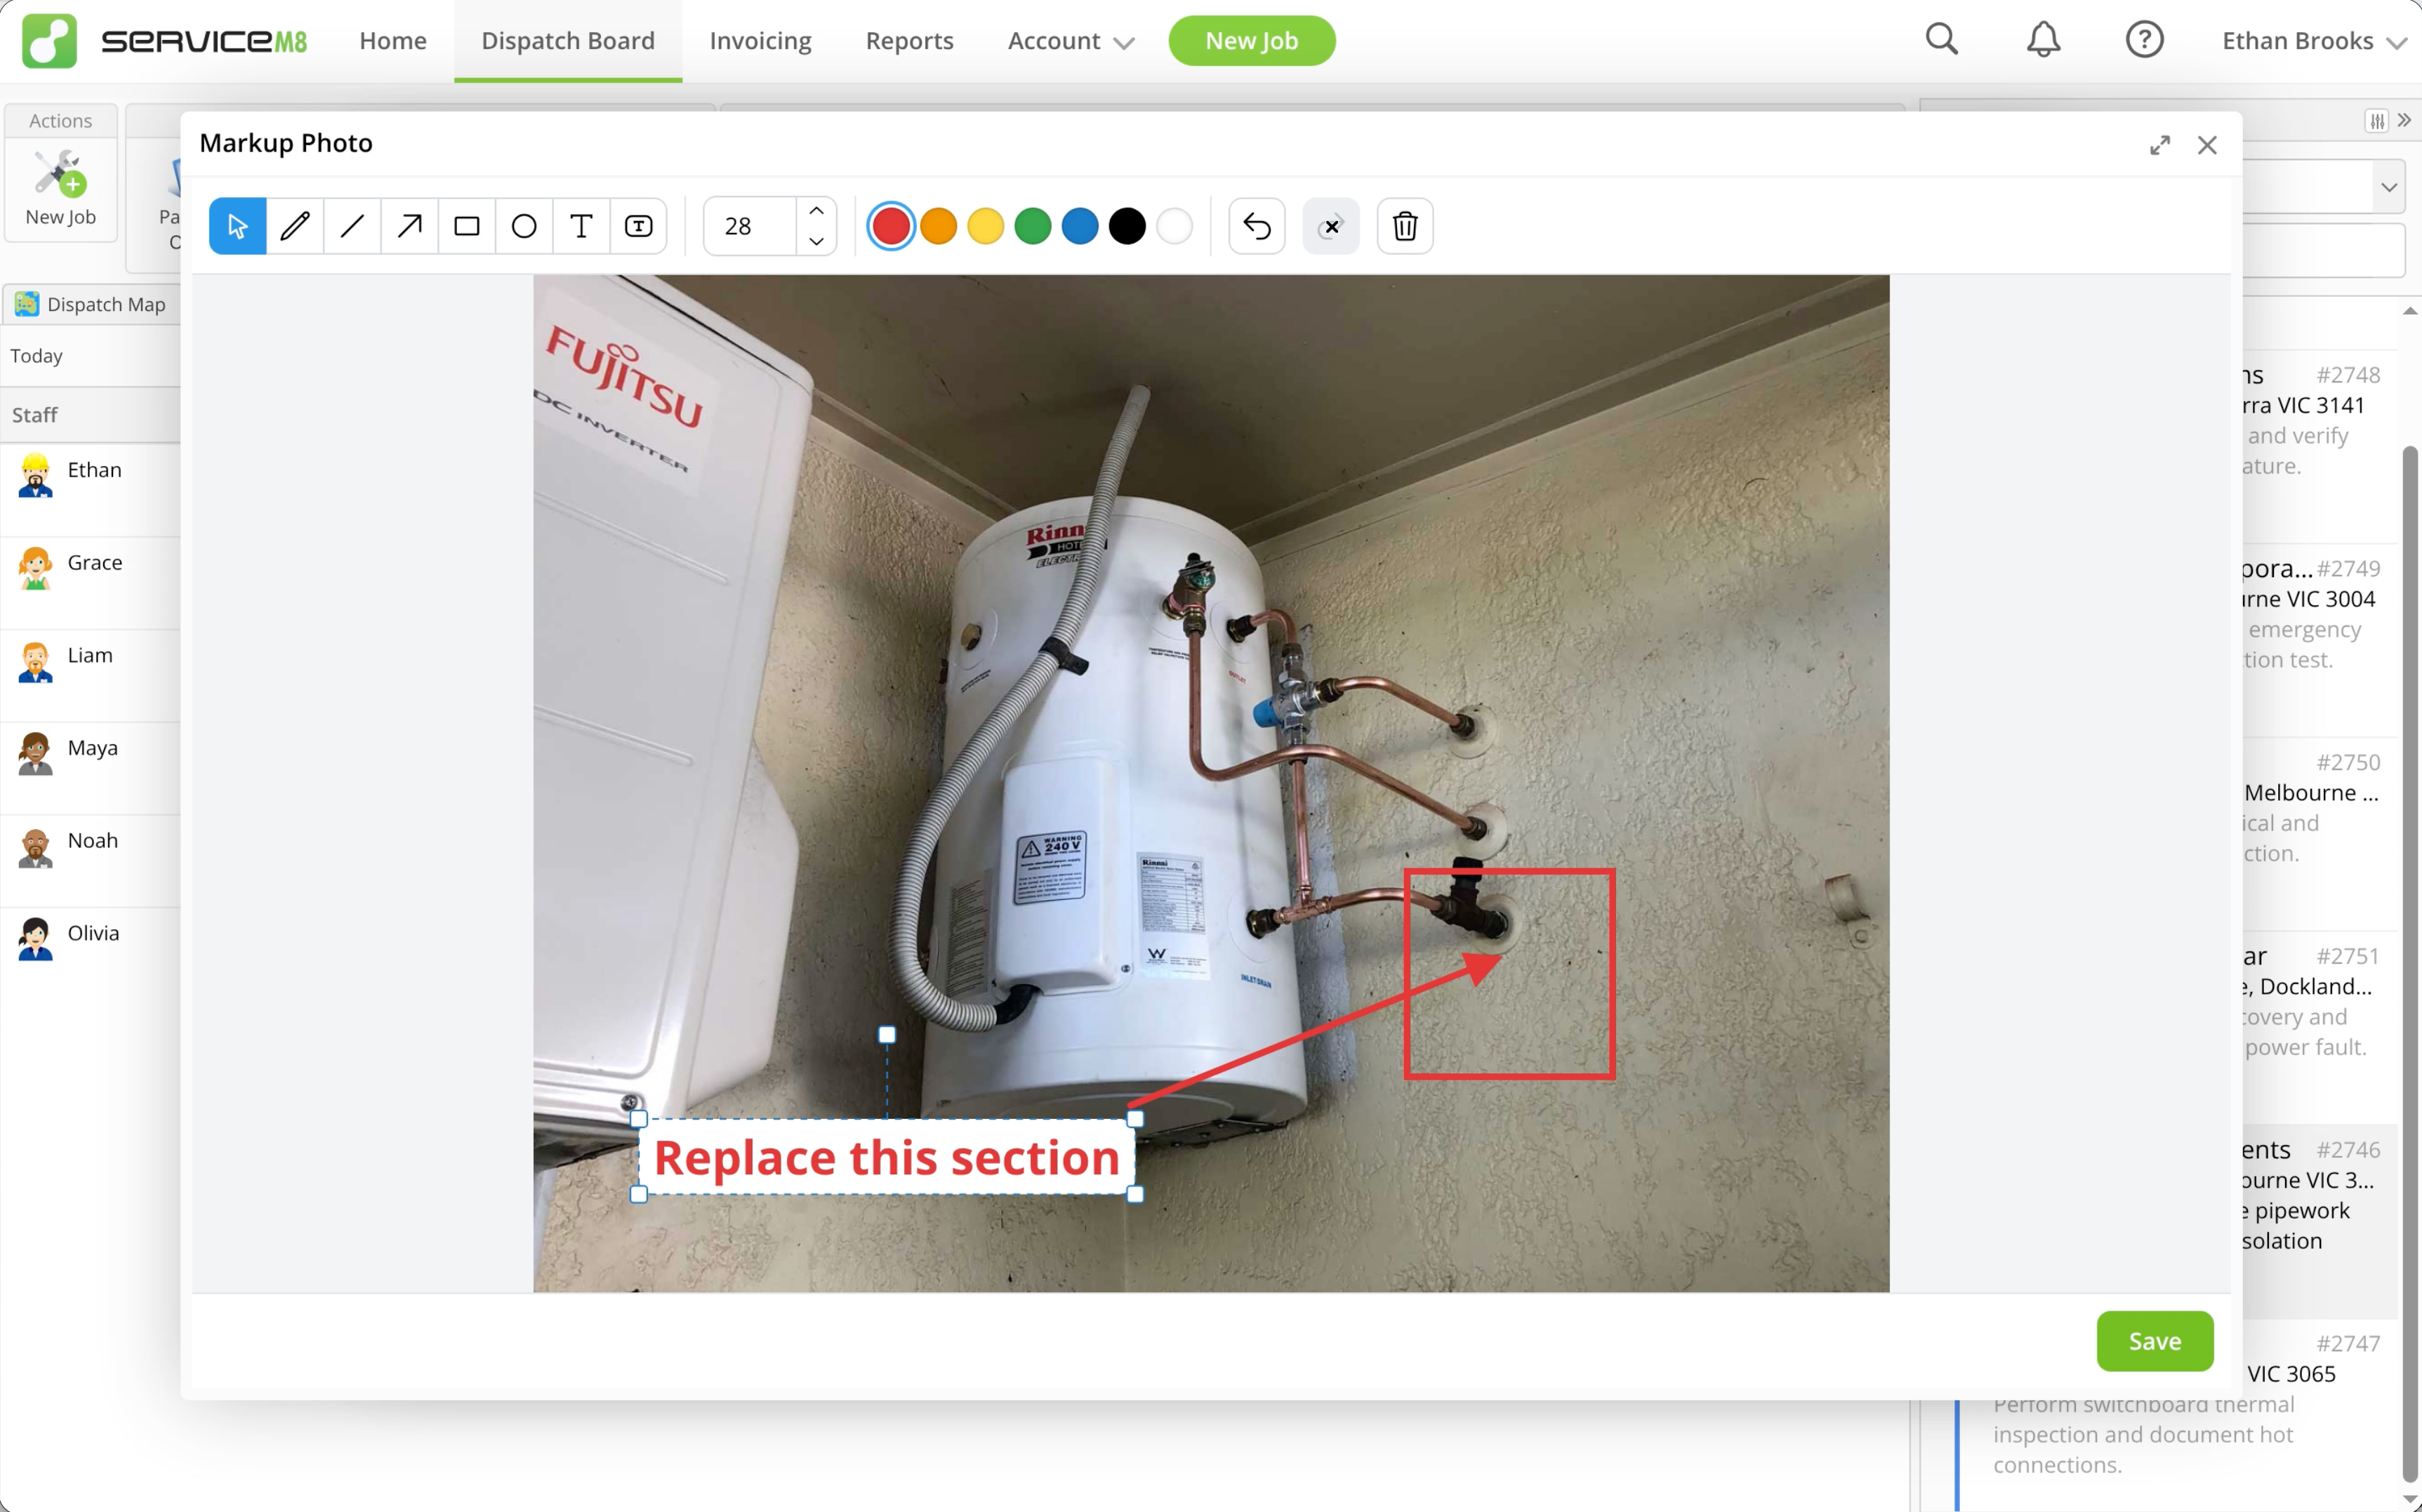
Choose Draw, Line, Arrow, Rectangle, or Circle and a colour, then drag on the photo to add a mark.
-
To add text, choose Text or Text Label, select a colour and text size, then click the photo. Type your text and press Enter.
-
To adjust a mark, click Select & Move, then select it. Drag it to move it or drag the selection handles to resize it. You can also change its colour or, for text and labels, its text size. Double-click text to edit it.
-
Use Undo or Redo to reverse or restore a change.
-
To remove a mark, select it and click the bin icon (Delete selected item). To remove all marks, click an empty area of the photo to deselect, then click the bin icon (Clear all markup).
-
Click Save. ServiceM8 saves a new JPEG copy to the Job Diary and displays it in the photo viewer. The original photo remains unchanged.