- Navigate the Home Screen: Jobs, Notifications, and More
- Access job details through the Job Card
- Start a job: Navigation and arrival
- Complete checklist tasks on a job
- Take additional actions: Phone, camera, and notes
- Check out of a job
Jobs, Notifications & More
Opening the app takes you directly to My Schedule. This page lists all of jobs scheduled to You, allowing you to quickly see what’s ahead.

- Jobs: Tap to return to the My Schedule page.
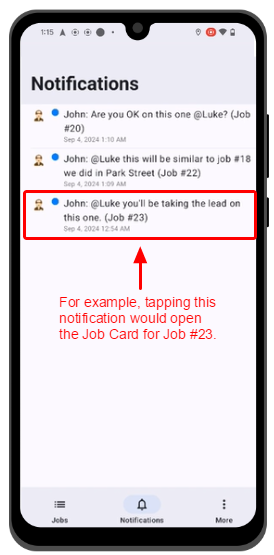
- Notifications: Tap to see all recent job notifications, such as booking changes or notes you’ve been tagged in. Tap a notification to open the relevant Job Card.
- More: This includes options for Help and Logout. If you tap Help, you’ll be directed to the ServiceM8 Help Centre for additional support.

Access job details through the Job Card
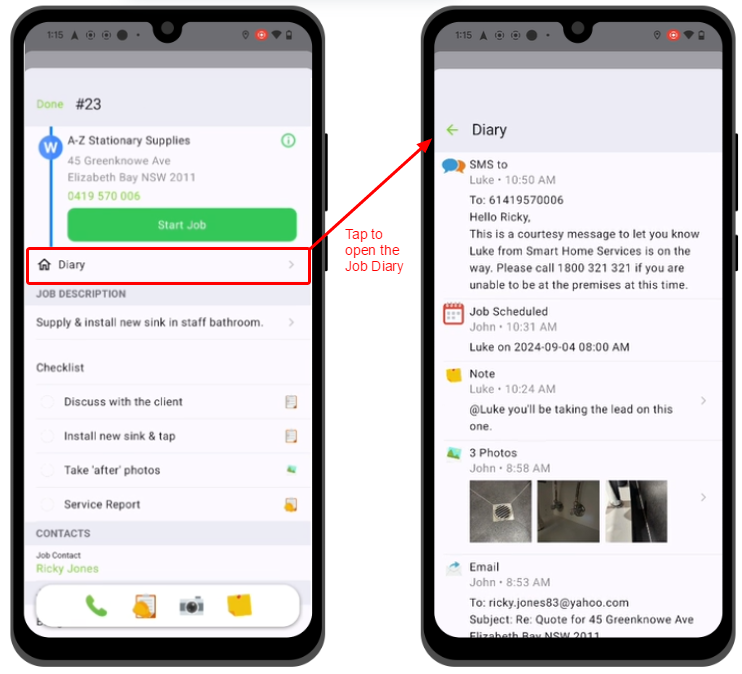
Tap on any job in your schedule to open the Job Card, where you’ll find the following key elements:- Job Description: An overview of what the job entails.
- Diary: Tap to open a history of events, communications, notes, attachments, and photos saved against the job.
- Checklist: A list of tasks that need to be completed on the job.
- Contacts: Information about the client or contacts related to the job.
- Job Details: Additional information regarding badges, job status, job category, and the purchase order number (if applicable).
- Job Action Bar: Use to contact the client, complete Forms, take photos, or add job notes.

- Tap Done at the top of the screen, or
- Swipe down or tap anywhere outside of the Job Card to return to the My Schedule view.
Start a job: Navigation and arrival
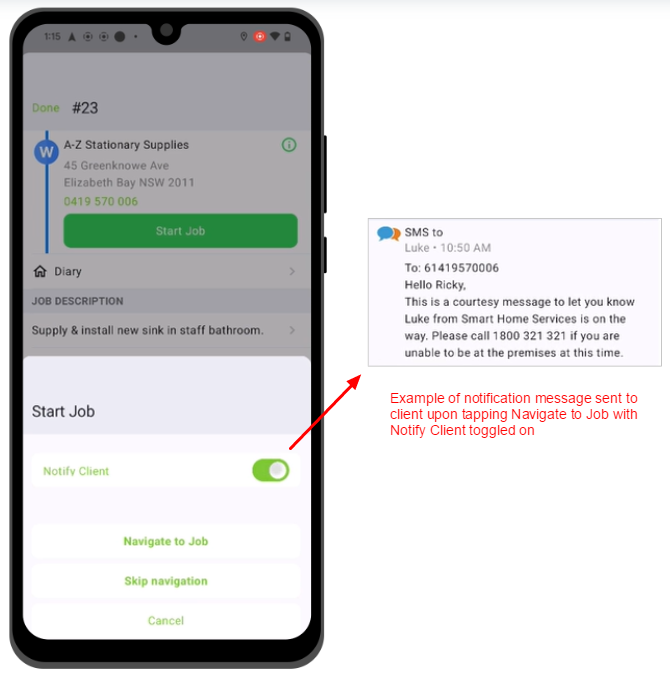
When you’re ready to start a job, open the job card and tap Start Job. You’ll be given two options:- Navigate to Job: This opens Google Maps for turn-by-turn navigation to the job site. Once you arrive at the job, return to the Job Card and tap Arrived. Your travel time will be automatically logged, and the job timer will start to track time on site.
- If Notify Client is toggled to the ON position and you select Navigate to Job, a message will automatically be sent to the job contact to let them know you’re on your way.
- Skip Navigation: If you don’t want to log your travel time, skip navigation. No travel time will be logged, and the job timer will start immediately.

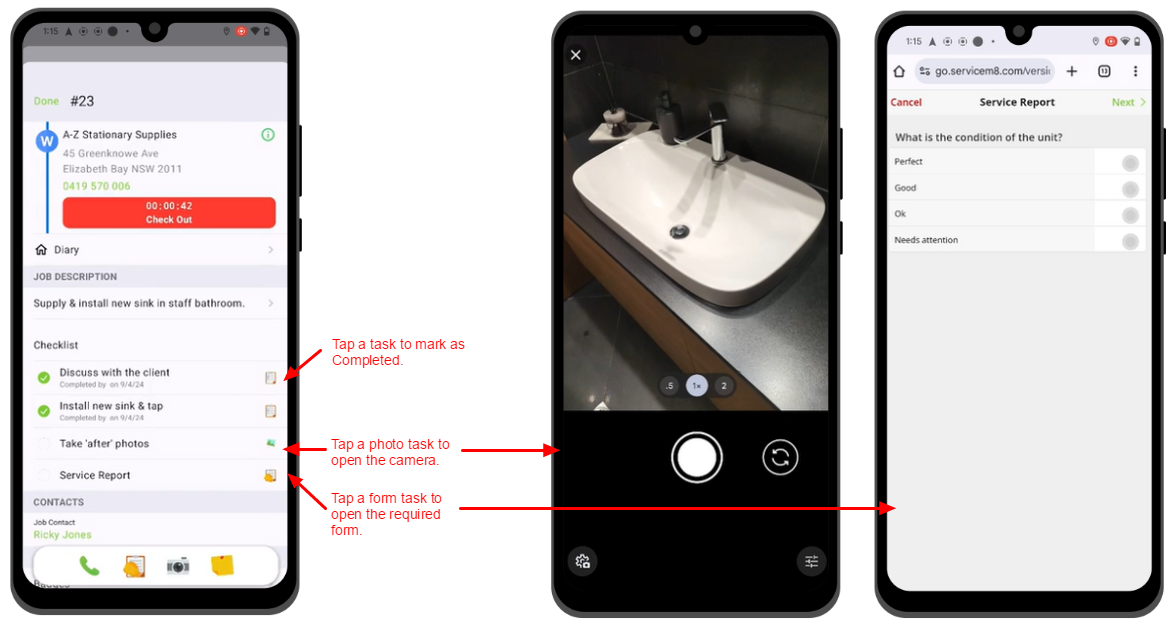
Complete checklist tasks on a job
Checklists help ensure that all tasks are completed before checking out of a job. As you complete each task, tap it to mark it as completed.- Photos: Tapping a checklist task containing the word “photo” will automatically open the camera. After taking the photo and tapping OK, the image is saved to the job’s Diary and the checklist task is marked as completed.
- Forms: Tapping a checklist task to complete a Form will automatically open the Form. After completing all form requirements, the form is saved to the job’s Diary and the checklist task is marked as completed.

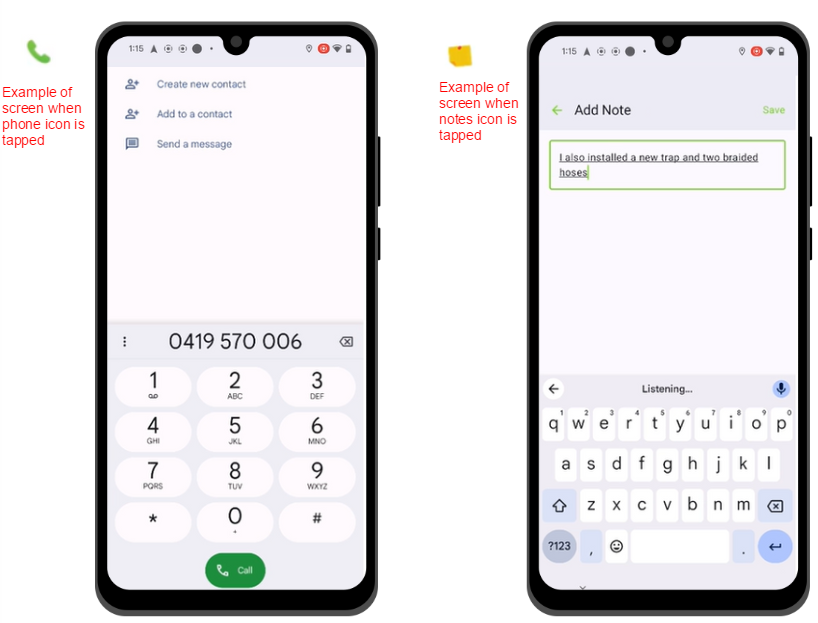
Take additional actions: Phone, camera, and notes
At the bottom of the Job Card, you’ll find an Action menu with three or four icons:- Phone: Tap to call the job contact directly from the app.
- Forms: Tap to complete any required Forms
- Camera: Tap to take photos, which will automatically be saved to the job’s Diary.
- Notes: Tap to add notes to the job’s Diary, helping you record any updates or observations during the job.

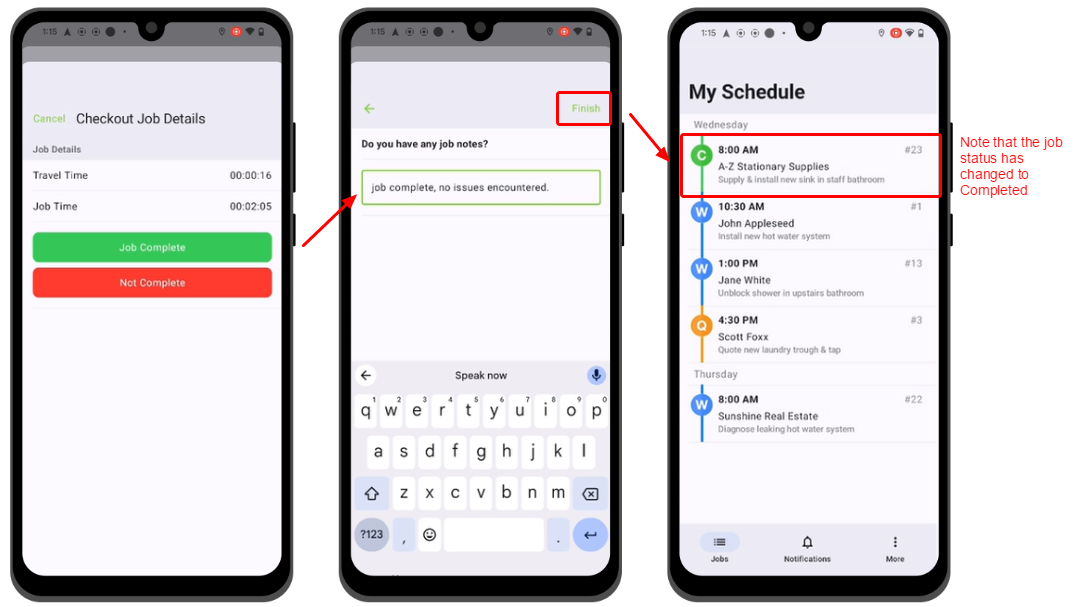
Check out of a job
Once you’ve completed all tasks, tap Check Out. The app will display a summary of your travel time and your job time (in hours and minutes). You’ll be prompted to select one of two options:- Job Complete: Tap if all tasks have been completed to the client’s satisfaction. The job status will update to Completed.
- Not Complete: Tap if not all tasks have been accomplished or if there are additional barriers to completion. The job status will remain unchanged.
- To add notes, tap the blank space and enter your notes, then tap Finish.
- If you do not have anything else to add, tap Finish.