

Jobs and scheduling
How to set up queues
Learn how to set up queues in ServiceM8.
Queues help you manage jobs on hold. This article explains how to set up regular queues and assignable queues in ServiceM8, how to edit queues, and how to remove queues.
- To learn more about the two types of job queues and how they work, see Queues - overview.
- To learn how to use queues in your daily workflow, see Manage jobs with queues.
Queues can only be set up, edited, or removed using the Online Dashboard.
To set up a new queue:
- From your Online Dashboard, go to Settings > Job Queues.
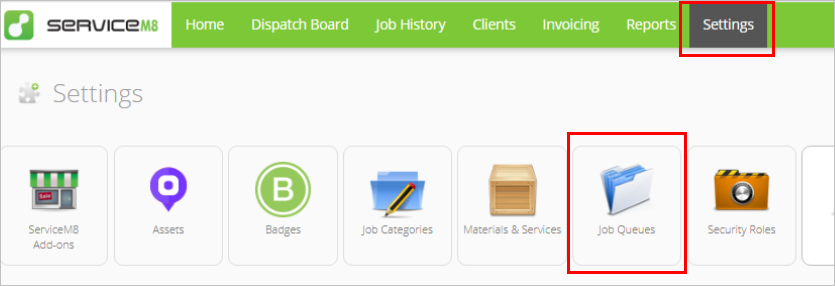
- Click Add Queue.

- Fill out the Job Queue fields.
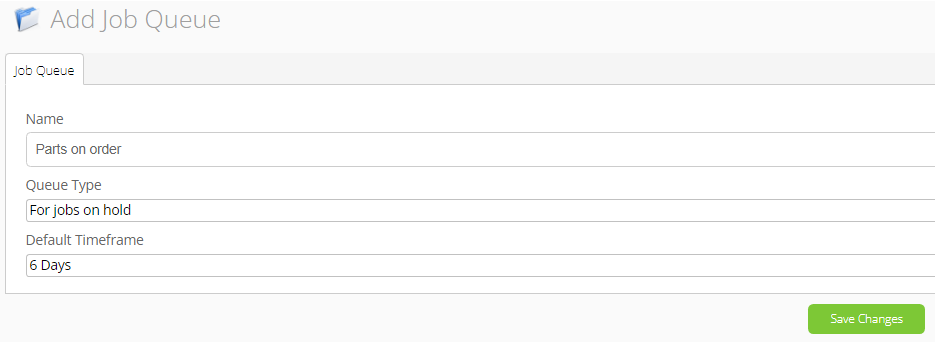
- If the new queue is a regular queue, which is for jobs waiting on an external action (for example, waiting for parts to arrive), fill out the fields as follows:
- Name: Input a queue name (best practice is to identify the reason for the hold, such as “Parts on order”, or “Quotes awaiting approval”)
- Queue Type: Select “For jobs on hold”
- Default Timeframe: Select the default time to act (this can always be changed when assigning the task in the queue)
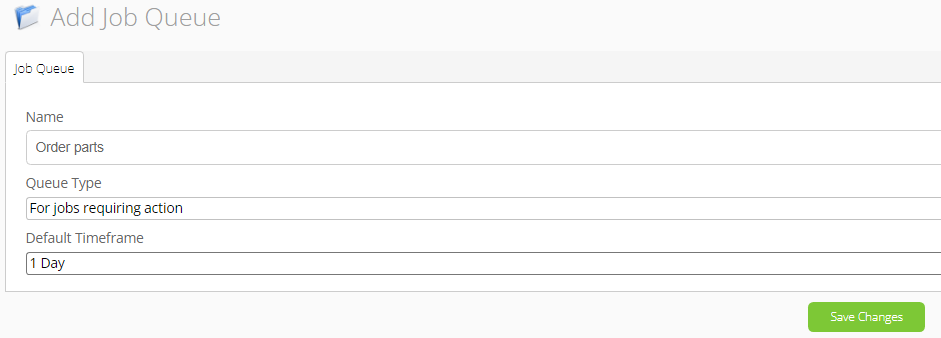
- If the new queue is an assignable queue, which is for jobs waiting on an internal action (for example, placing an order for parts), fill out the fields as follows:
- Name: Input a queue name (best practice is to identify what the assigned staff member must do, such as “Order parts”, or “Provide quote”)
- Queue Type: Select “For jobs requiring action”
- Default Timeframe: Select the default time to act (this can always be changed when assigning the task in the queue)
- Click Save Changes.
When you return to the Dispatch Board, your new queue folders will be there, and the new queue will also have a column in the Queues view. Note that assignable queue folders are a different colour than regular queue folders.

To edit a queue:
- From your Online Dashboard, go to Settings > Job Queues.
- Find the queue and click Edit.
- Make your desired changes to the queue settings (see previous section for more information about queue settings).
- Click Save Changes.

To remove a queue:
- From your Online Dashboard, go to Settings > Job Queues.
- Find the queue and click Remove.
- Click Yes to confirm removal (only if you’re sure you want to delete the queue from your workflow!).
