To activate Advanced Photo Branding:
- From the Online Dashboard, go to Settings > ServiceM8 Add-ons.
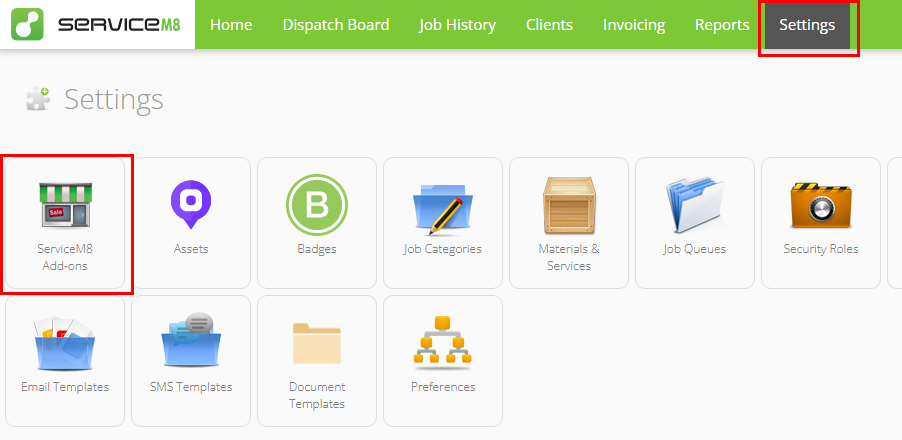
- Find and click Advanced Photo Branding.
- Click the switch to toggle ON.

To customise Advanced Photo Branding:
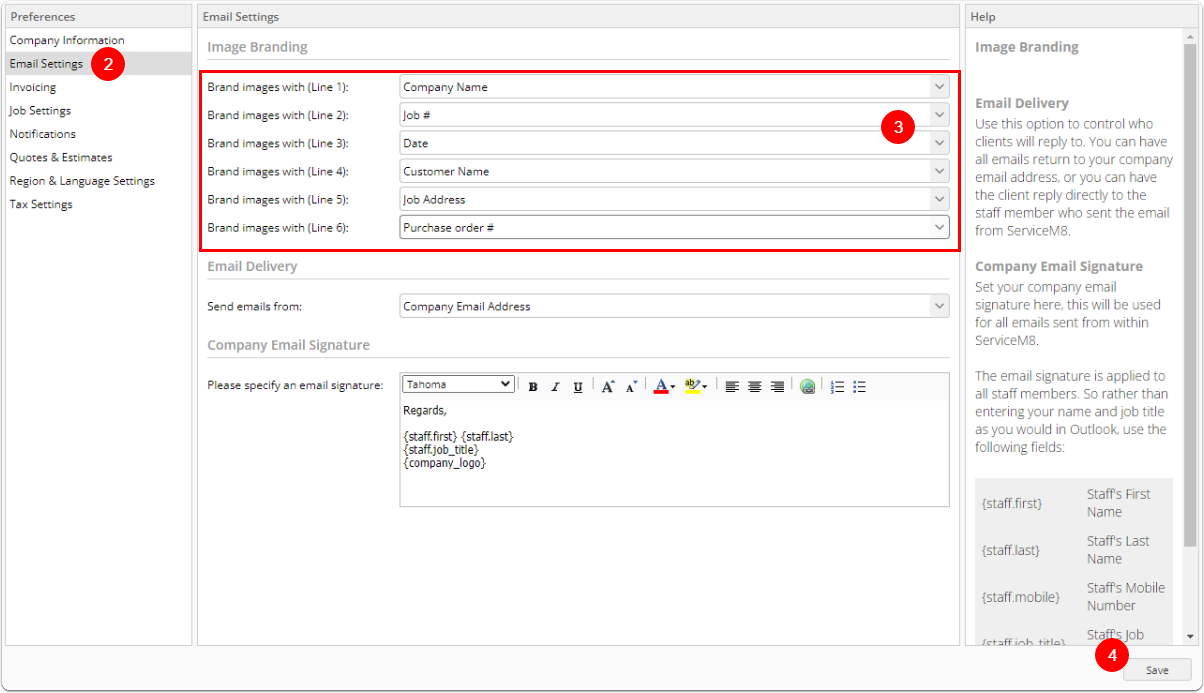
- Go to Settings > Preferences.
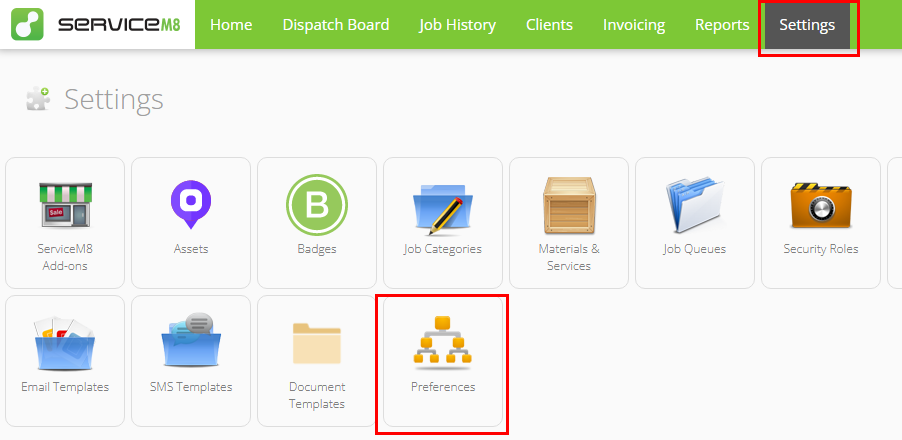
- Click Email Settings.
-
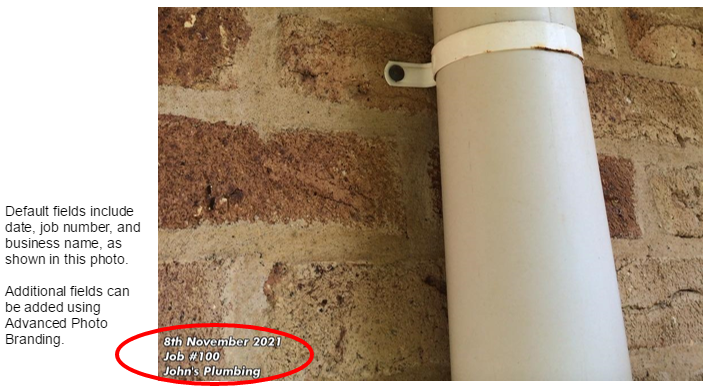
Under Image Branding, use the drop-down arrow next to each line item to select the details you would like branded on your photos. Options include:
- Customer Name
- Company Name
- Date
- Date & Time
- GPS Location
- Purchase Order #
- Photo Tags
- Job Address
- Job #
- N/A (to leave blank)
- Click Save.
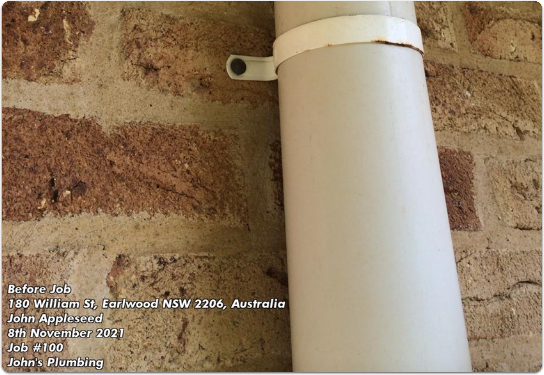
 The next time you email a photo to a client, it will display your custom branding options.