

The mobile app
Use the Schedule on a tablet
Plan bookings, adjust work and schedule jobs from the Jobs panel on your tablet. This guide illustrates the iPad workflow.
With the ServiceM8 mobile app on a tablet, such as an iPad, the Schedule lets you plan bookings across staff and dates, adjust work with touch controls, and schedule jobs from the Jobs panel. Use your tablet in landscape for more room to see staff and booking details.
Before you start
If you can’t see these options, check that you’re using the latest ServiceM8 app and operating system available for your device.
Open the Schedule
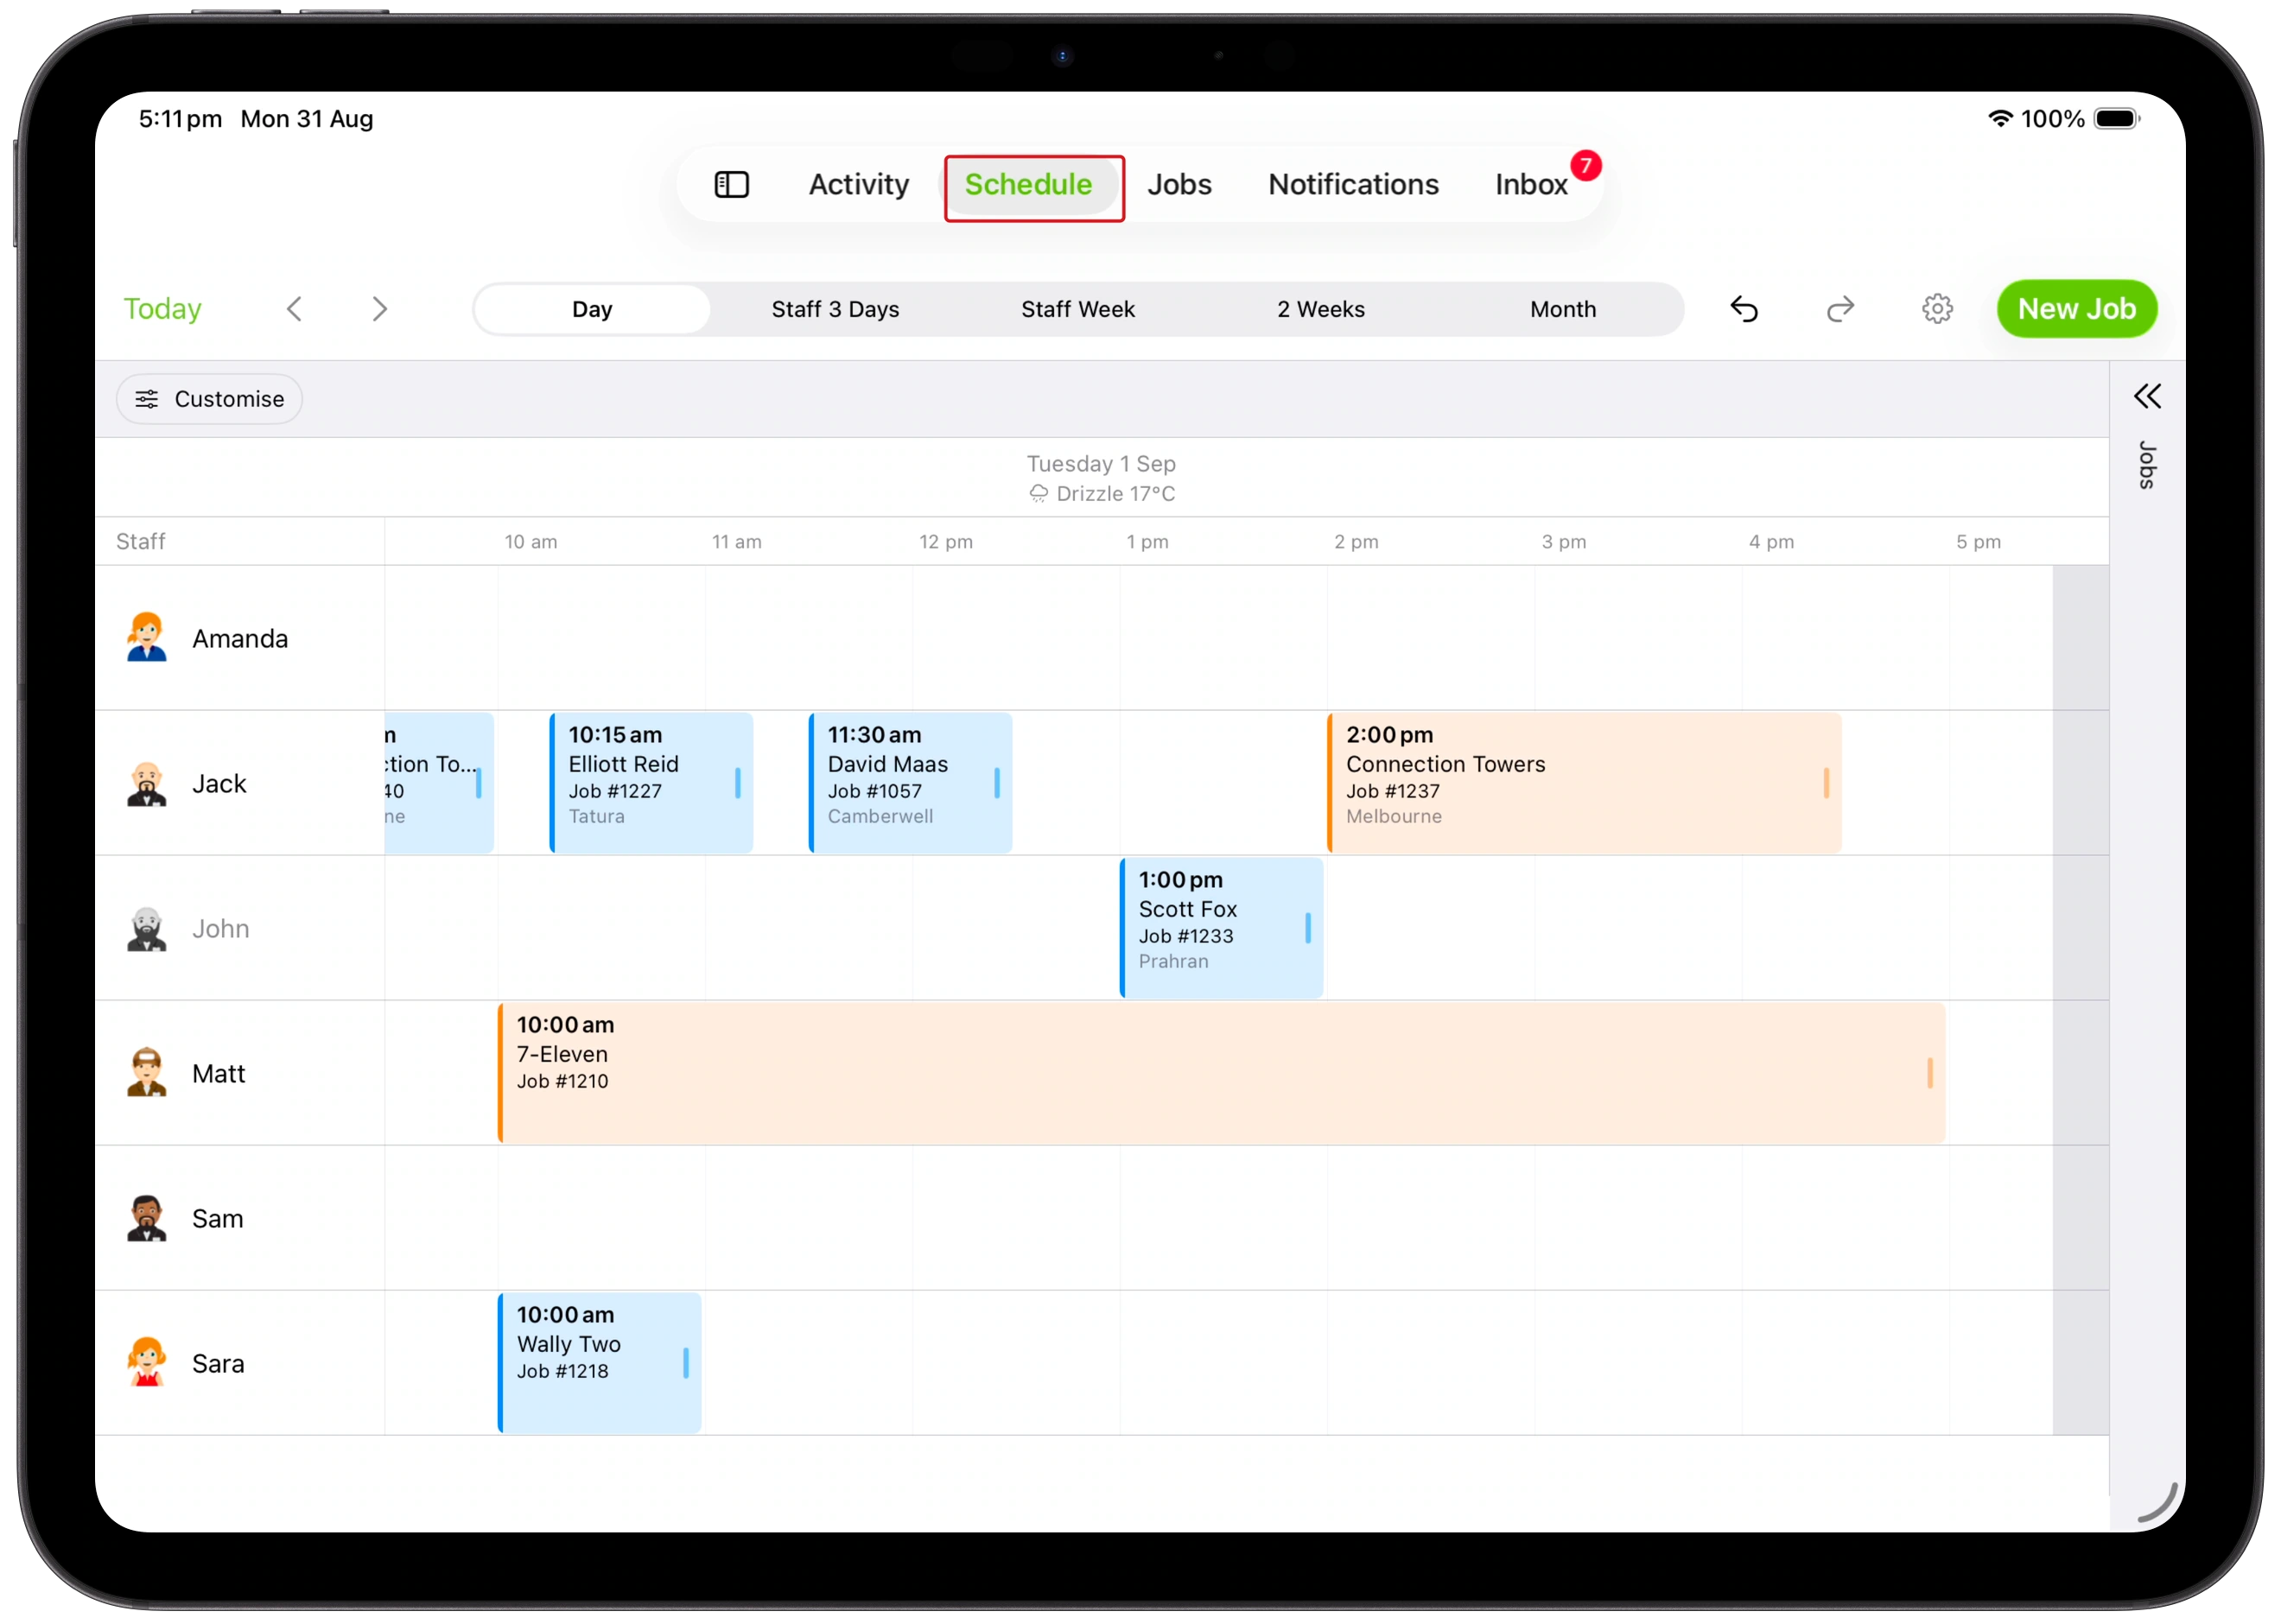
Tap Schedule.
Choose a view
-
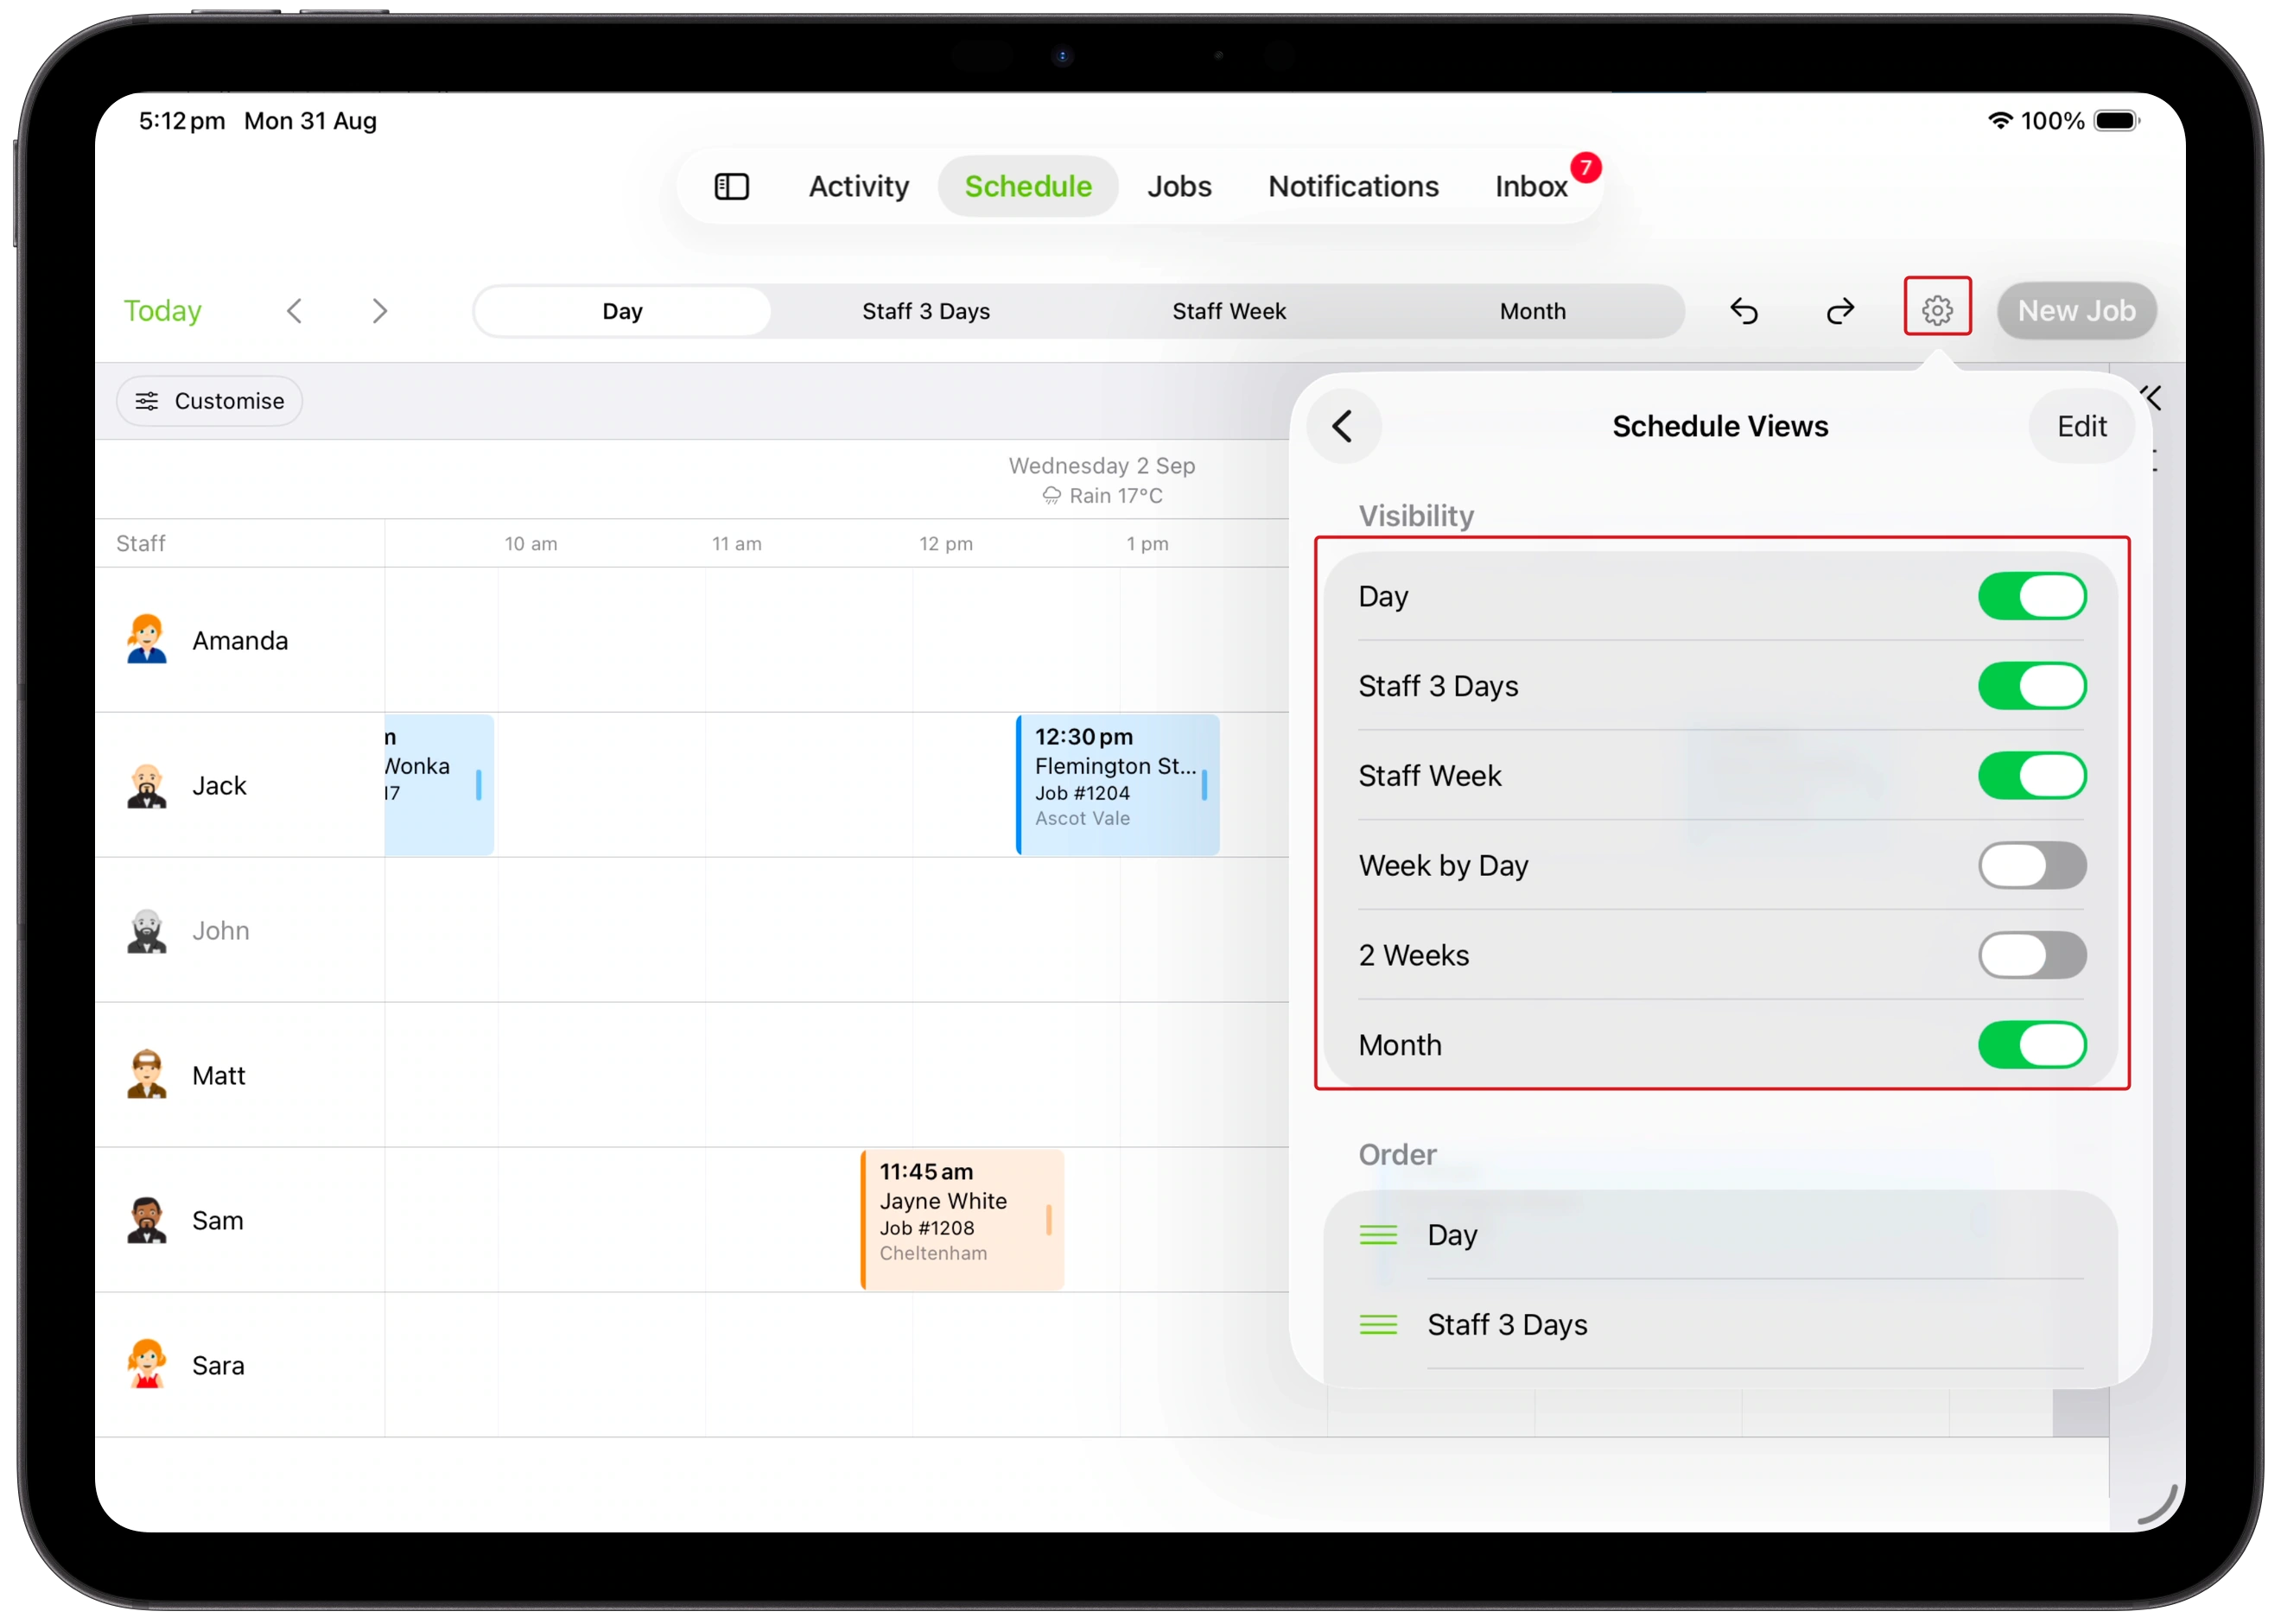
Tap the gear icon (Schedule Settings), then Schedule Views.
-
Turn on the views you want in the toolbar. Use Edit and the reorder handles to change their order. Keep at least one view enabled.
-
Return to the Schedule and tap a view in the toolbar.
| View | Use it for |
|---|---|
| Day | Daily planning across staff rows, with time running horizontally. Bookings use job-status colours. |
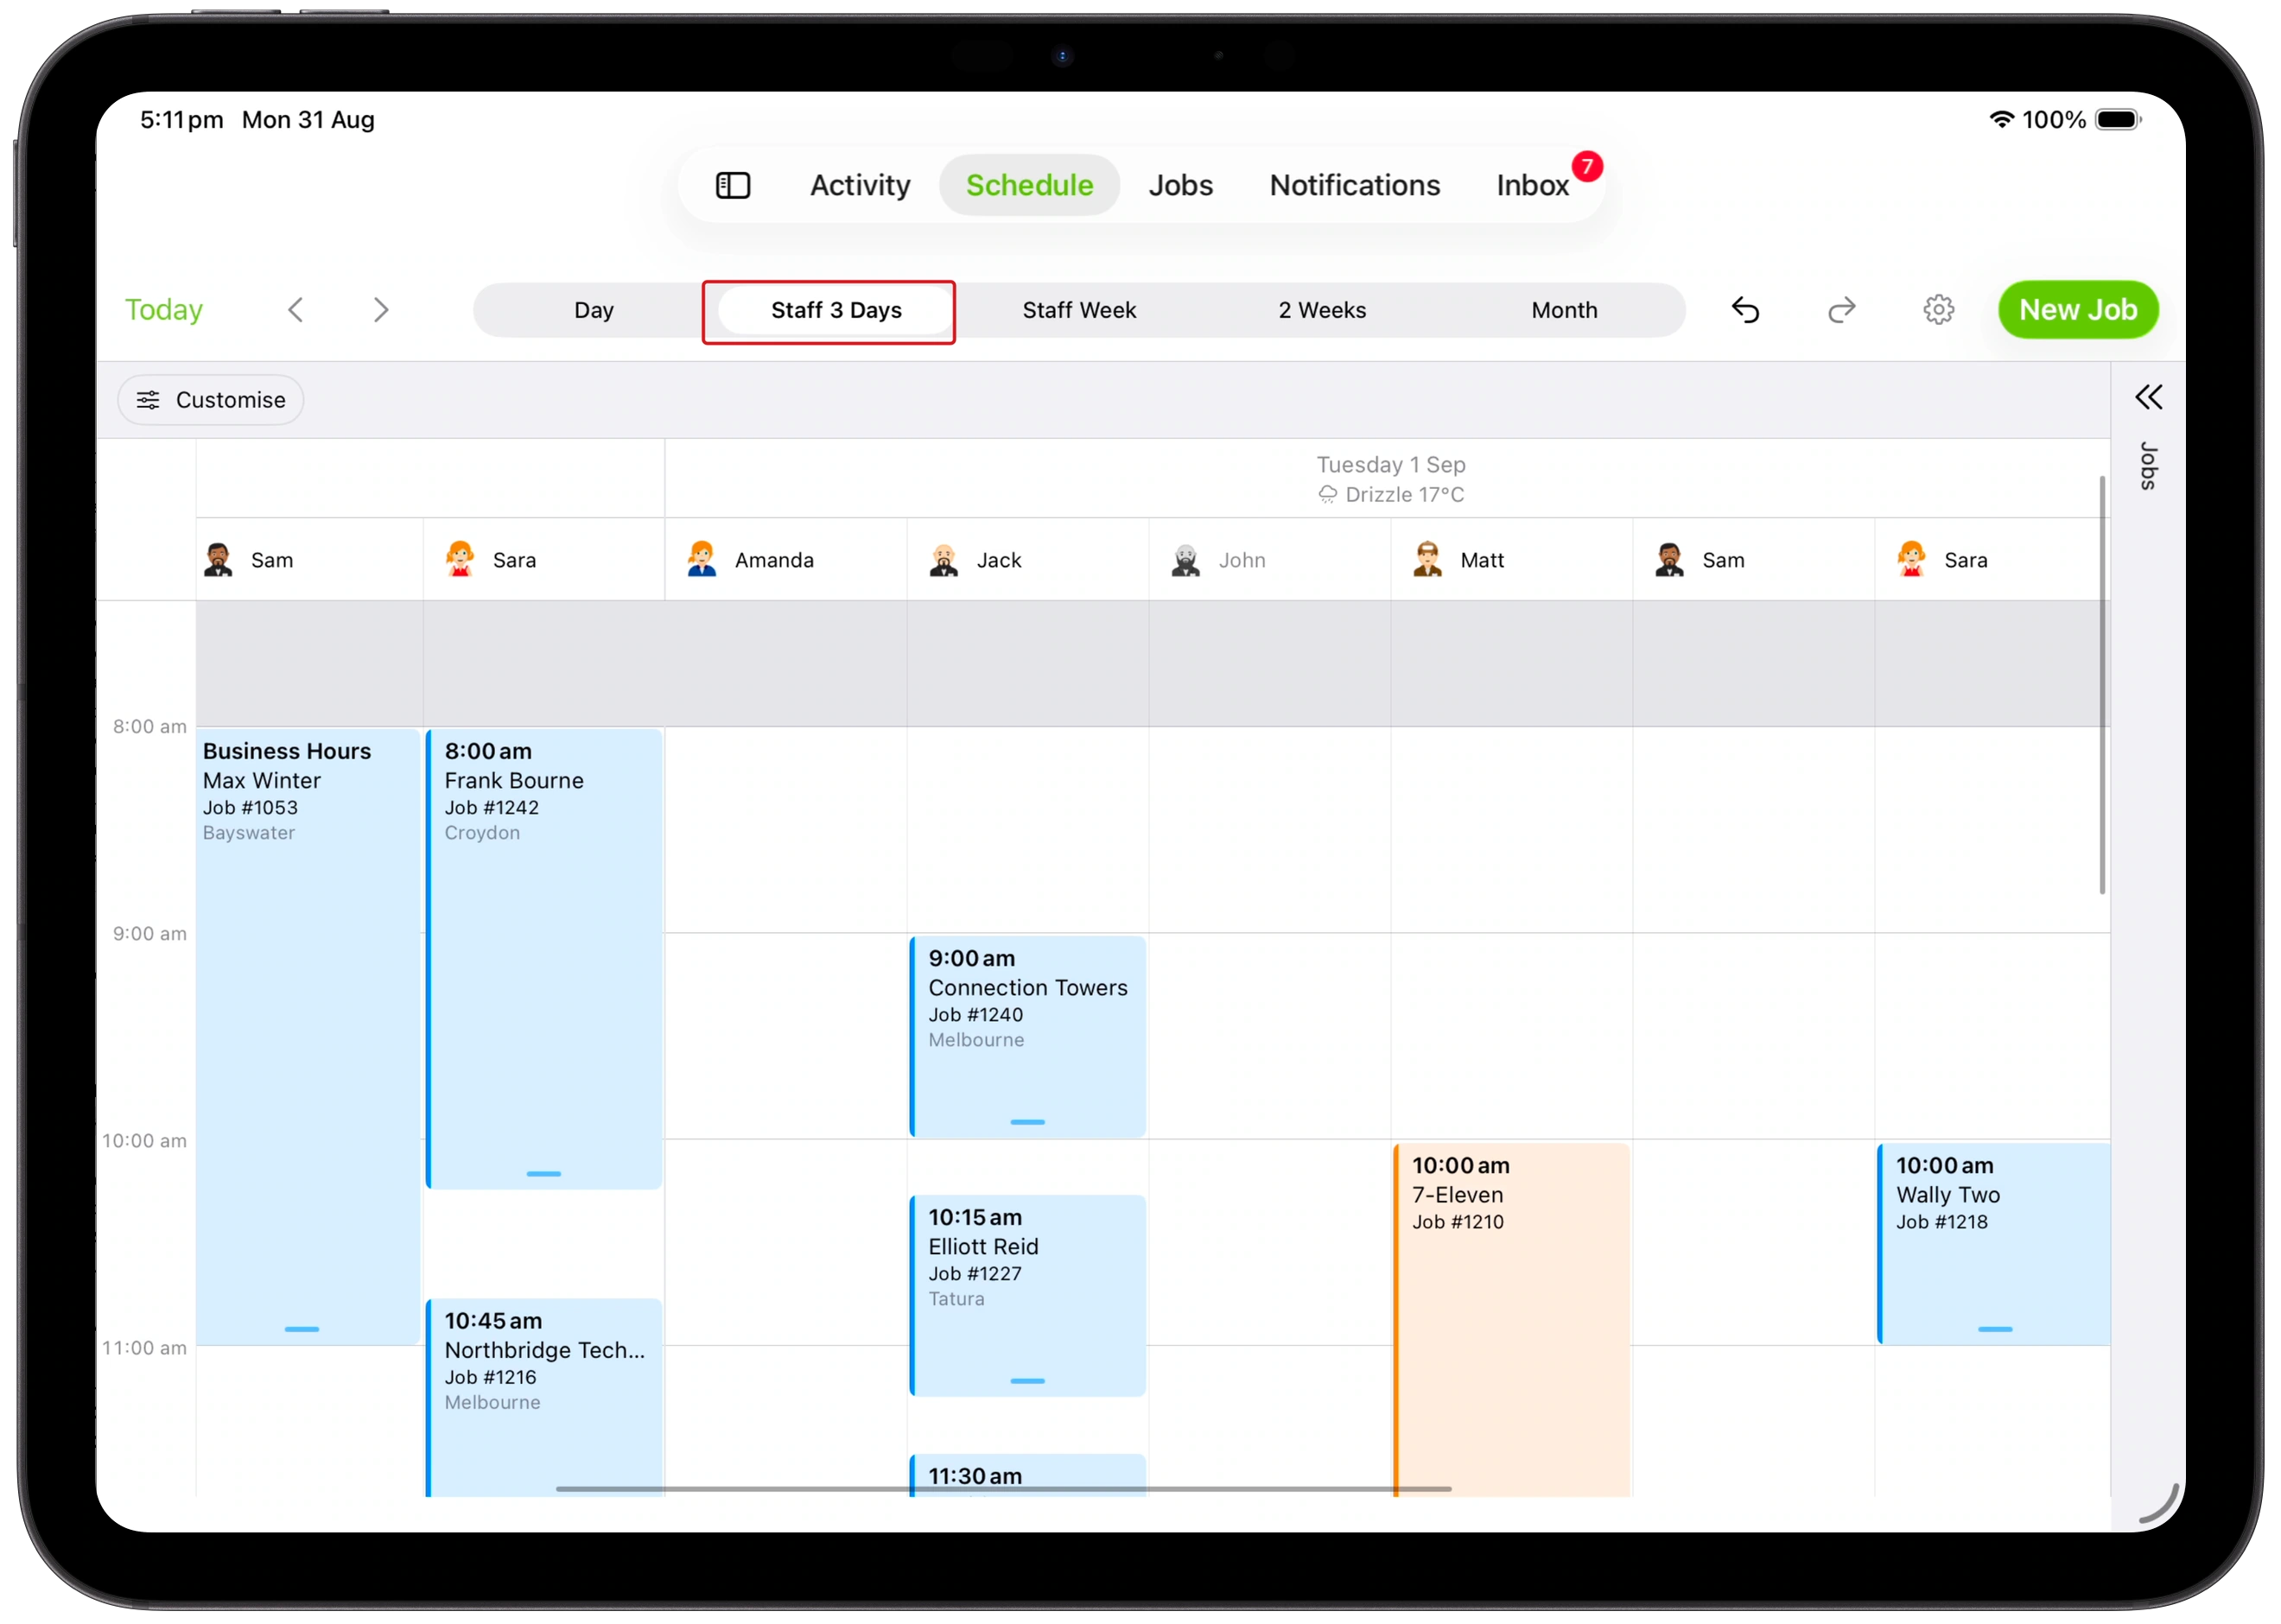
| Staff 3 Days and Staff Week | Planning across several dates in vertical staff columns, with job-status colours. |
| Week by Day | Planning by date with staff grouped within each day. Bookings use staff colours with a separate job-status dot; overlapping bookings appear side by side. |
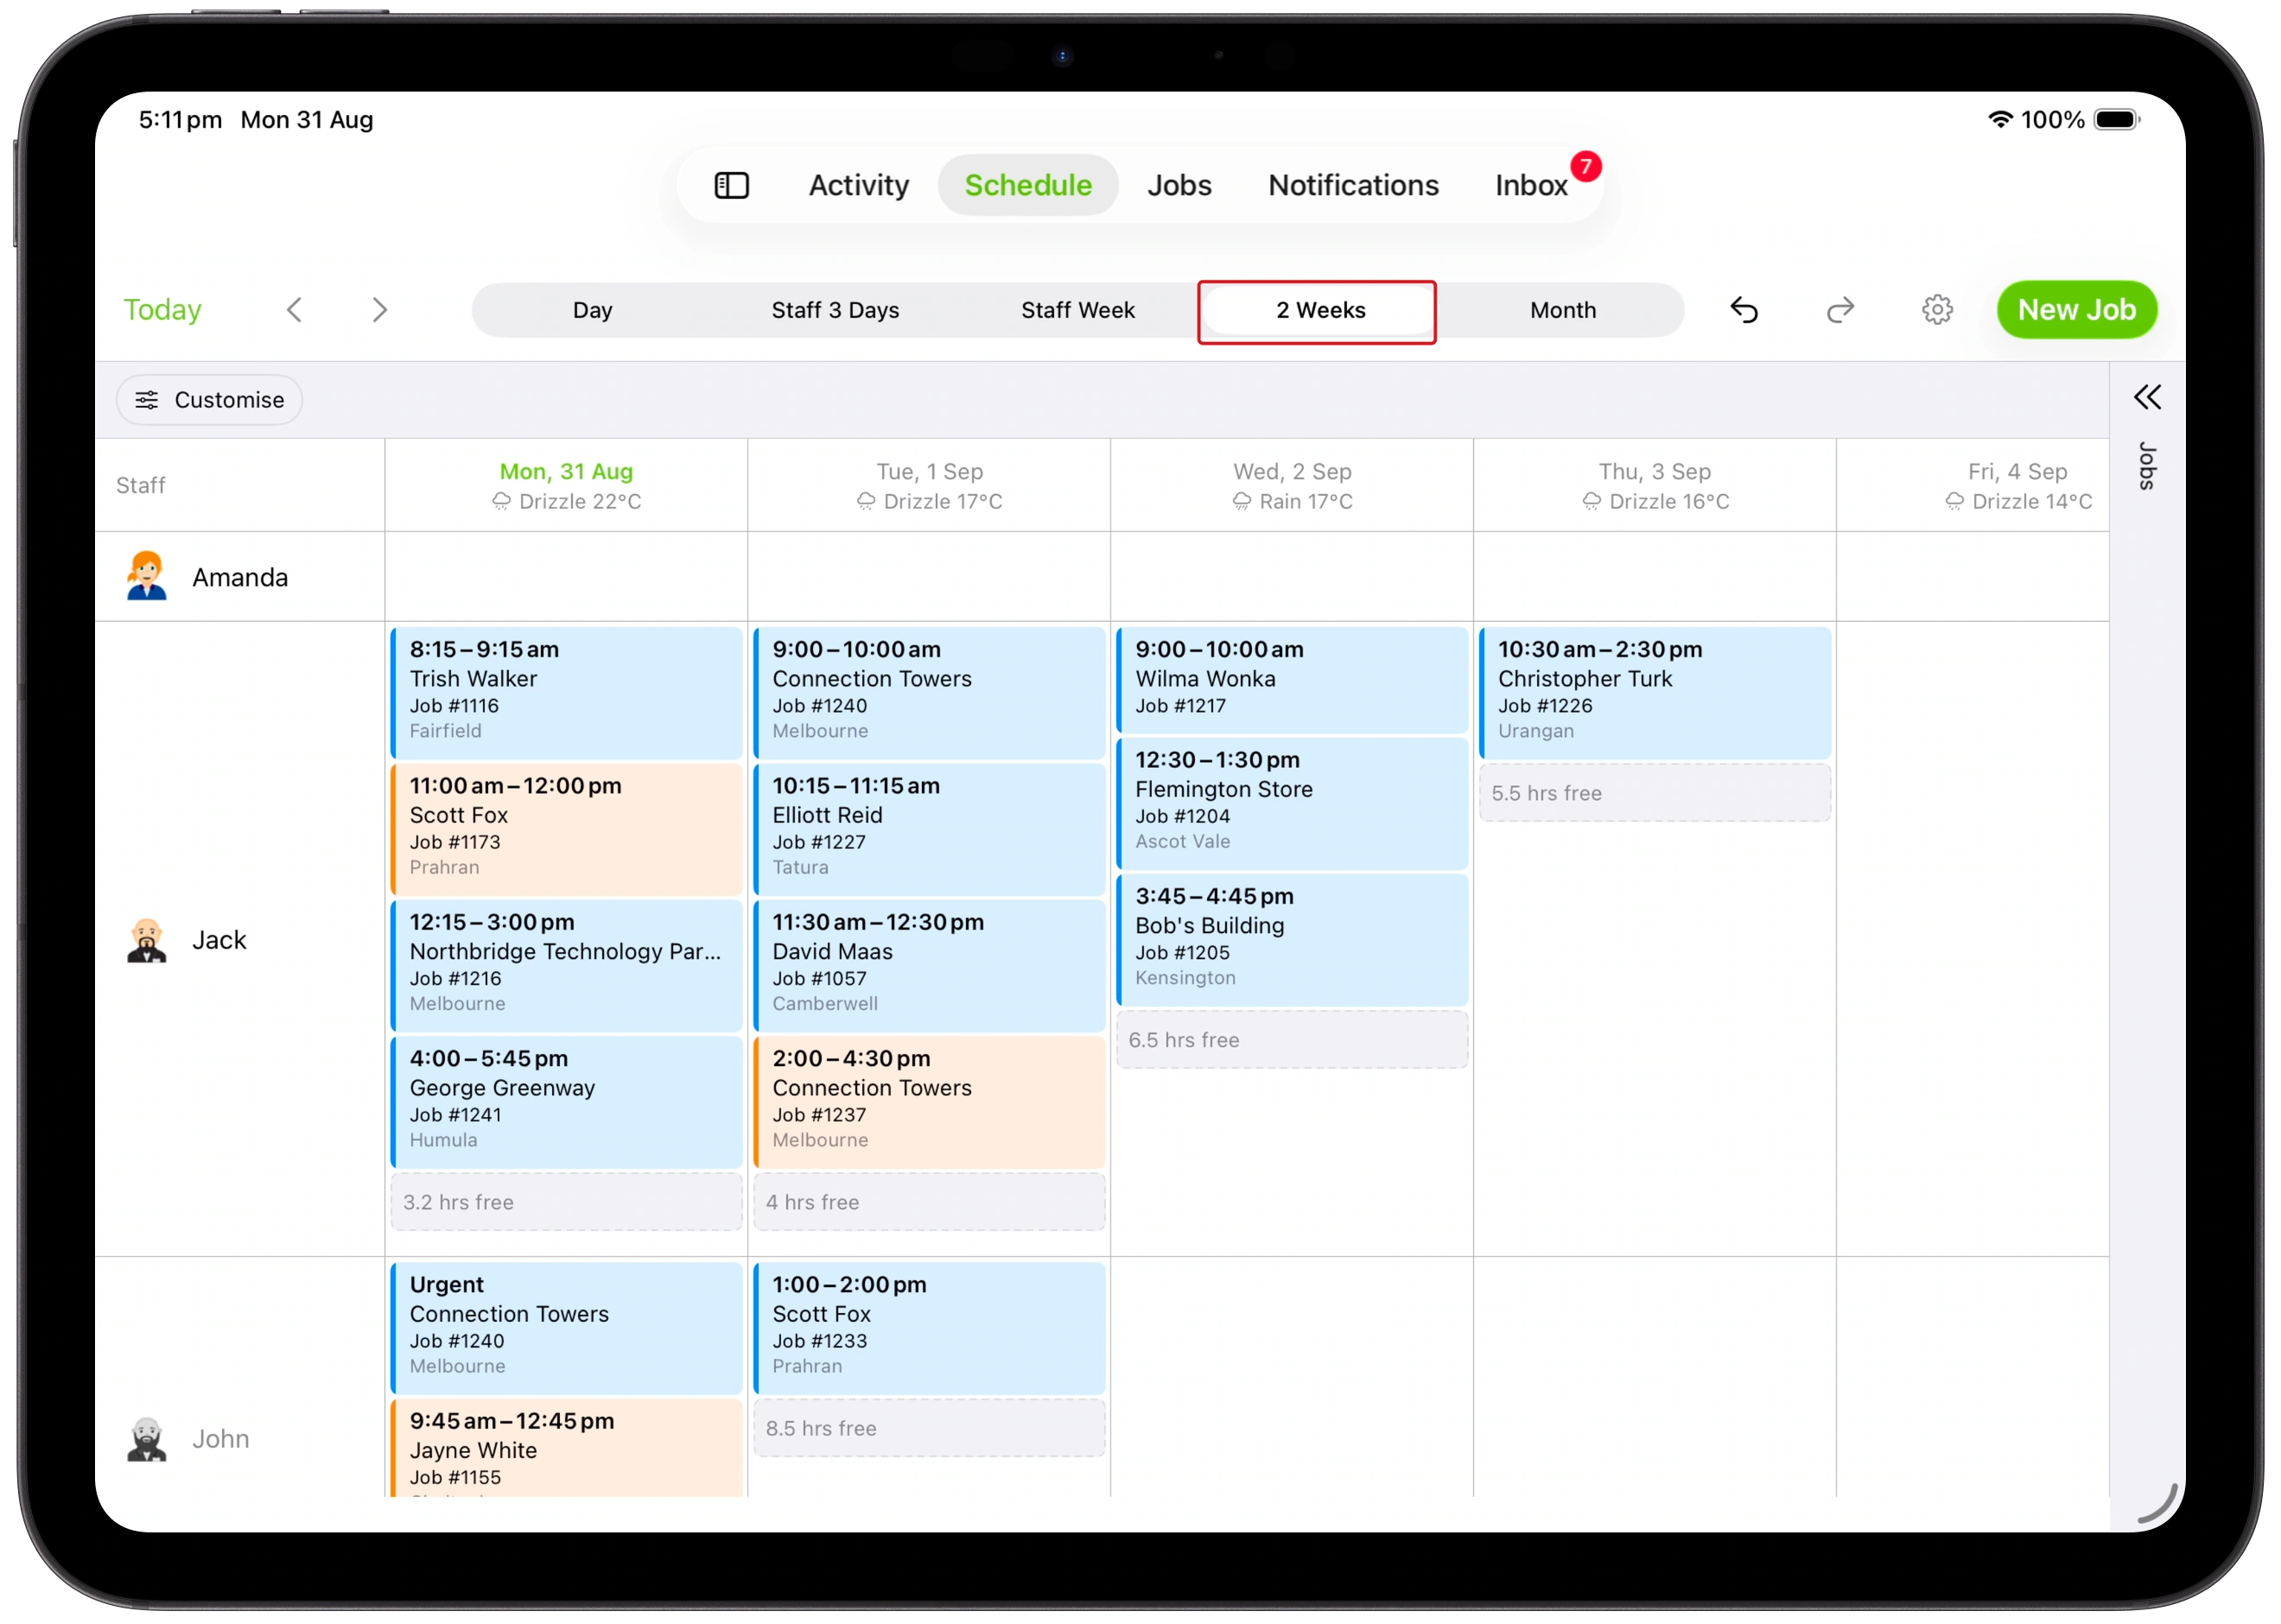
| 2 Weeks | Comparing bookings and remaining daily capacity across staff rows and dates. |
| Month | Reviewing workload across a month and opening individual bookings. |
Tap Staff 3 Days to plan in staff columns. Scroll across to see further staff and dates.
Tap 2 Weeks to compare bookings and free hours for each staff member and day.
Use the arrows to move through the current range, tap the date heading to choose a date, or tap Today. Pinch to change the time scale in Day, Staff 3 Days, Staff Week and Week by Day.
Find and schedule jobs
-
Tap Jobs at the right edge to expand the Jobs panel.
-
Open the list selector and choose Unscheduled Jobs, Action Required, a job filter, a staff list or a queue. Use Job Search to find a job across your account.
-
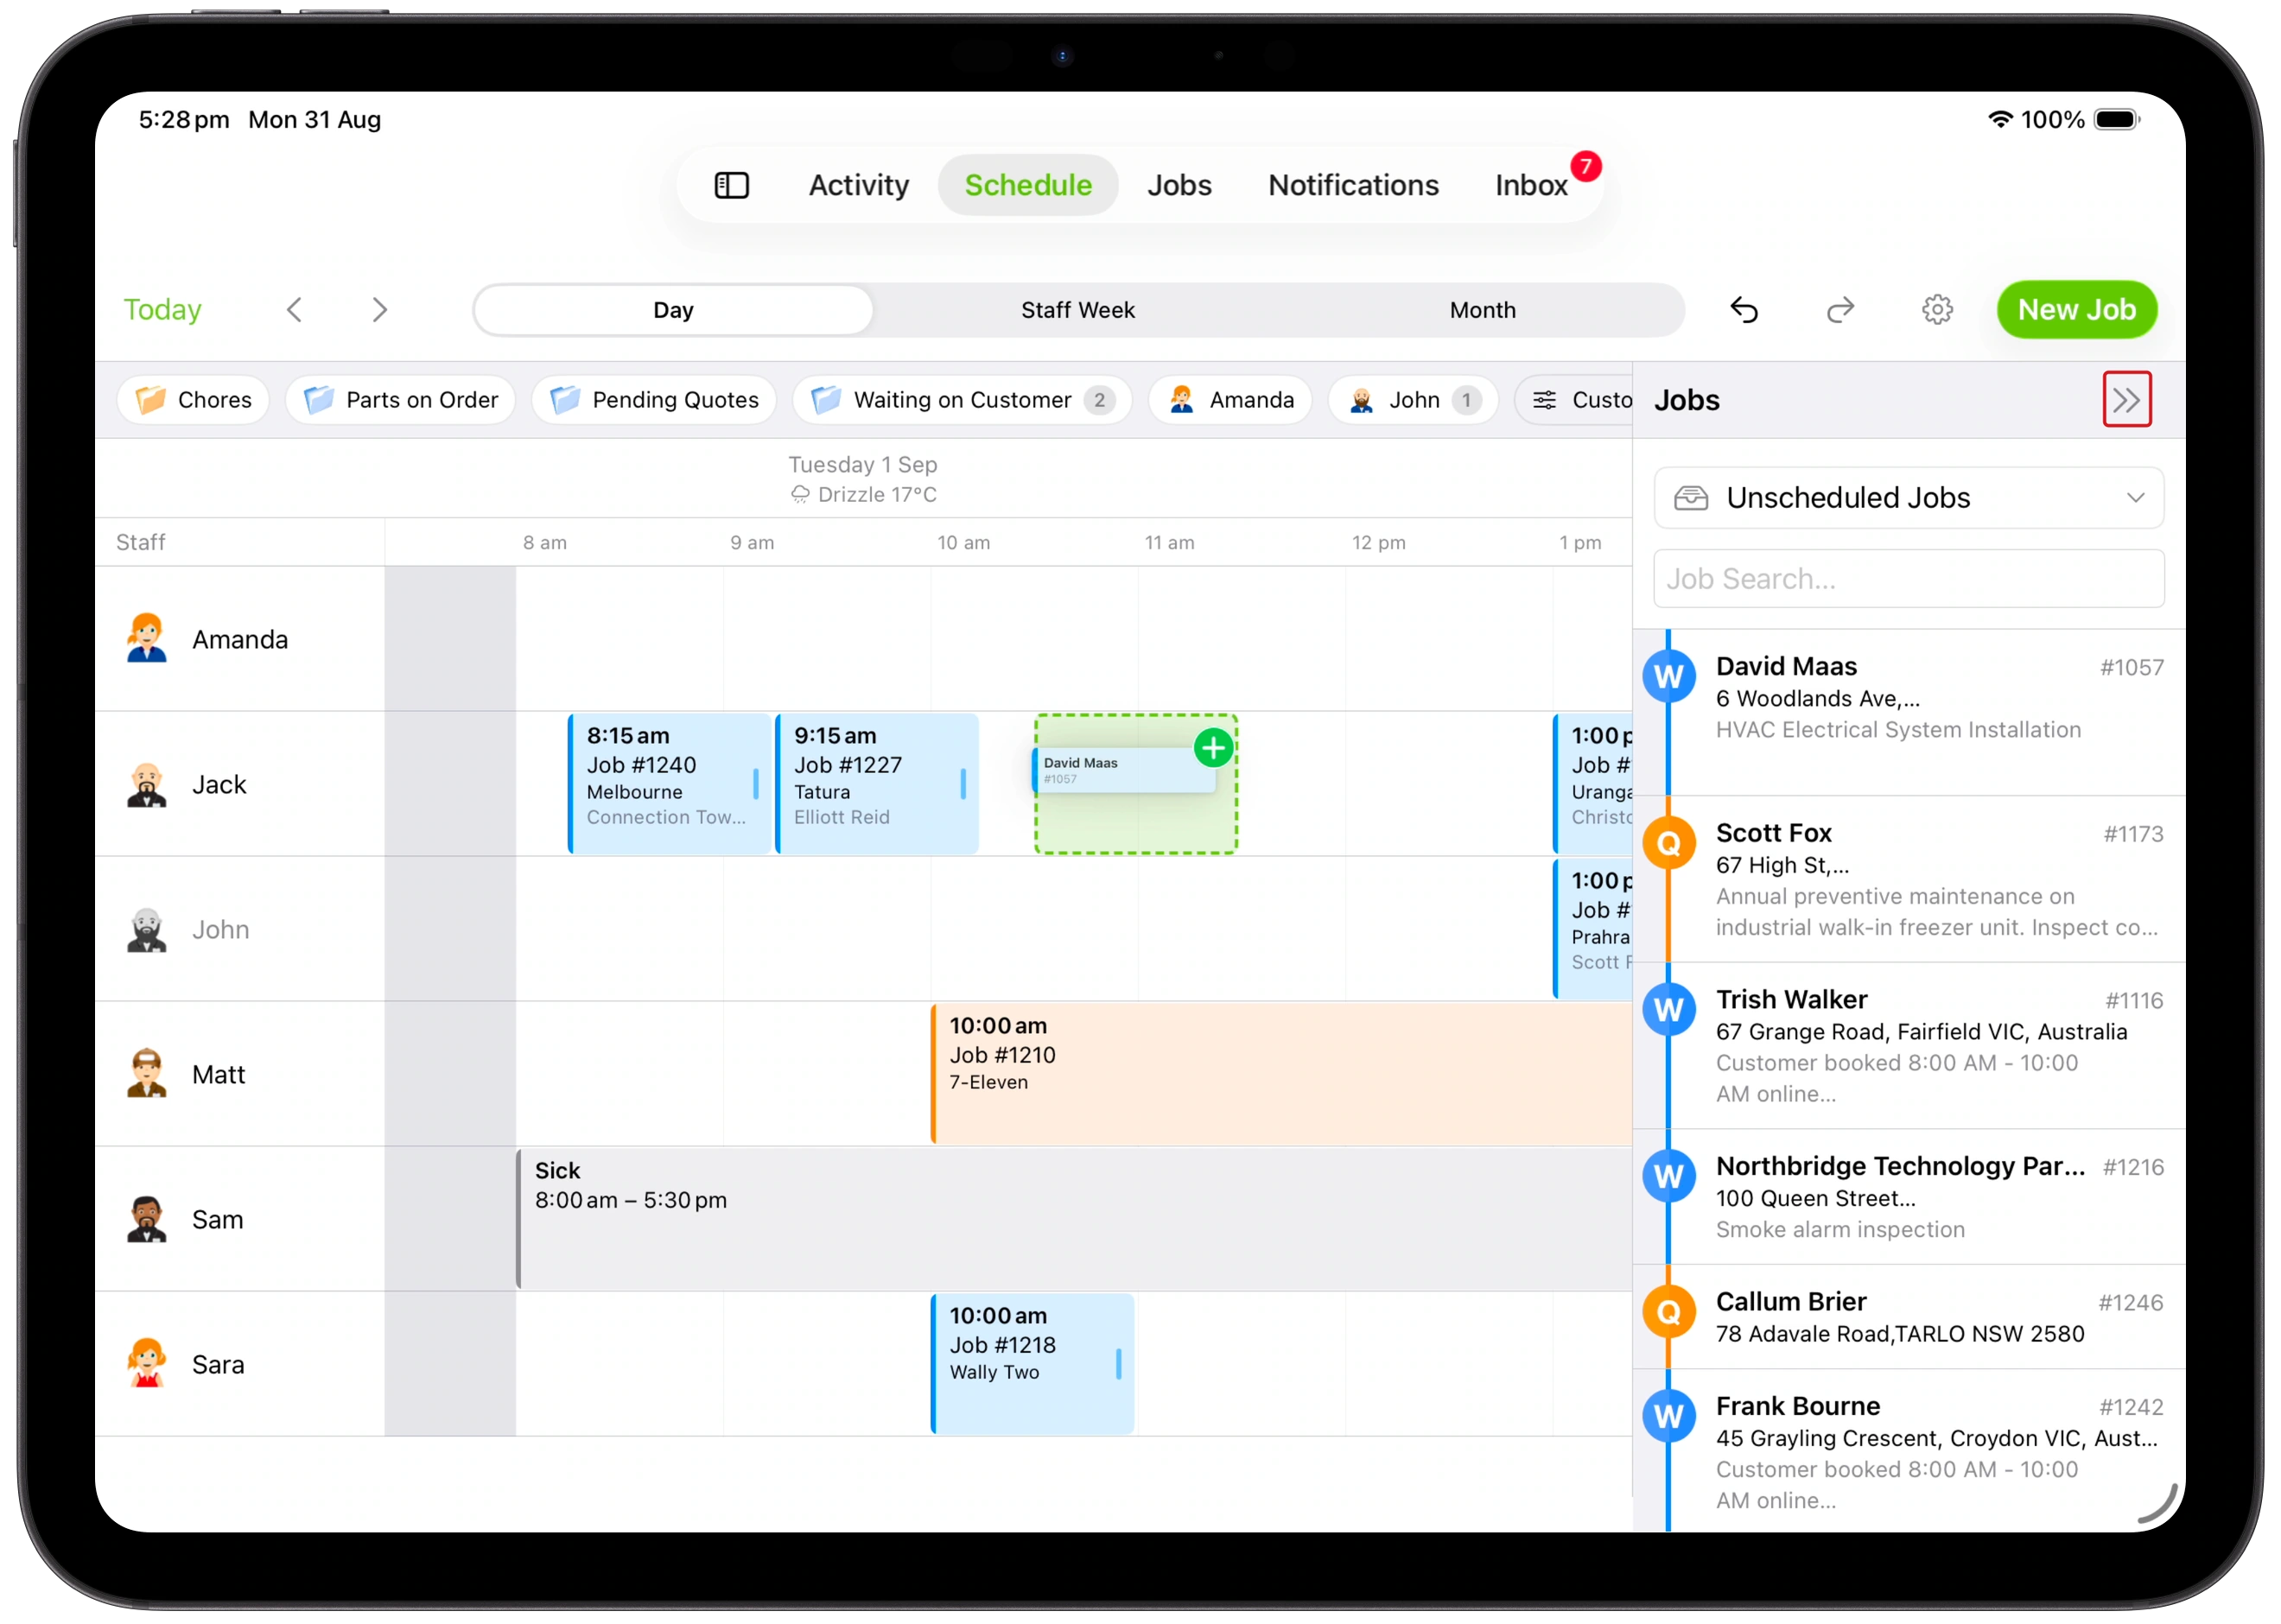
Touch and hold a job, then drag it onto the required staff member, date and time.
-
Release the job to create the booking. If the booking screen opens, review the details and save.
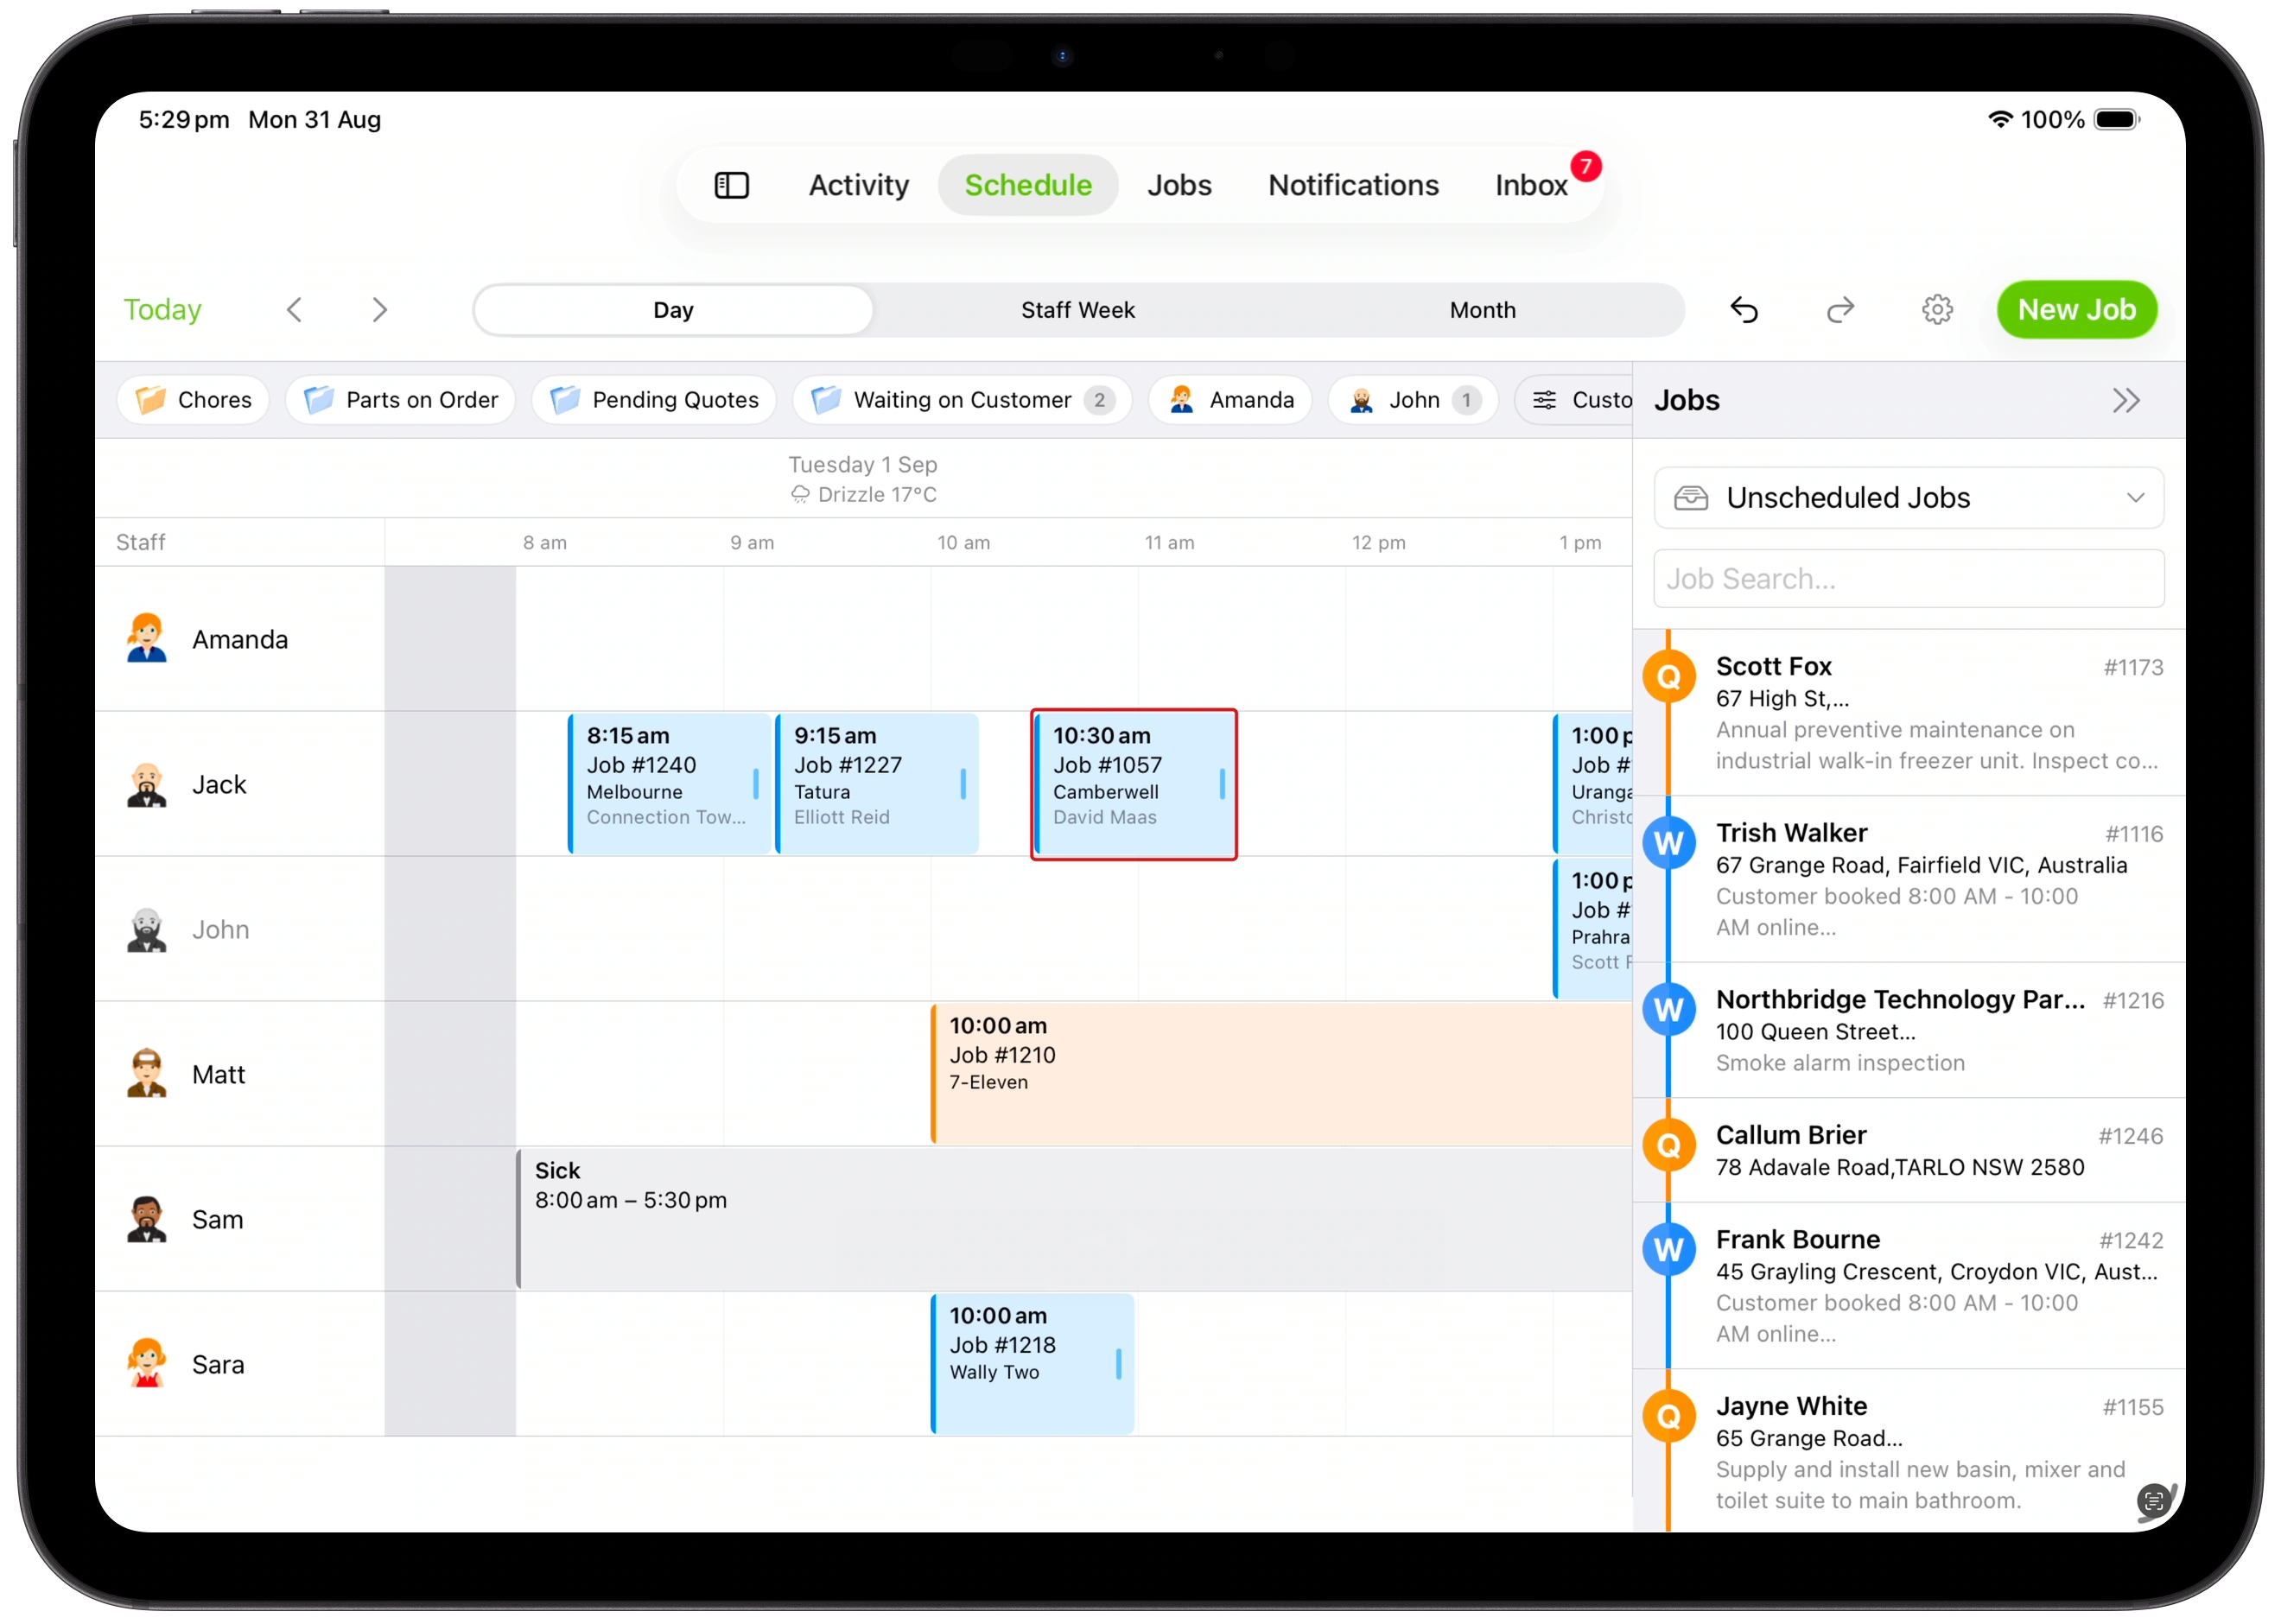
With Fixed Time selected, drops into Day, Staff 3 Days and Staff Week create a booking directly when the staff member and time are known. Week by Day, 2 Weeks and Month open the booking screen.
Tap a job in the panel to open its Job card. Tap the panel’s double chevron to collapse it when you need more room.
Create a booking from an empty slot
- In a timed view, touch and hold an empty position for the required staff member, date and time.
- In Select Job, choose an existing job to book it into that slot. To create a job, tap New Job and complete the job details.
The selected or newly created job is booked into the slot for one hour. You can then adjust its duration. New Job is available when your access allows job creation.
Review and change a booking
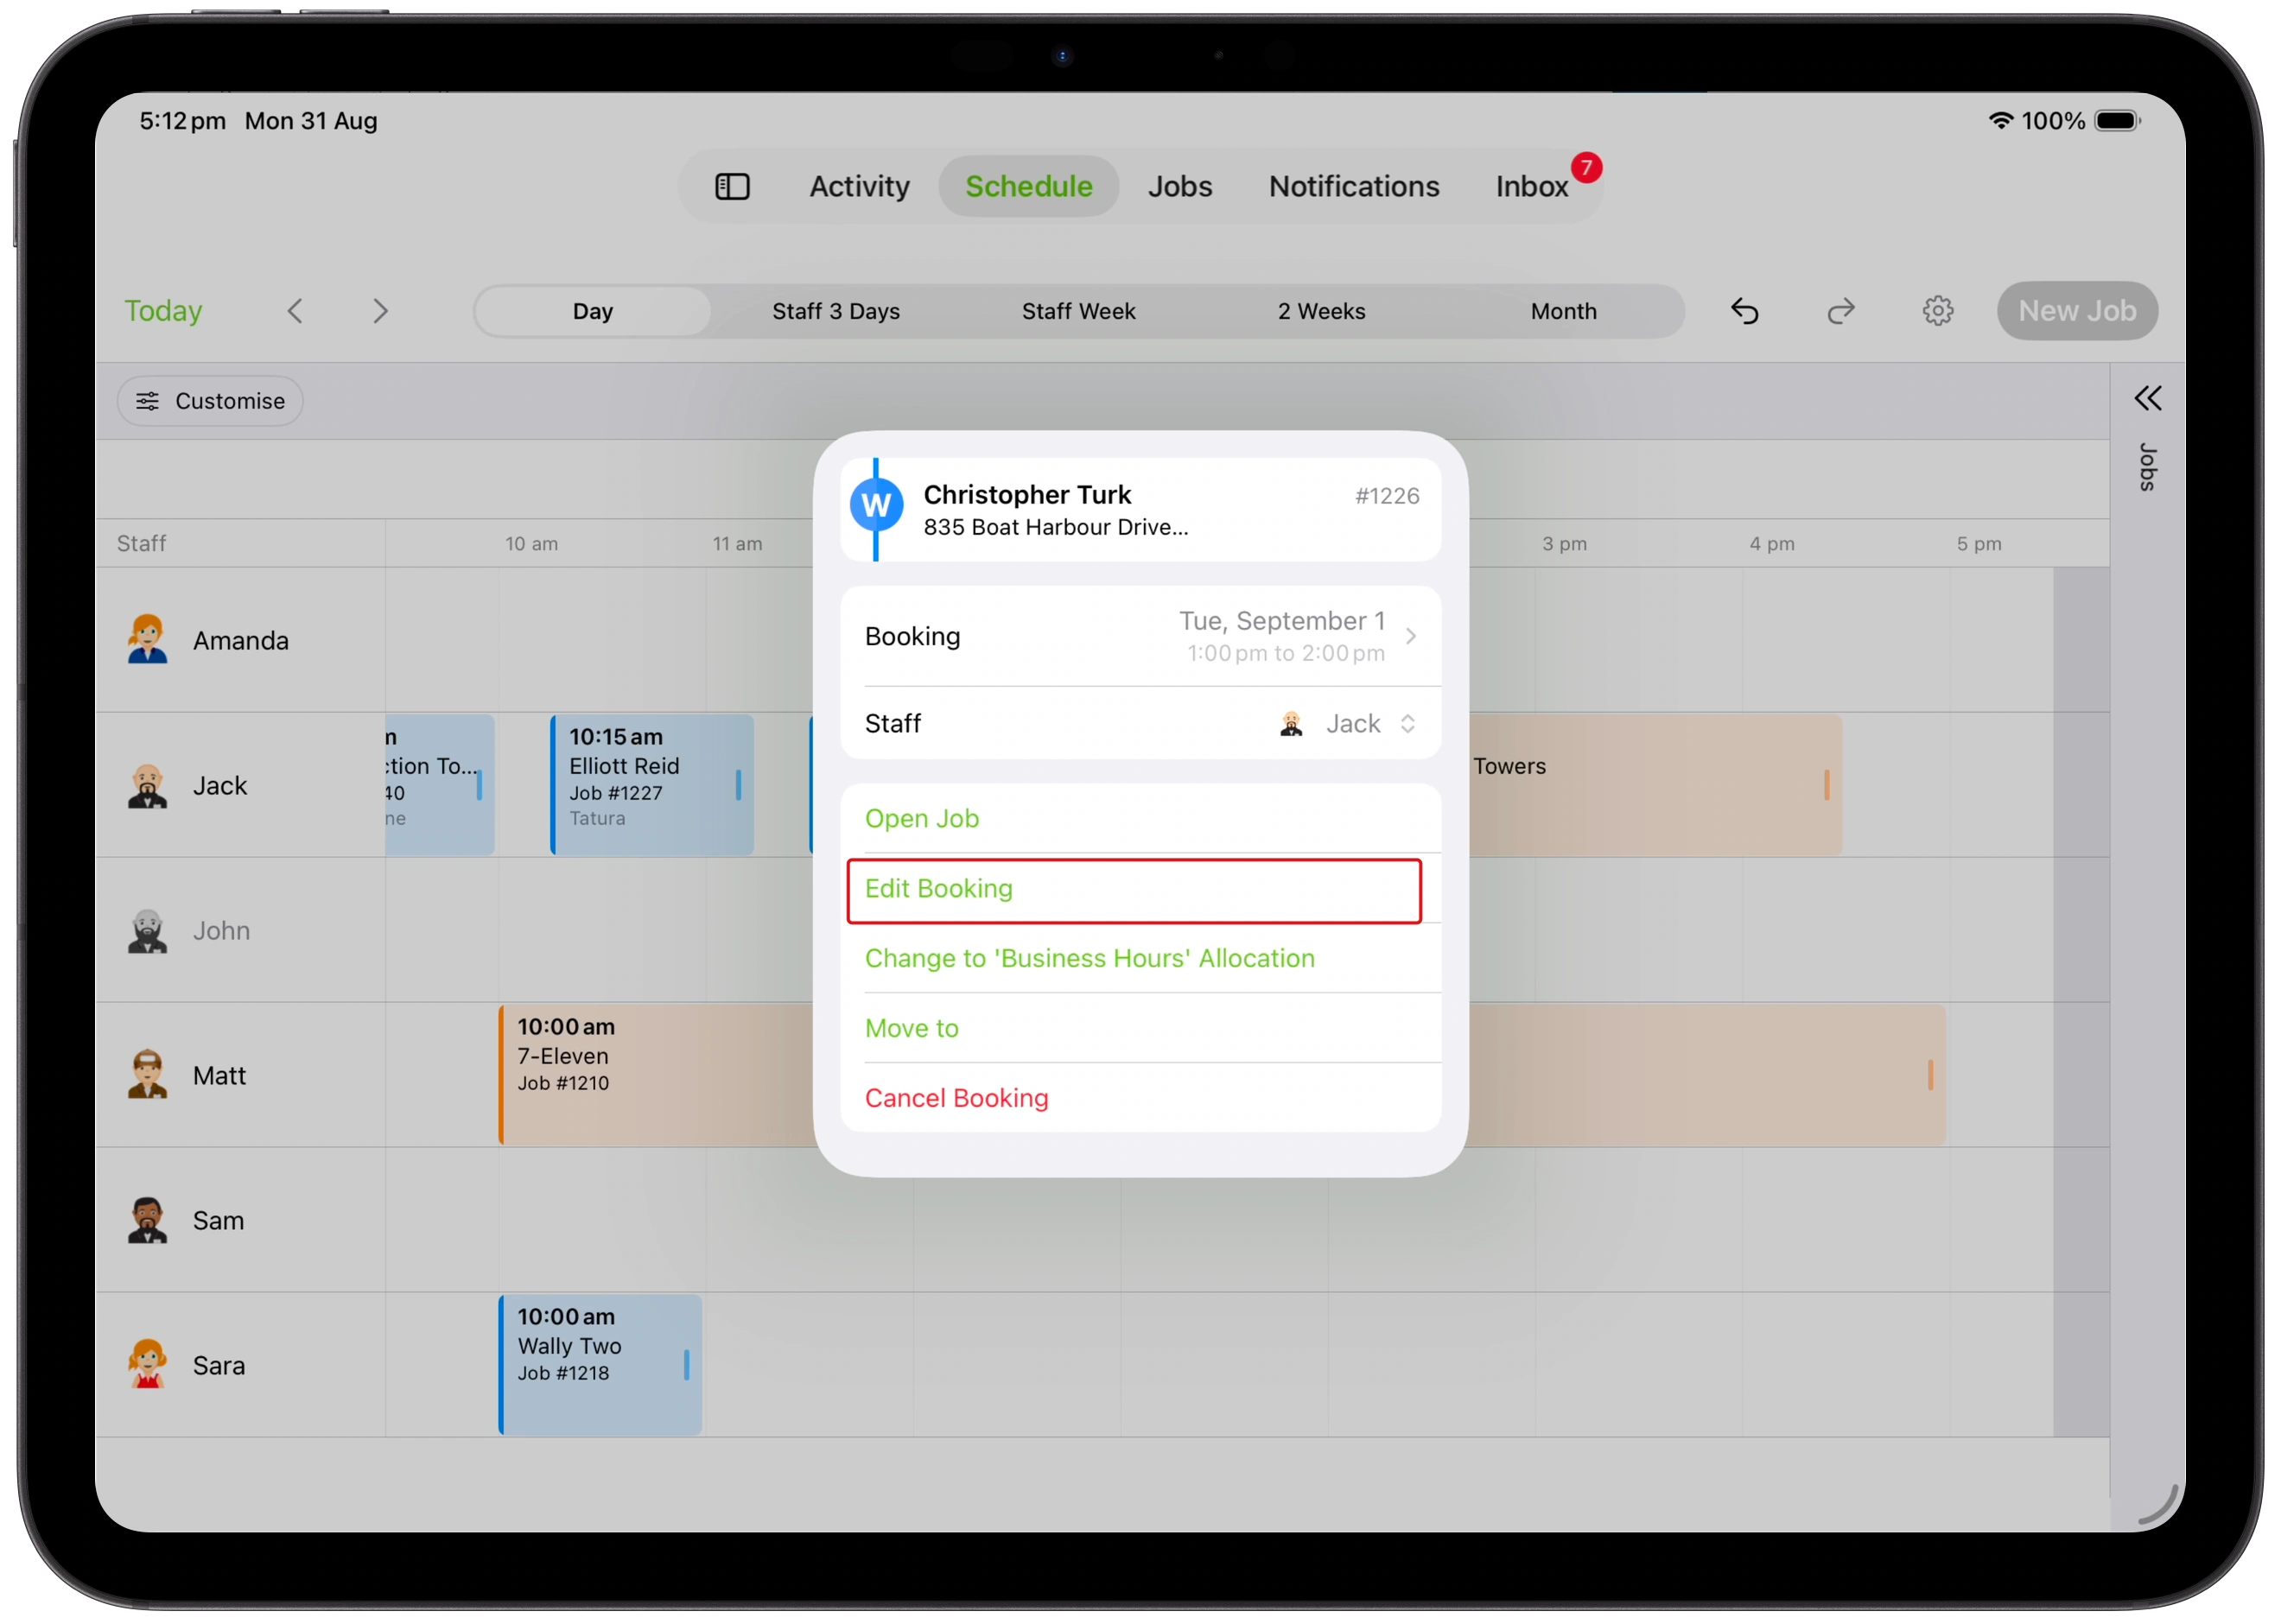
Tap a booking to open its preview. Tap Edit Booking to change its details, Staff to change who is assigned, or Open Job to open the Job card. You can also cancel the booking from this preview.
Move and resize a booking
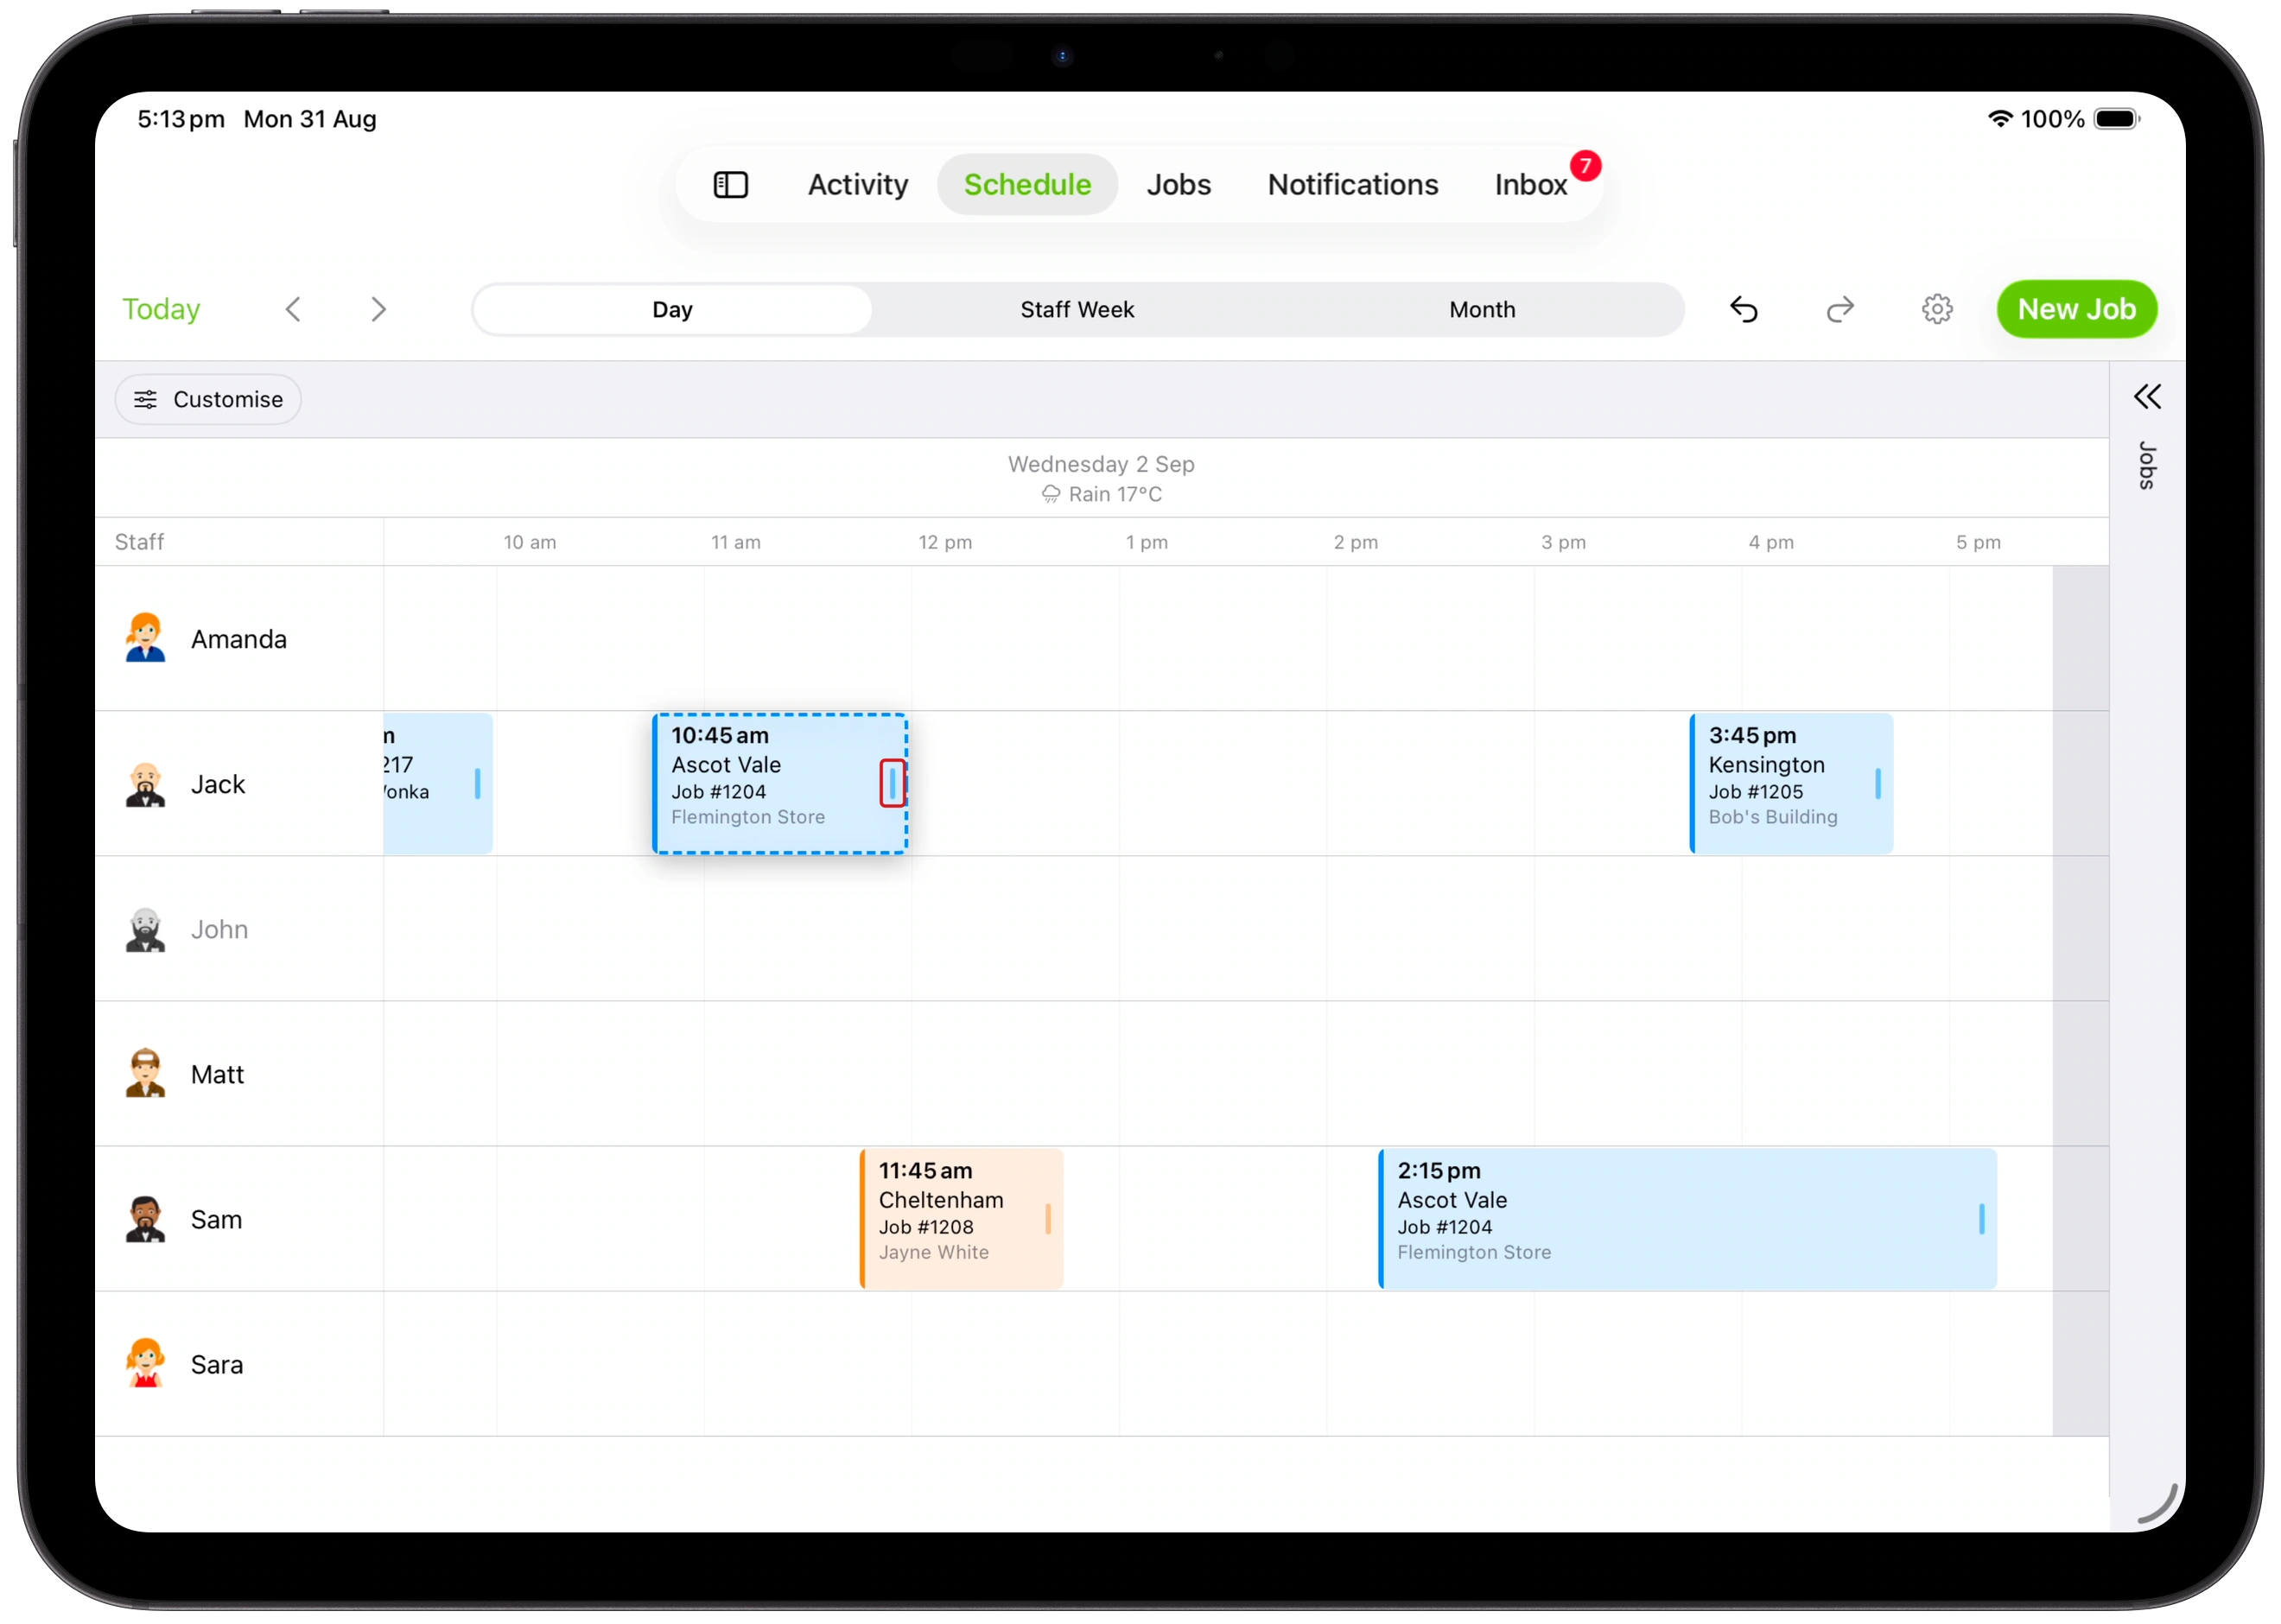
In Day, Staff 3 Days, Staff Week or Week by Day, touch and hold a booking, then drag it to another staff member, date or time. Check the preview position, then release to save the move.
To change the duration, drag the booking’s resize grip: the right edge in Day, or the bottom edge in vertical timed views. Check the preview, then release to save. Times snap to 15-minute increments.
In 2 Weeks and Month, tap a booking to use its preview and editing options.
Use booking shortcuts
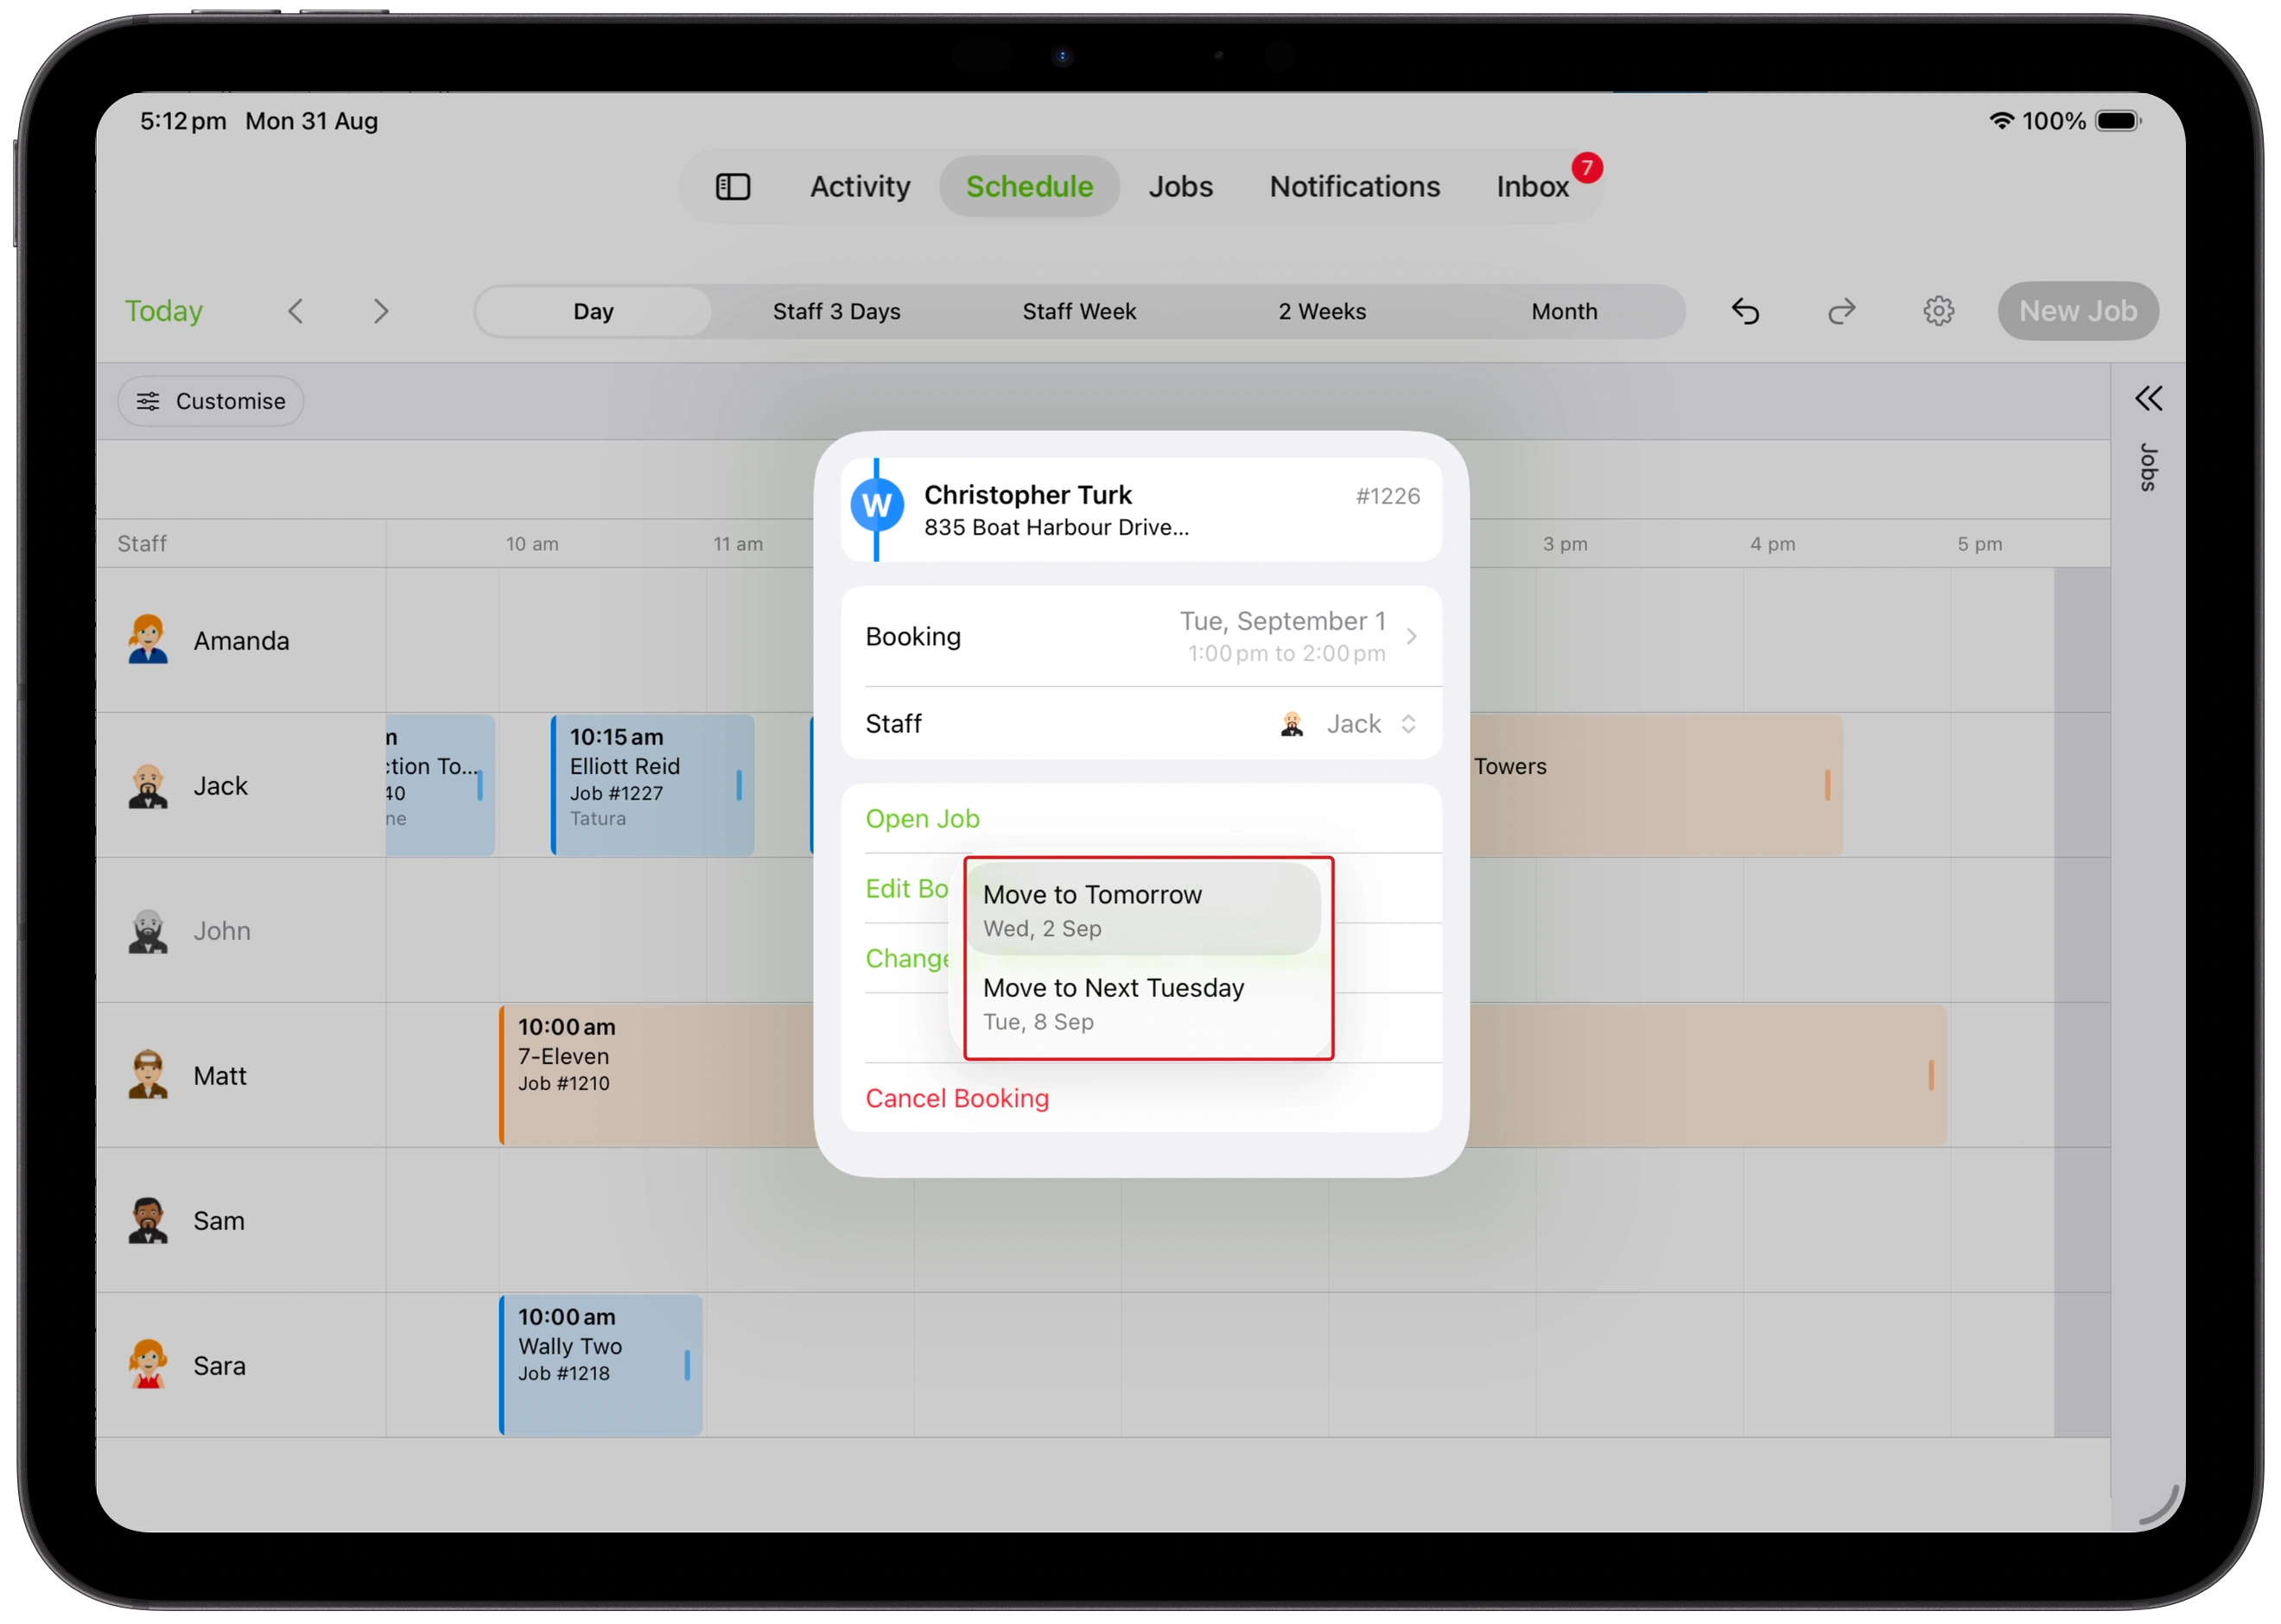
Tap a booking, then Move to. Choose Move to Tomorrow to move it forward one day, or Move to Next [weekday] to move it forward one week, keeping its time and assigned staff.
Undo or redo a schedule change
Tap Undo, the left-turning arrow in the toolbar, to reverse a supported Schedule change. Tap Redo, the right-turning arrow, to reapply it.
History holds up to 20 changes in the current Schedule session, including supported booking and allocation creations, moves, resizes, staff changes and cancellations. A successful new change clears Redo history. Saving changes in the separate booking editor clears Schedule history; those edits do not create an Undo entry.
Customise the Schedule
Tap the gear icon (Schedule Settings).
- Under Job Details, choose what appears on Line 1, Line 2 and Line 3. Options include customer name, job number, suburb, full address, postcode and the first line of the job description. Choose None for Line 2 or Line 3 to leave it out.
- Turn on Job Category Colours to add a category-colour stripe to booking cards.
- Under Default Booking Type, choose Fixed Time or Business Hours Allocation for jobs dragged from the Jobs panel.
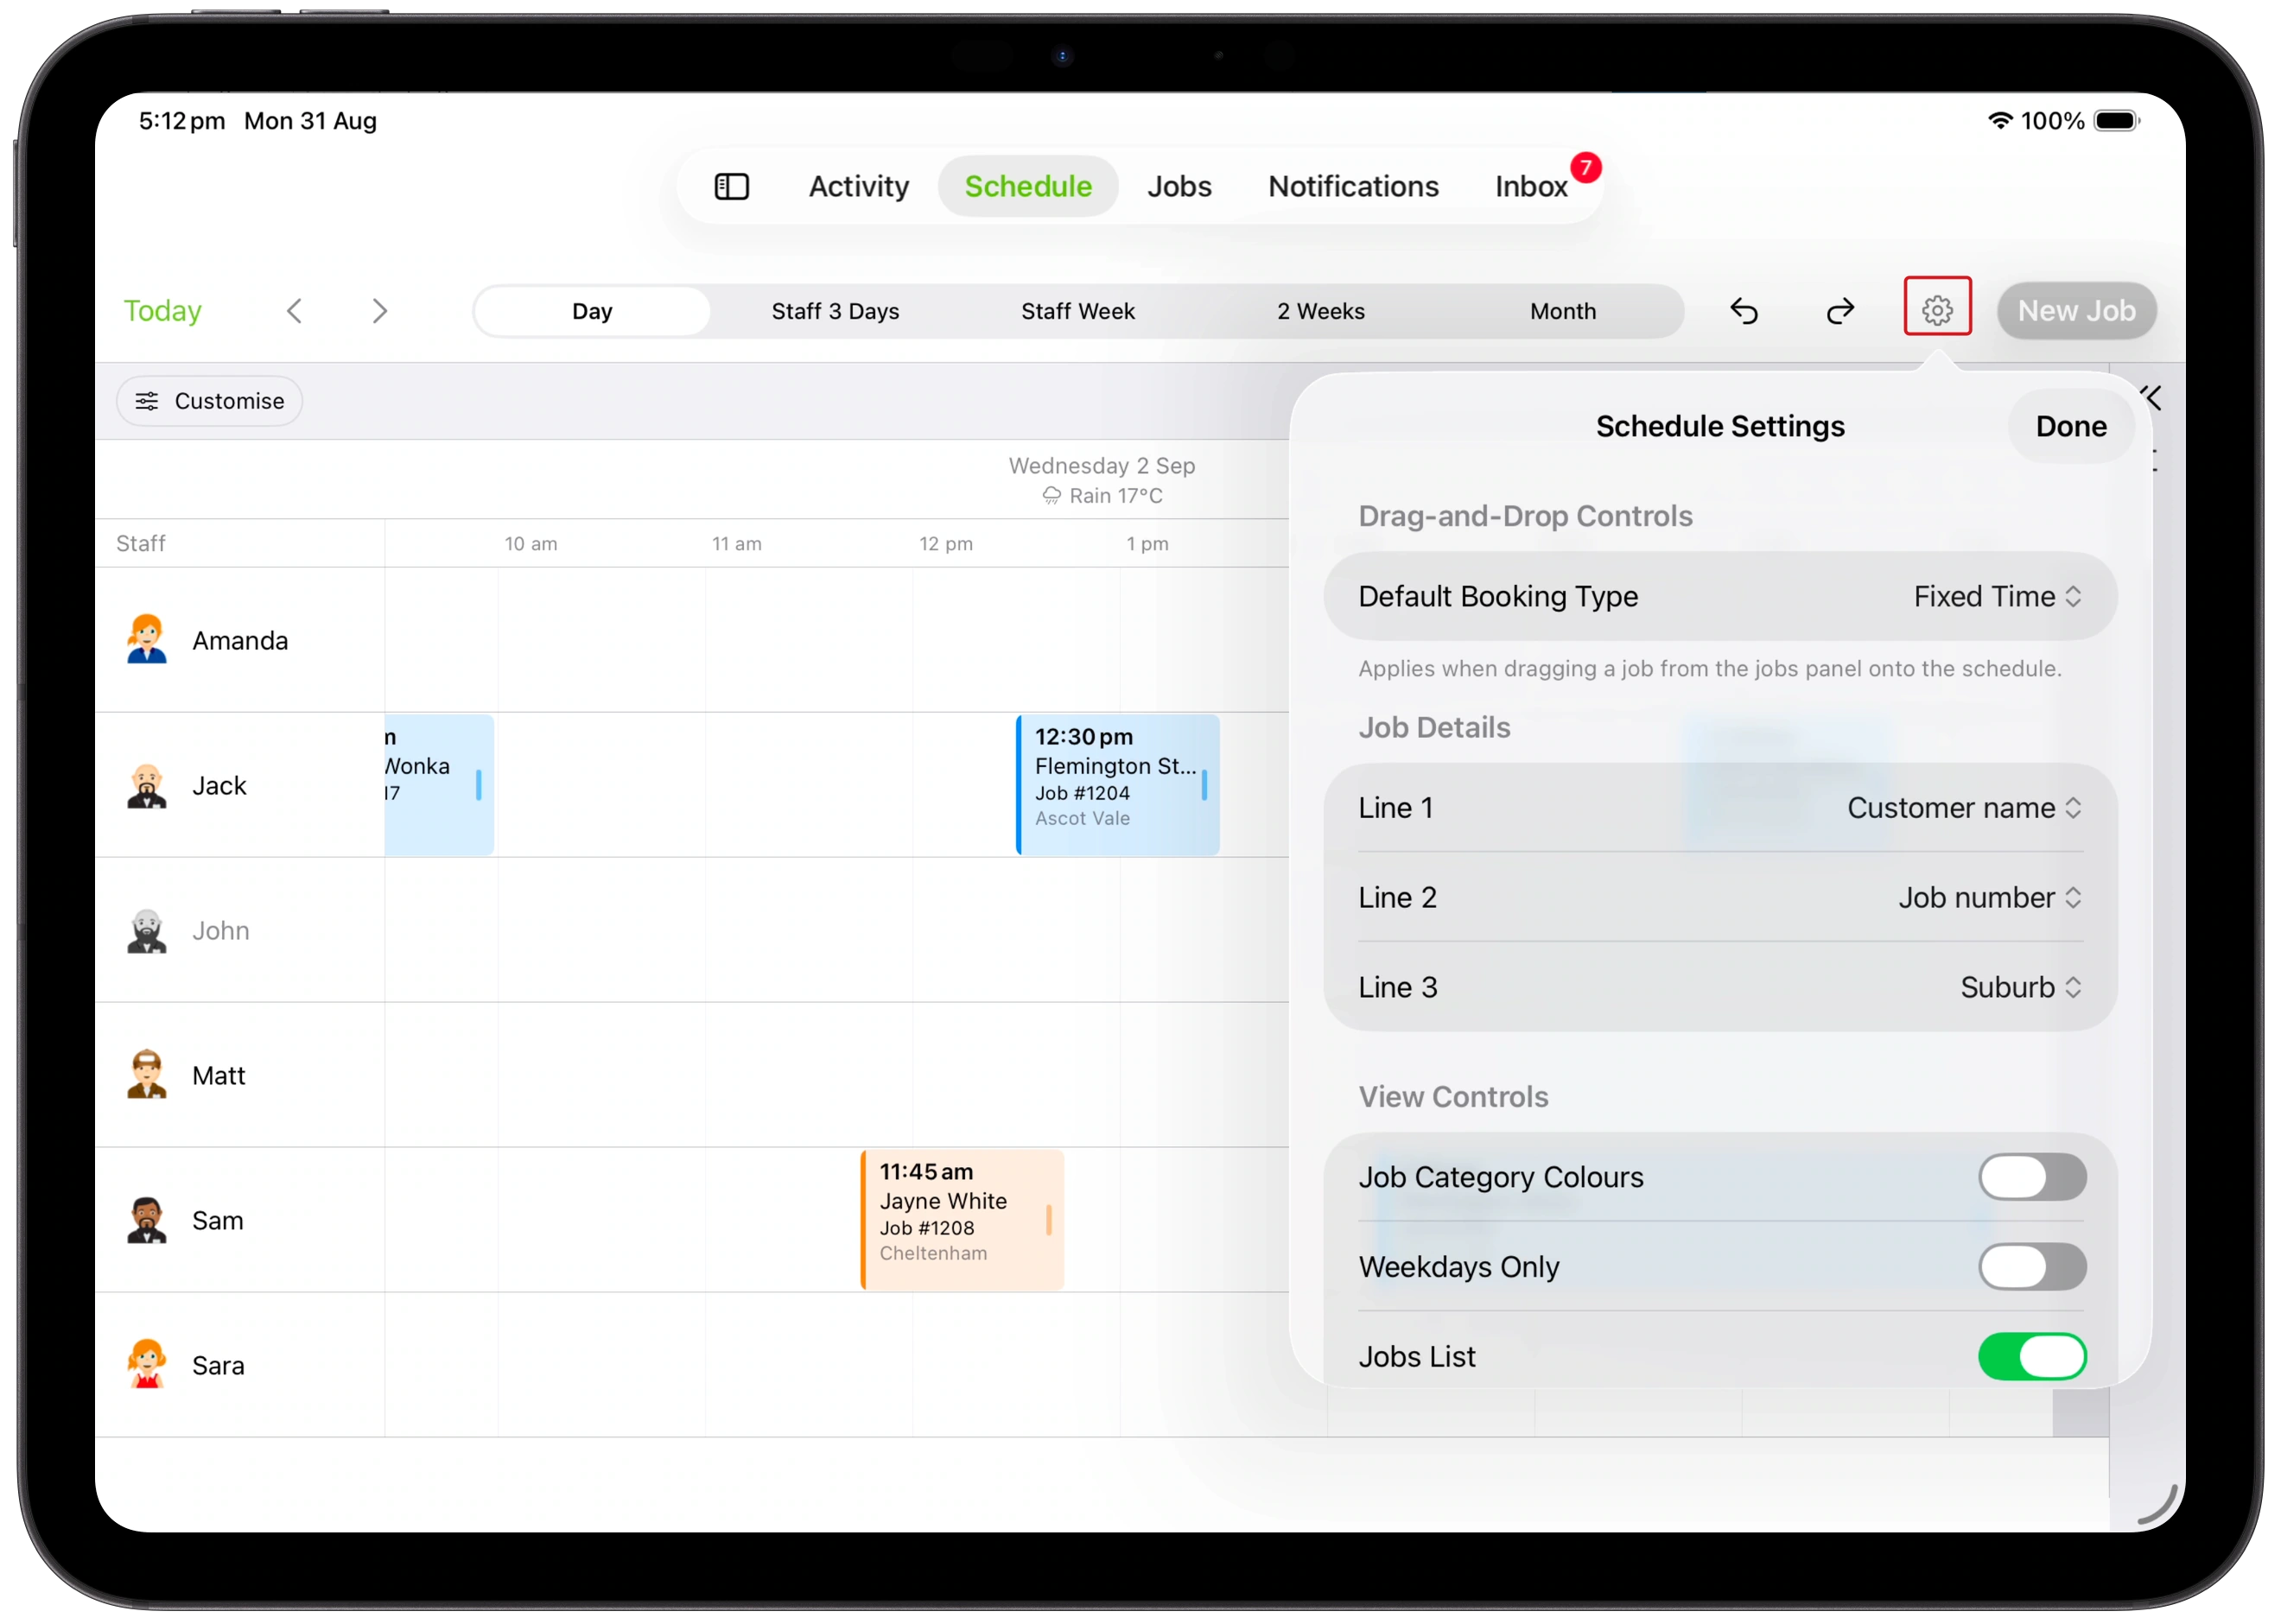
To use Business Hours Allocation, you need an active Business Hours booking window and access to allocate jobs. See How to allocate jobs in booking windows. This setting applies to Jobs-panel drops; bookings created from empty slots use a fixed time.
Choose staff and layout
Under View Controls:
- Open Staff Members to choose which staff appear and arrange their order.
- Turn on Weekdays Only to hide weekends in multi-day and month views.
- Turn on Jobs List to keep the Jobs panel available alongside the Schedule.
- Turn on Queue & Staff Shortcuts to show the shortcuts above the Schedule.
In Week by Day, use the staff selector to temporarily show or hide staff. Staff Members saves your preferred staff list and order; the Week by Day selector temporarily filters that list. These controls change what you see, not who is assigned to a booking.
Choose queue and staff shortcuts
Tap Customise above the Schedule. In Pinned Items, select the queues and staff you want as shortcuts. Tap a shortcut to show its jobs in the Jobs panel.
Move a job into a queue
-
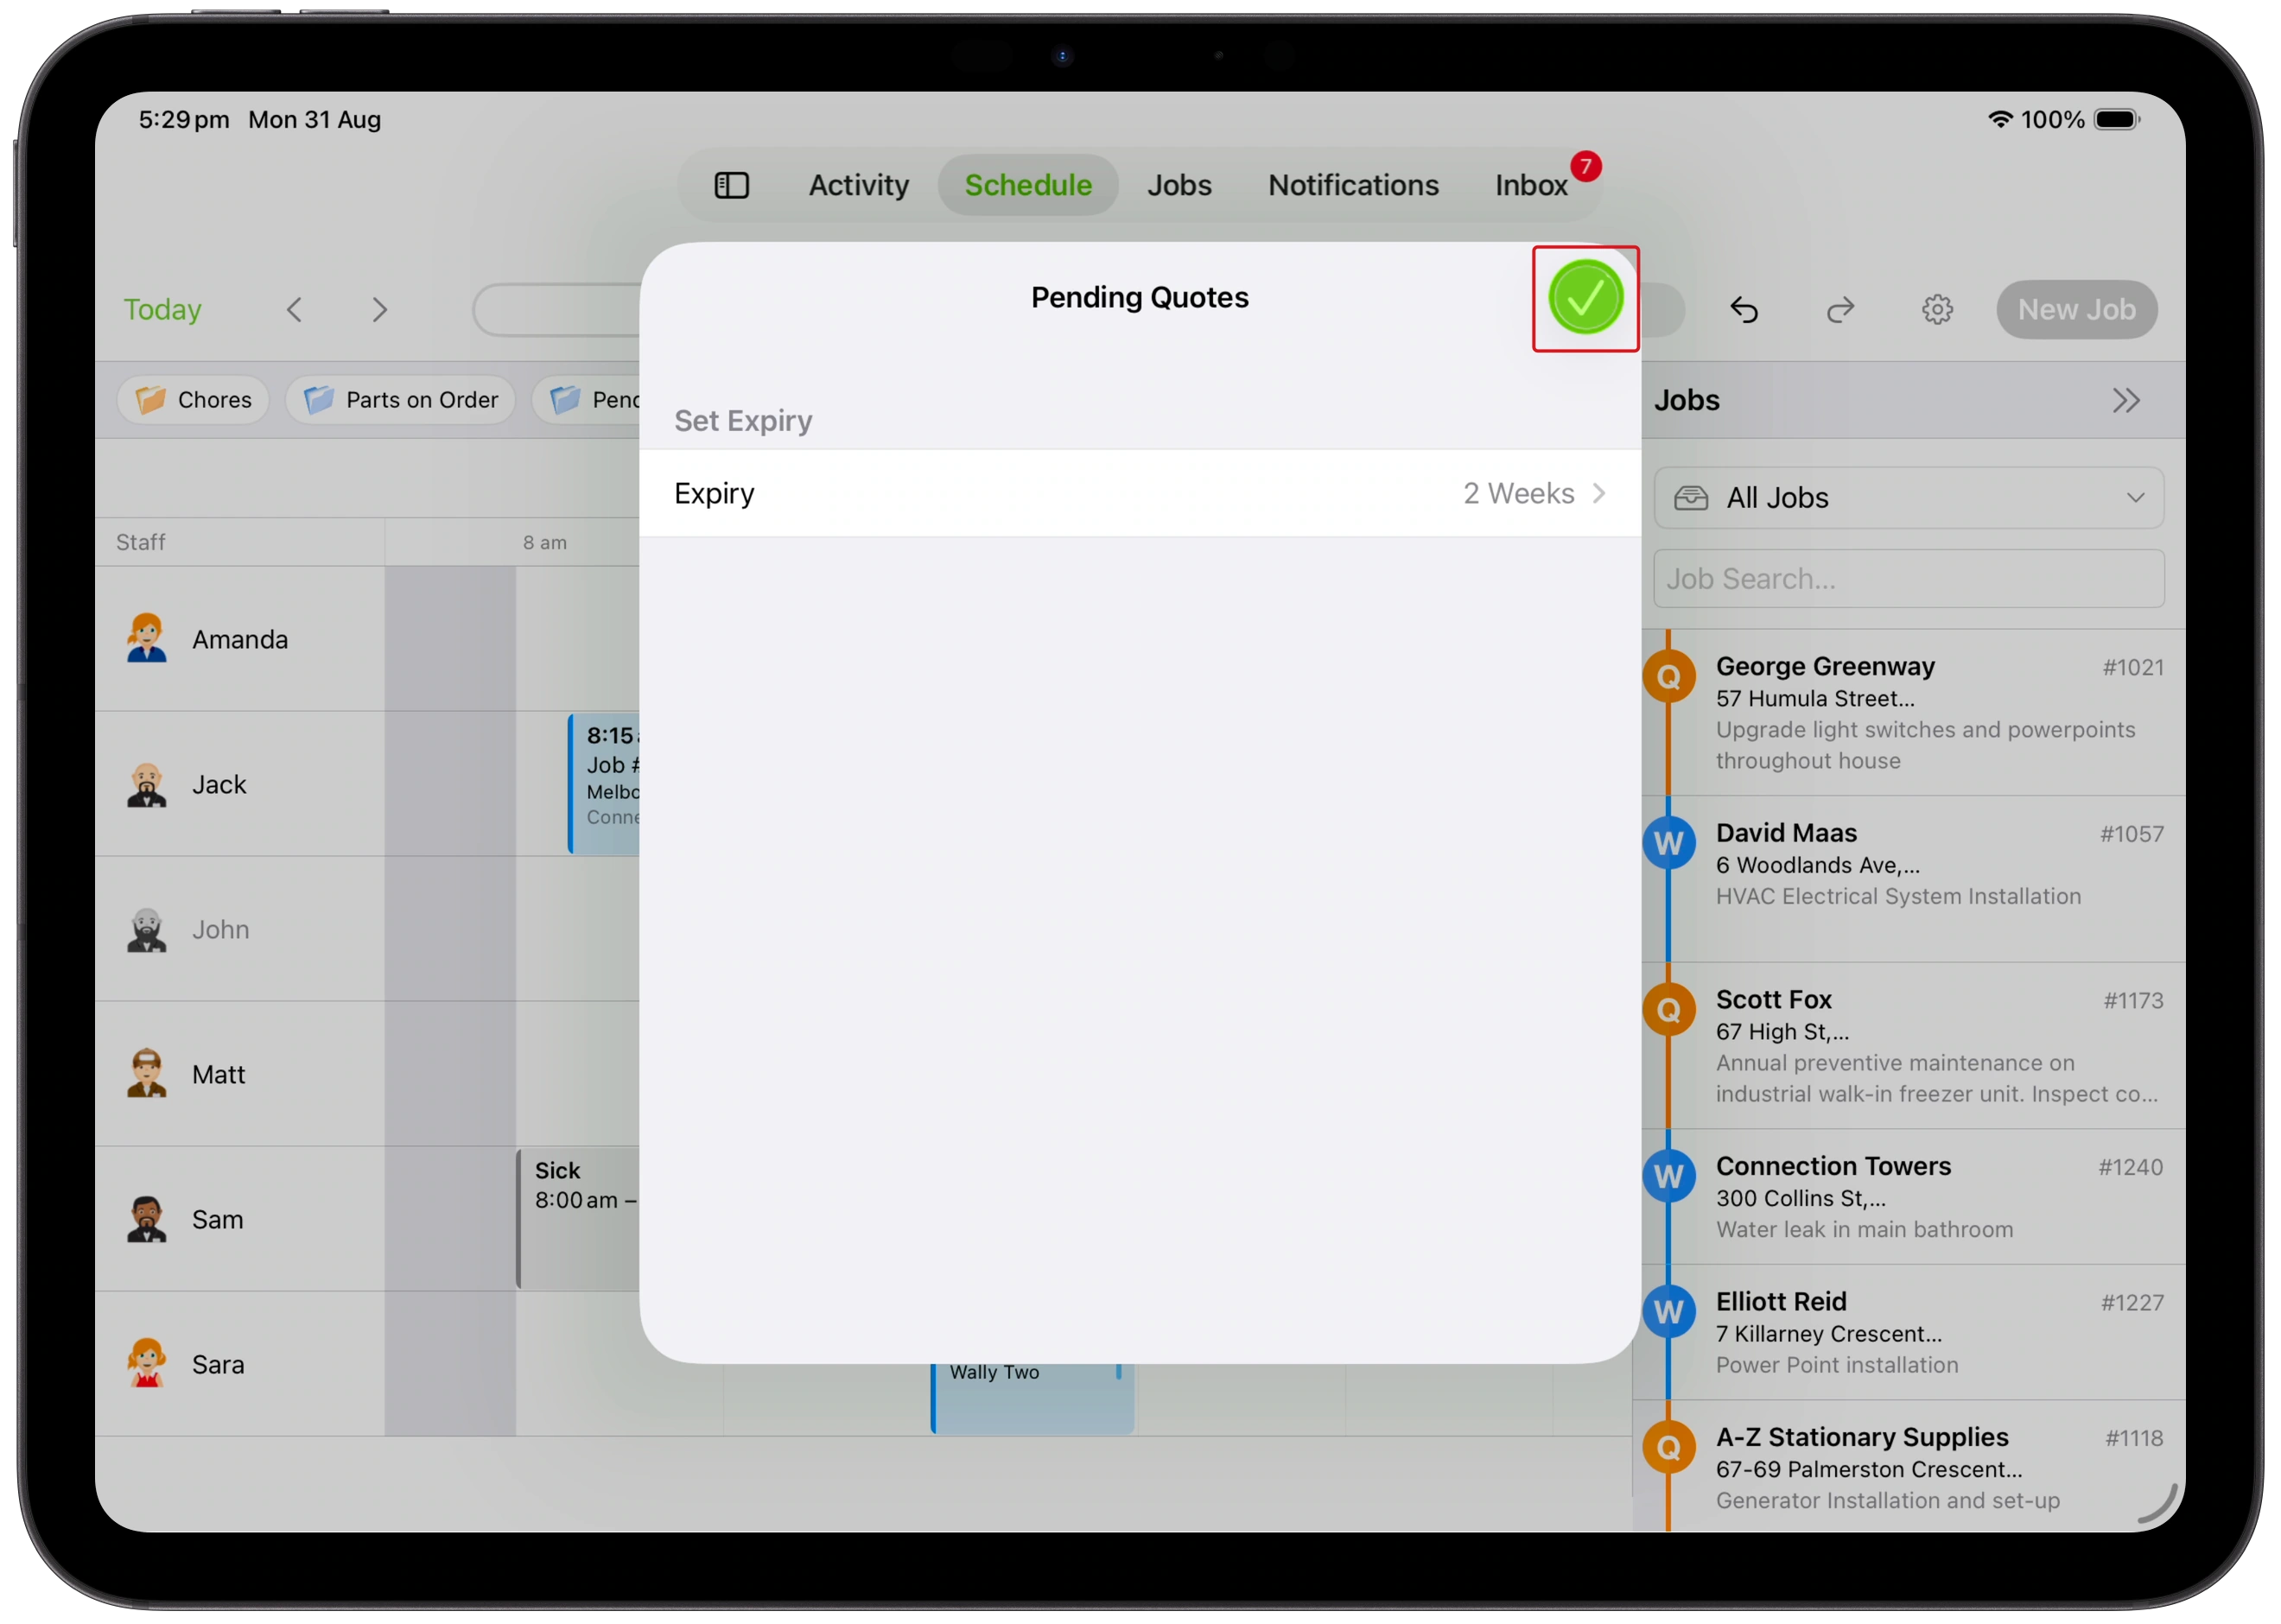
Find the job in the Jobs panel, then touch and hold it and drag it onto a queue shortcut.
-
Choose the expiry and complete any other options offered, then tap the green tick to confirm.
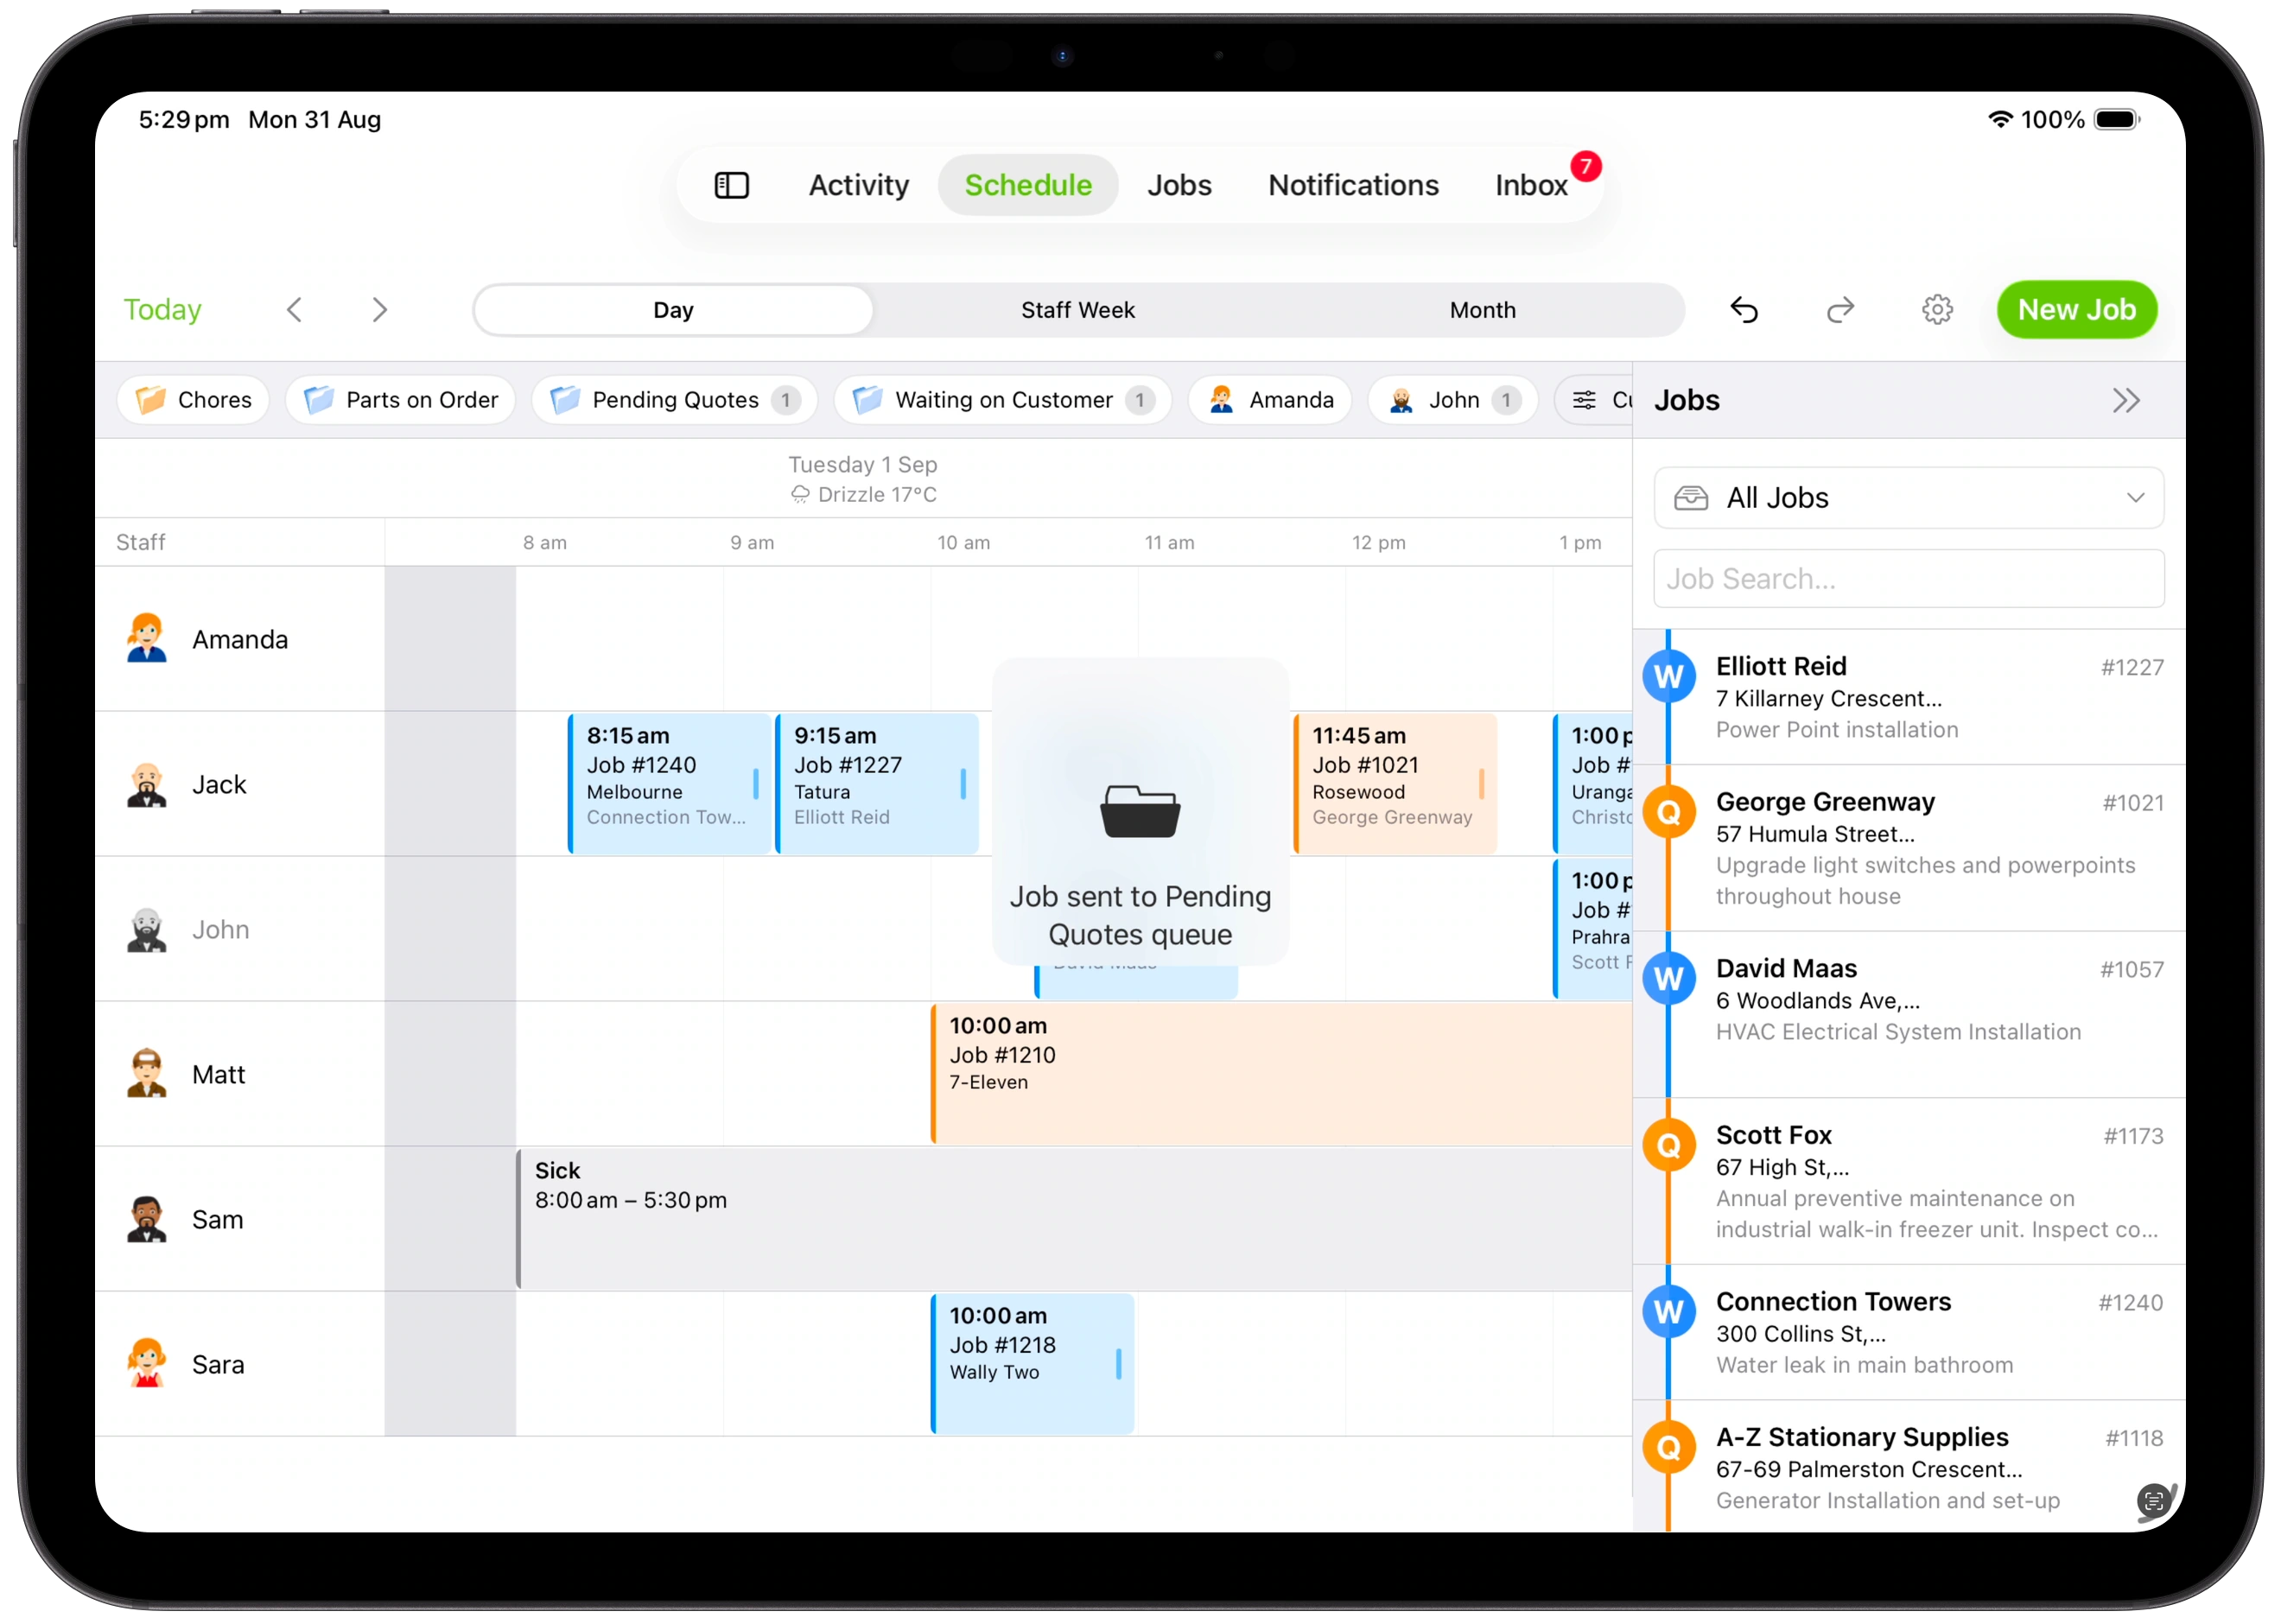
ServiceM8 confirms that the job has been sent to the queue.
Show the weather forecast
- Tap the gear icon (Schedule Settings).
- Under View Controls, turn on Weather Forecast.
- Tap Done.
Daily Apple Weather conditions or temperatures appear with date headings when a forecast is available. Forecasts require location information and an internet connection, use your business location when available, and cover the dates provided by Apple Weather. Dates appear without weather information when a location or forecast is unavailable.