

Jobs and scheduling
Using the Staff Schedule in the Online Dashboard
Choose your schedule views, customise booking details, and book or adjust work from the Online Dashboard.
The Schedule brings daily dispatch and longer-range planning into one place. Choose the views, staff and booking details that suit how you plan your work.
Open the Schedule
Click Dispatch Board, then Schedule.
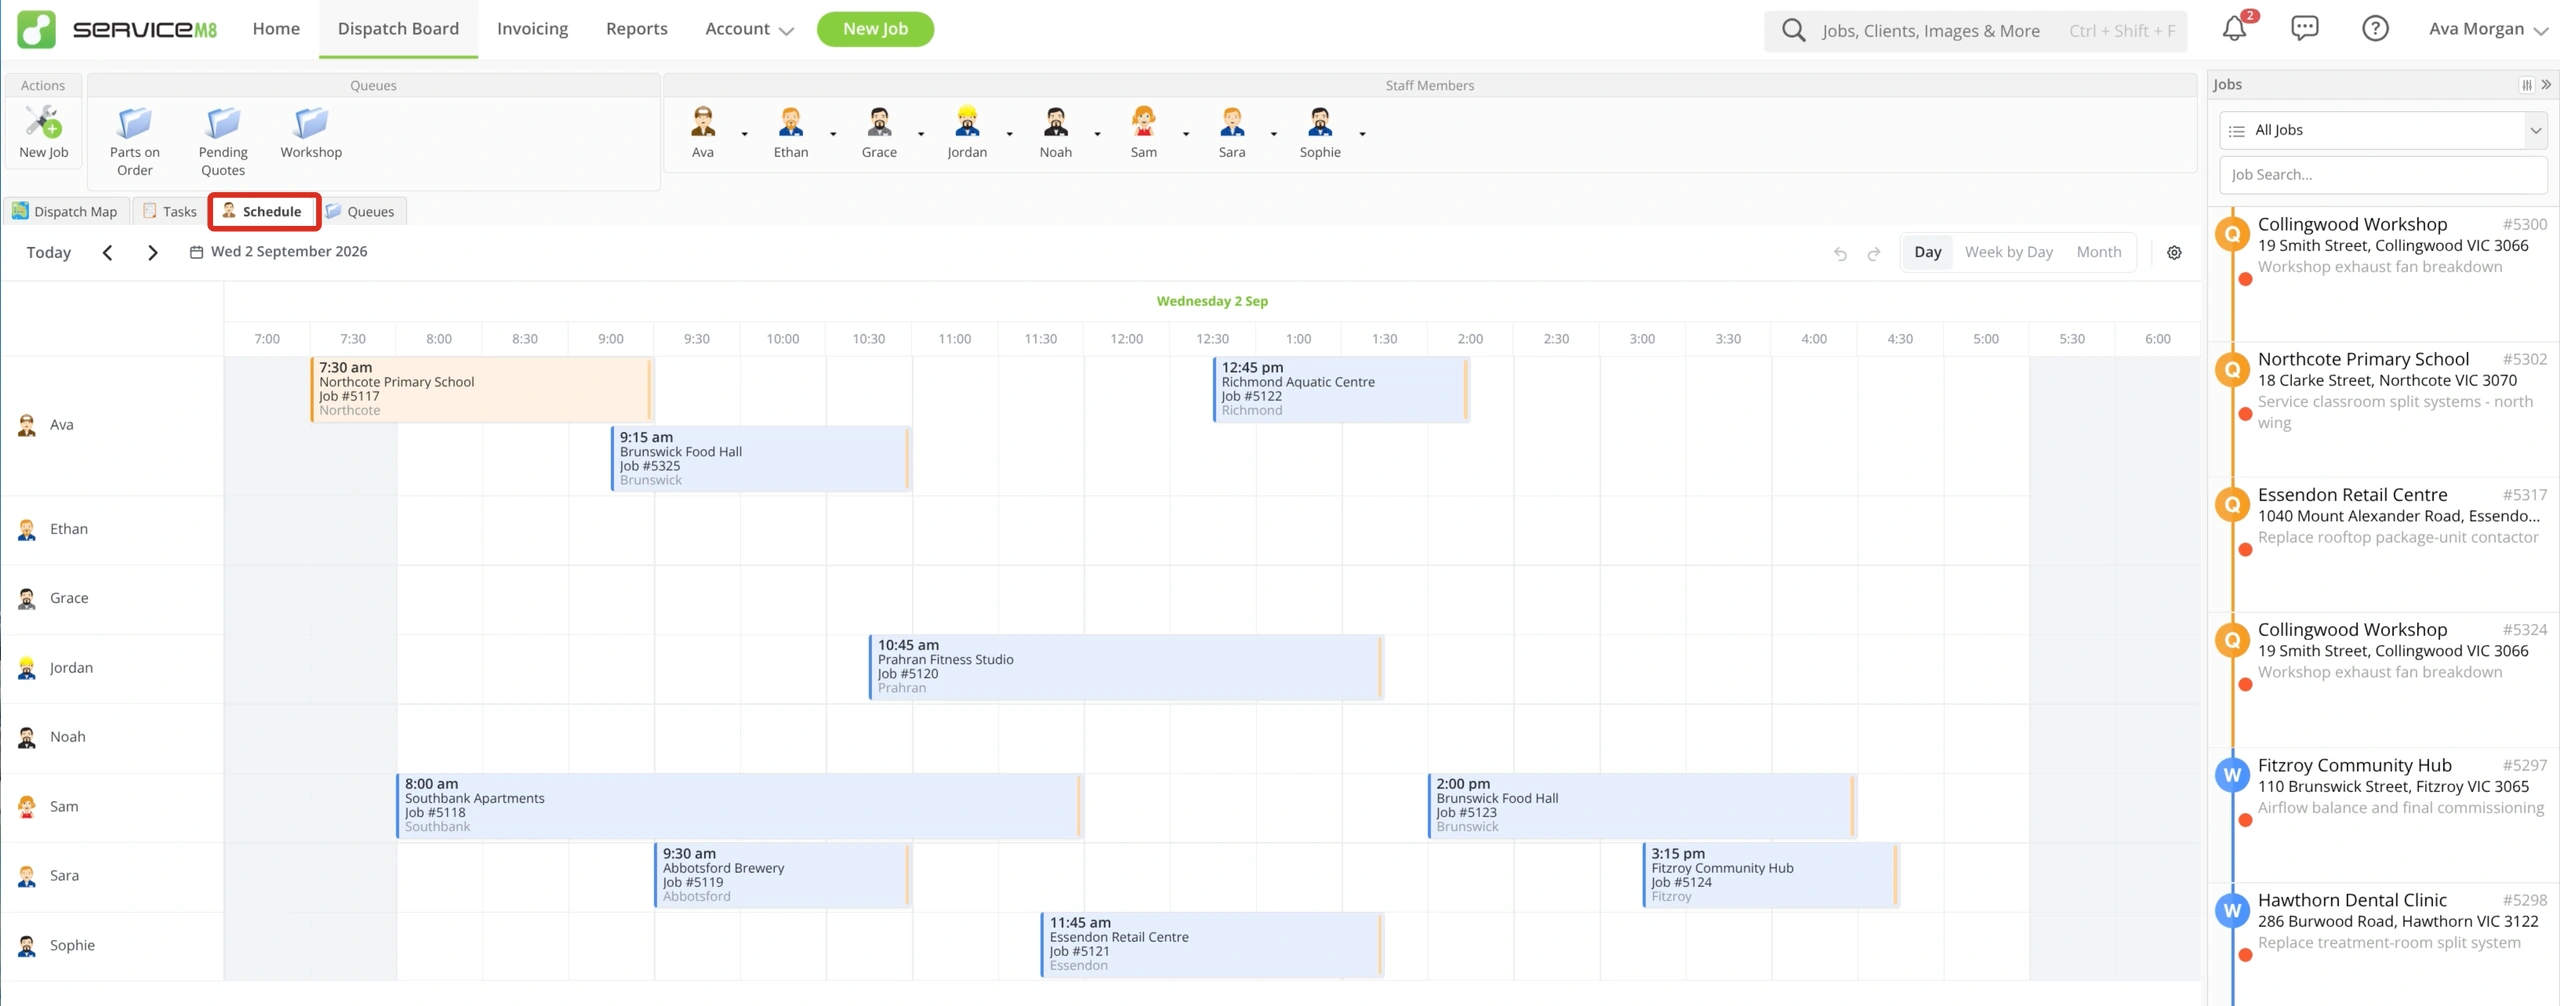
Choose a view
-
Click the gear icon (Schedule display preferences), then Schedule Views.
-
Select the views you want in your toolbar, then close the window. Keep at least one view selected.
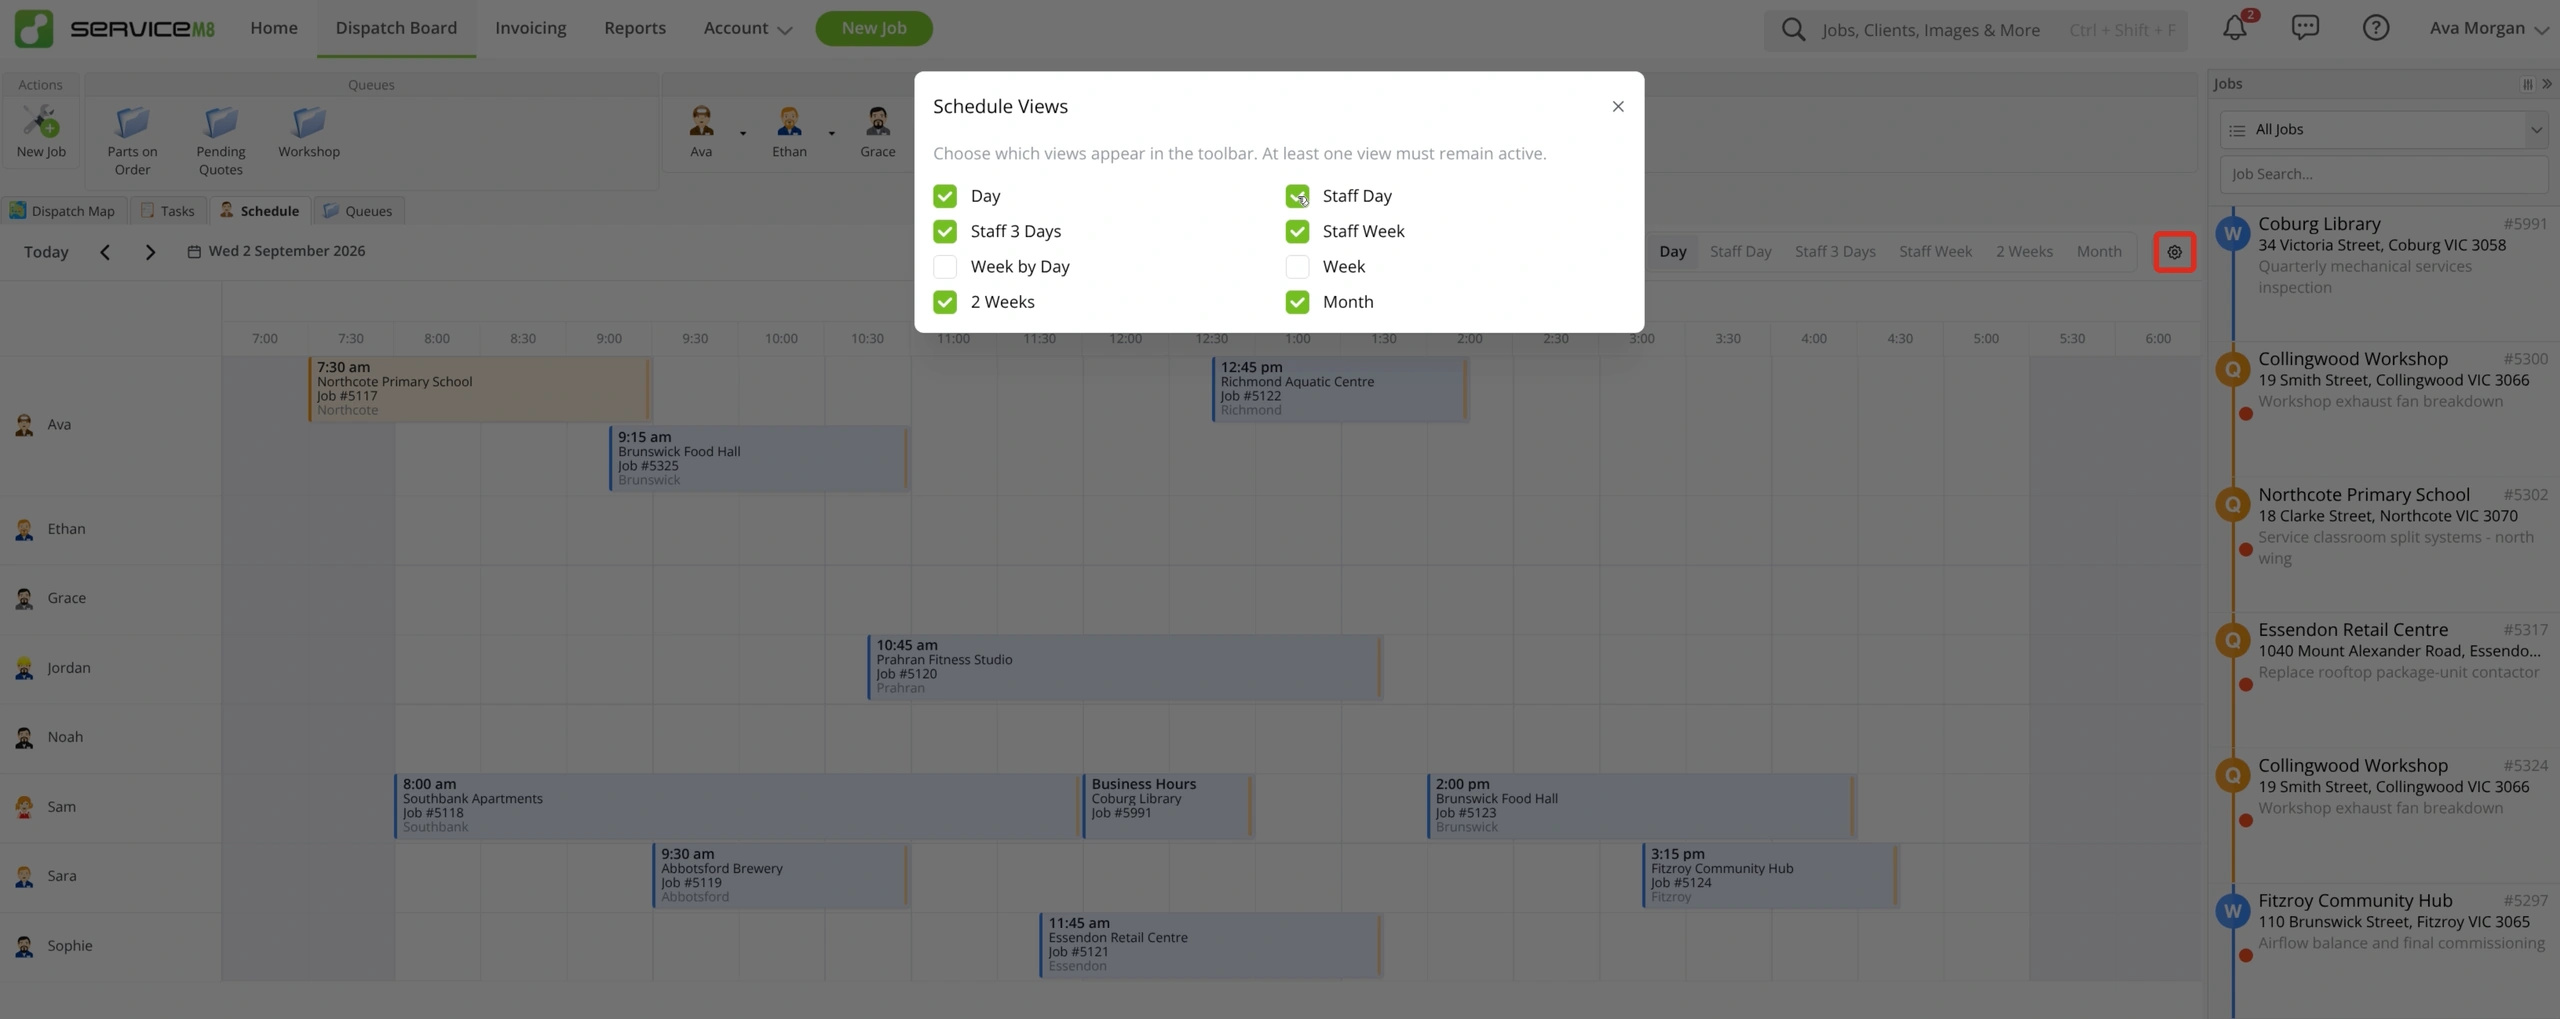
-
Click a view in the toolbar. ServiceM8 remembers your view choices and the view you last used.
| View | Use it for |
|---|---|
| Day | Daily planning across staff rows. Bookings use job-status colours, and rows expand to show overlapping bookings. |
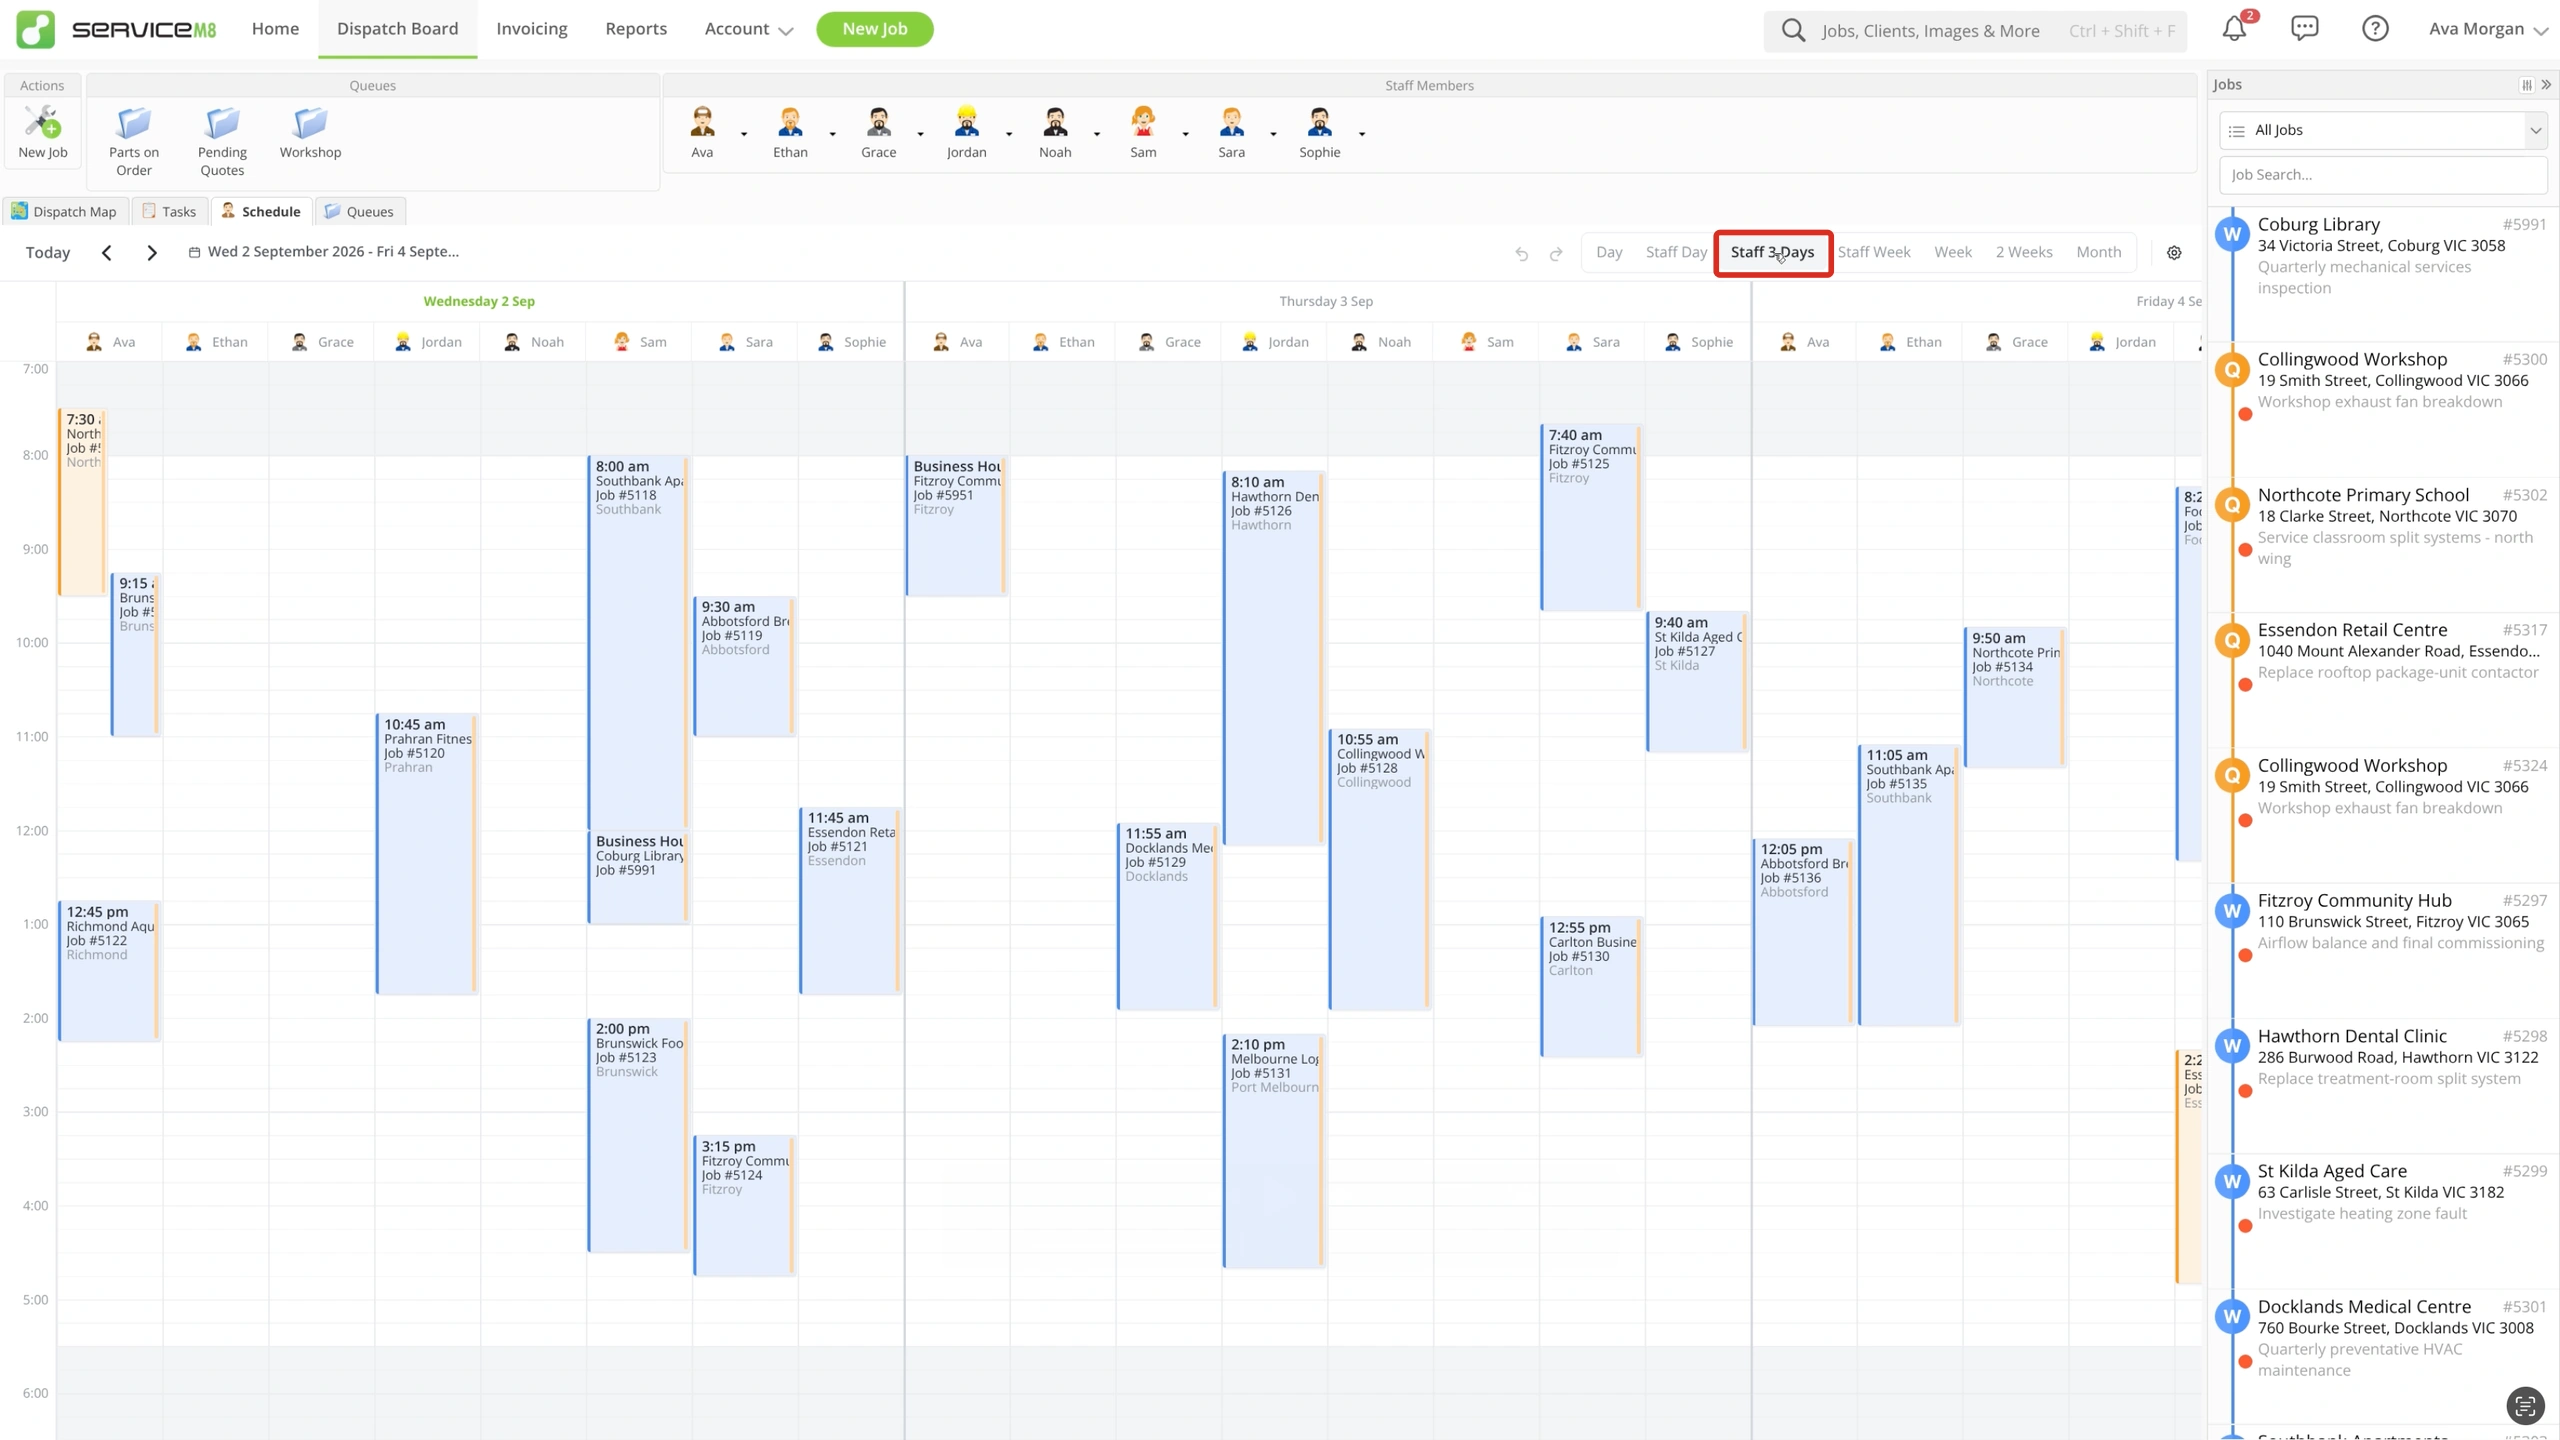
| Staff Day, Staff 3 Days and Staff Week | Planning in vertical staff columns, with job-status colours. |
| Week by Day | Calendar-style planning in date columns. Bookings use staff colours, with a separate dot for job status. Overlapping bookings for the same staff member appear side by side. |
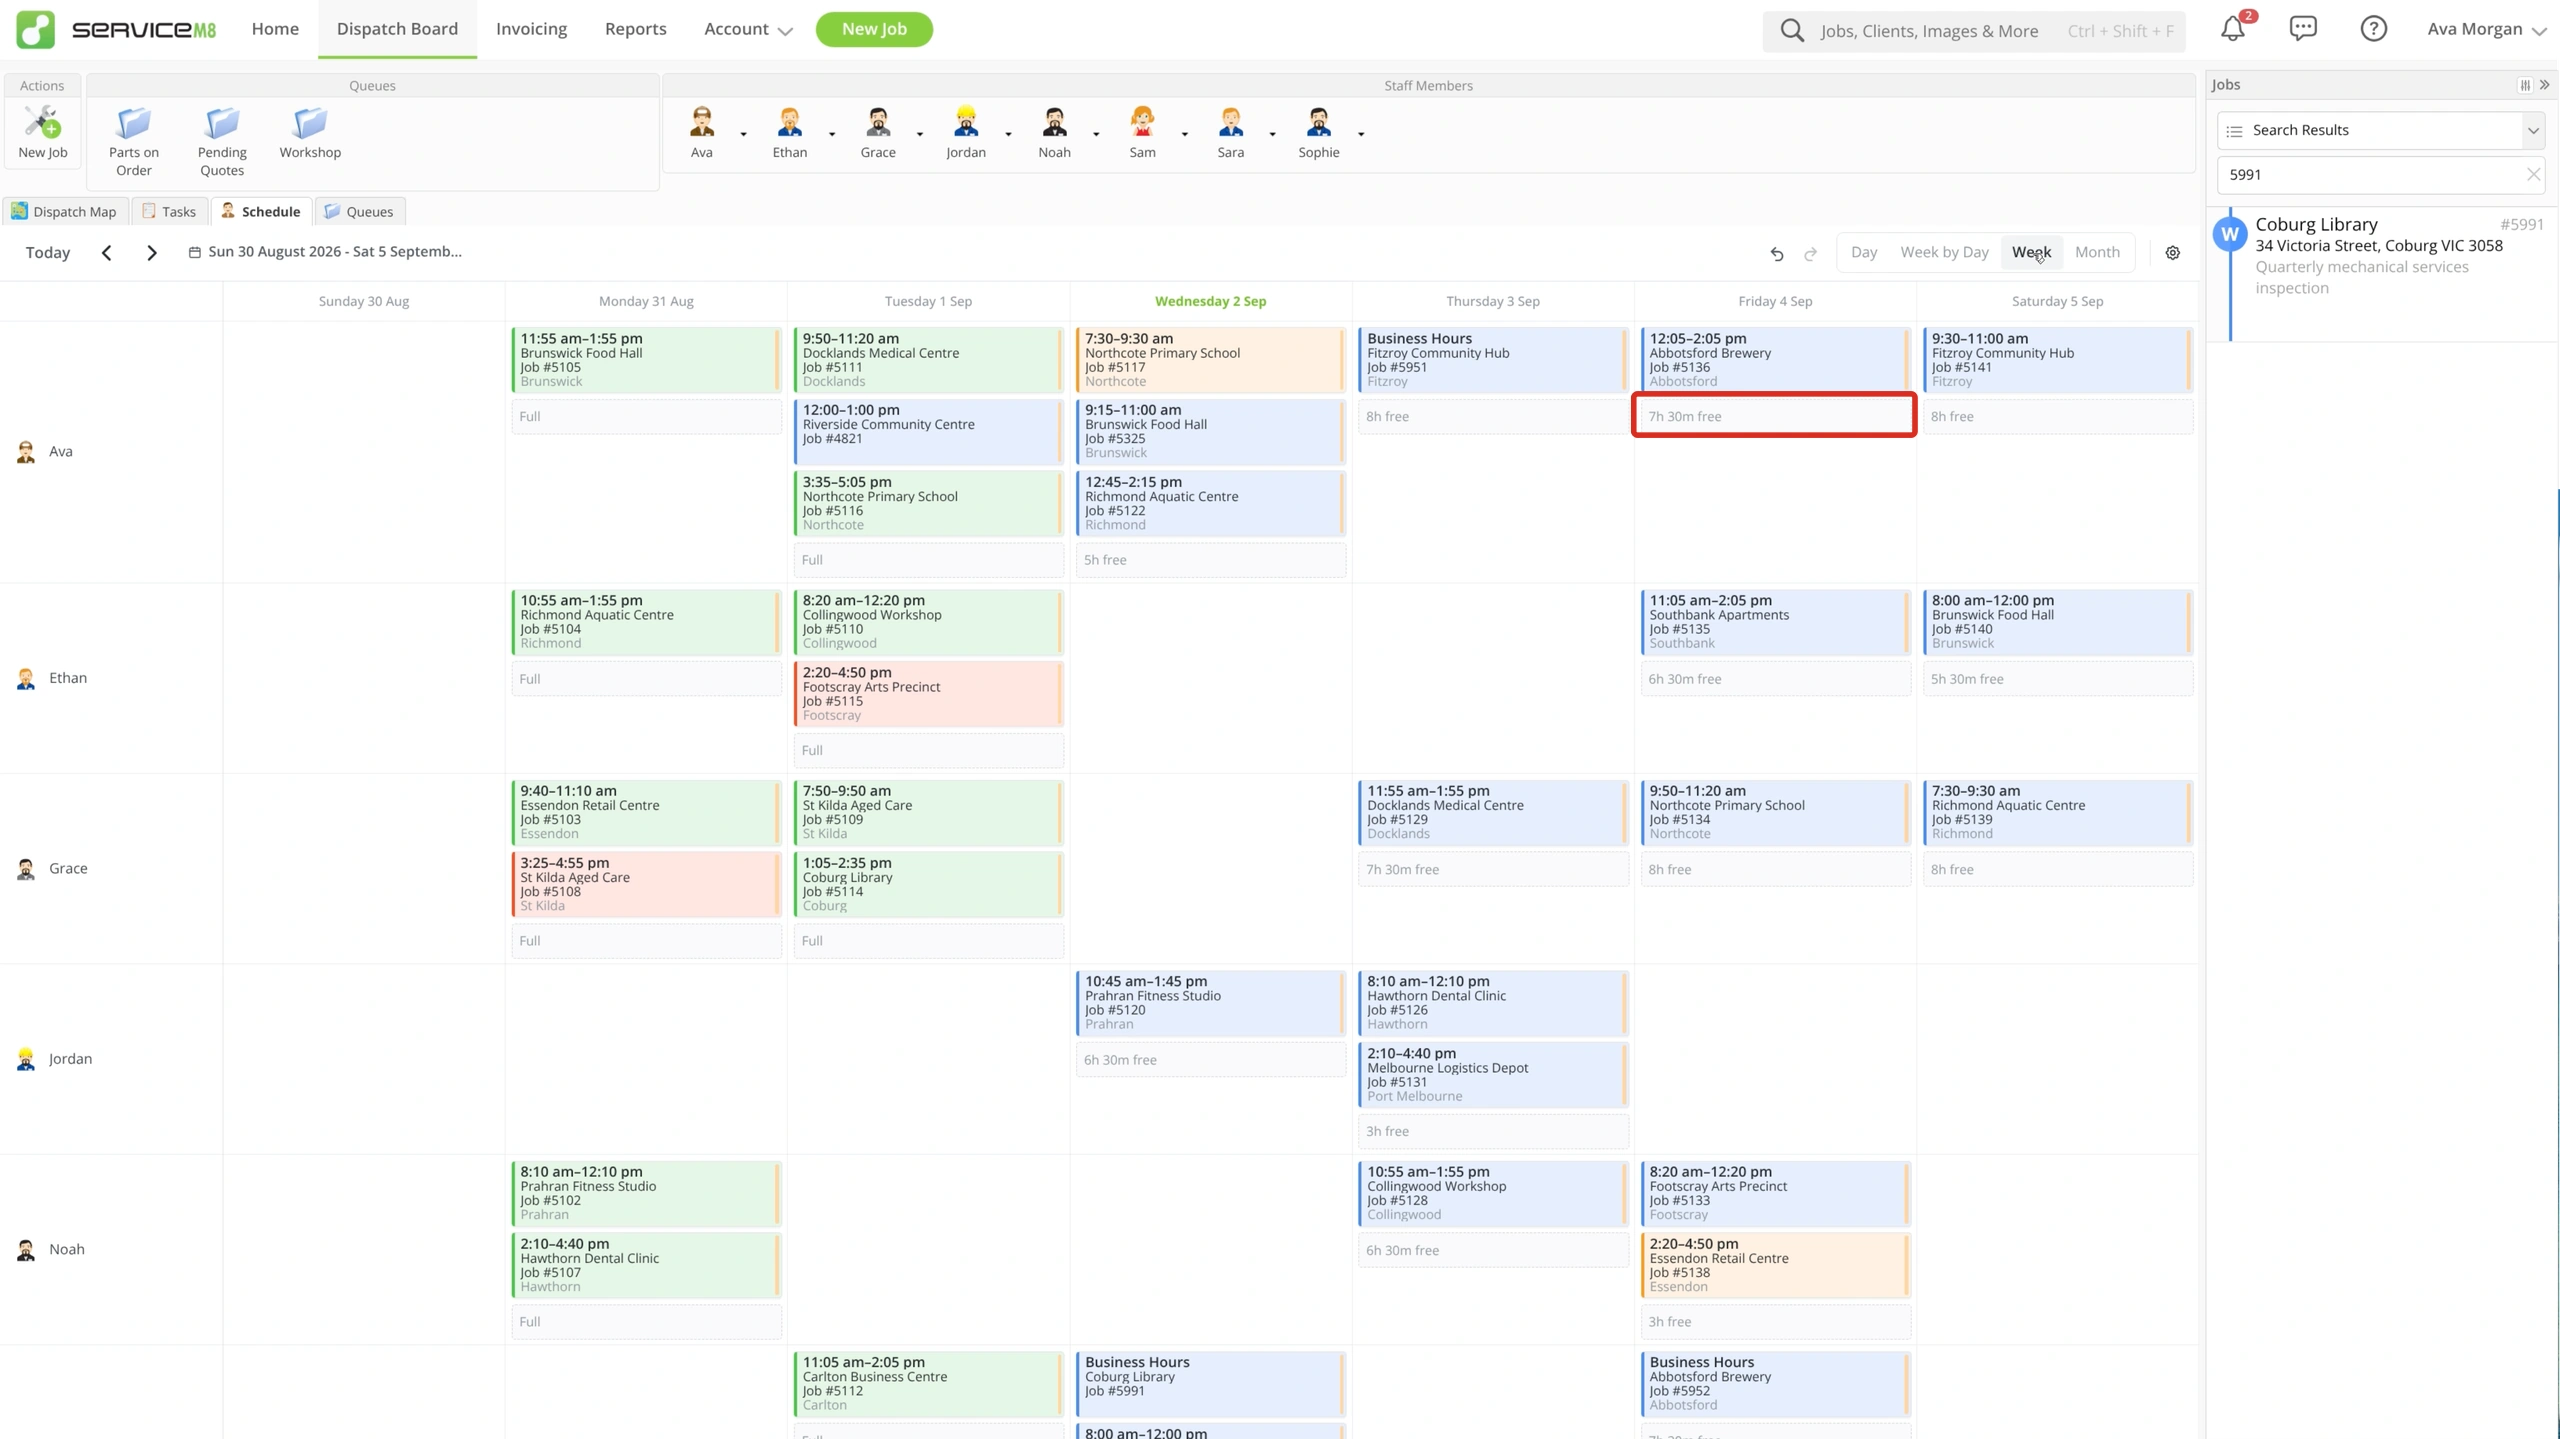
| Week and 2 Weeks | Planning across staff rows and dates, with job-status colours and remaining daily capacity. |
| Month | Comparing booked hours across the team and opening a date for detailed planning. Bookings use job-status colours. |
Click Staff 3 Days to plan across three dates in staff columns. Scroll across to see further staff columns when needed.
Click Week or 2 Weeks to compare the time remaining for each staff member and day. Capacity uses your operating hours and accounts for overlapping bookings and unavailable time. For today, it shows the time remaining from now.
In Month, click a date’s booked-hours summary (Open Day View) to open that date in Day.
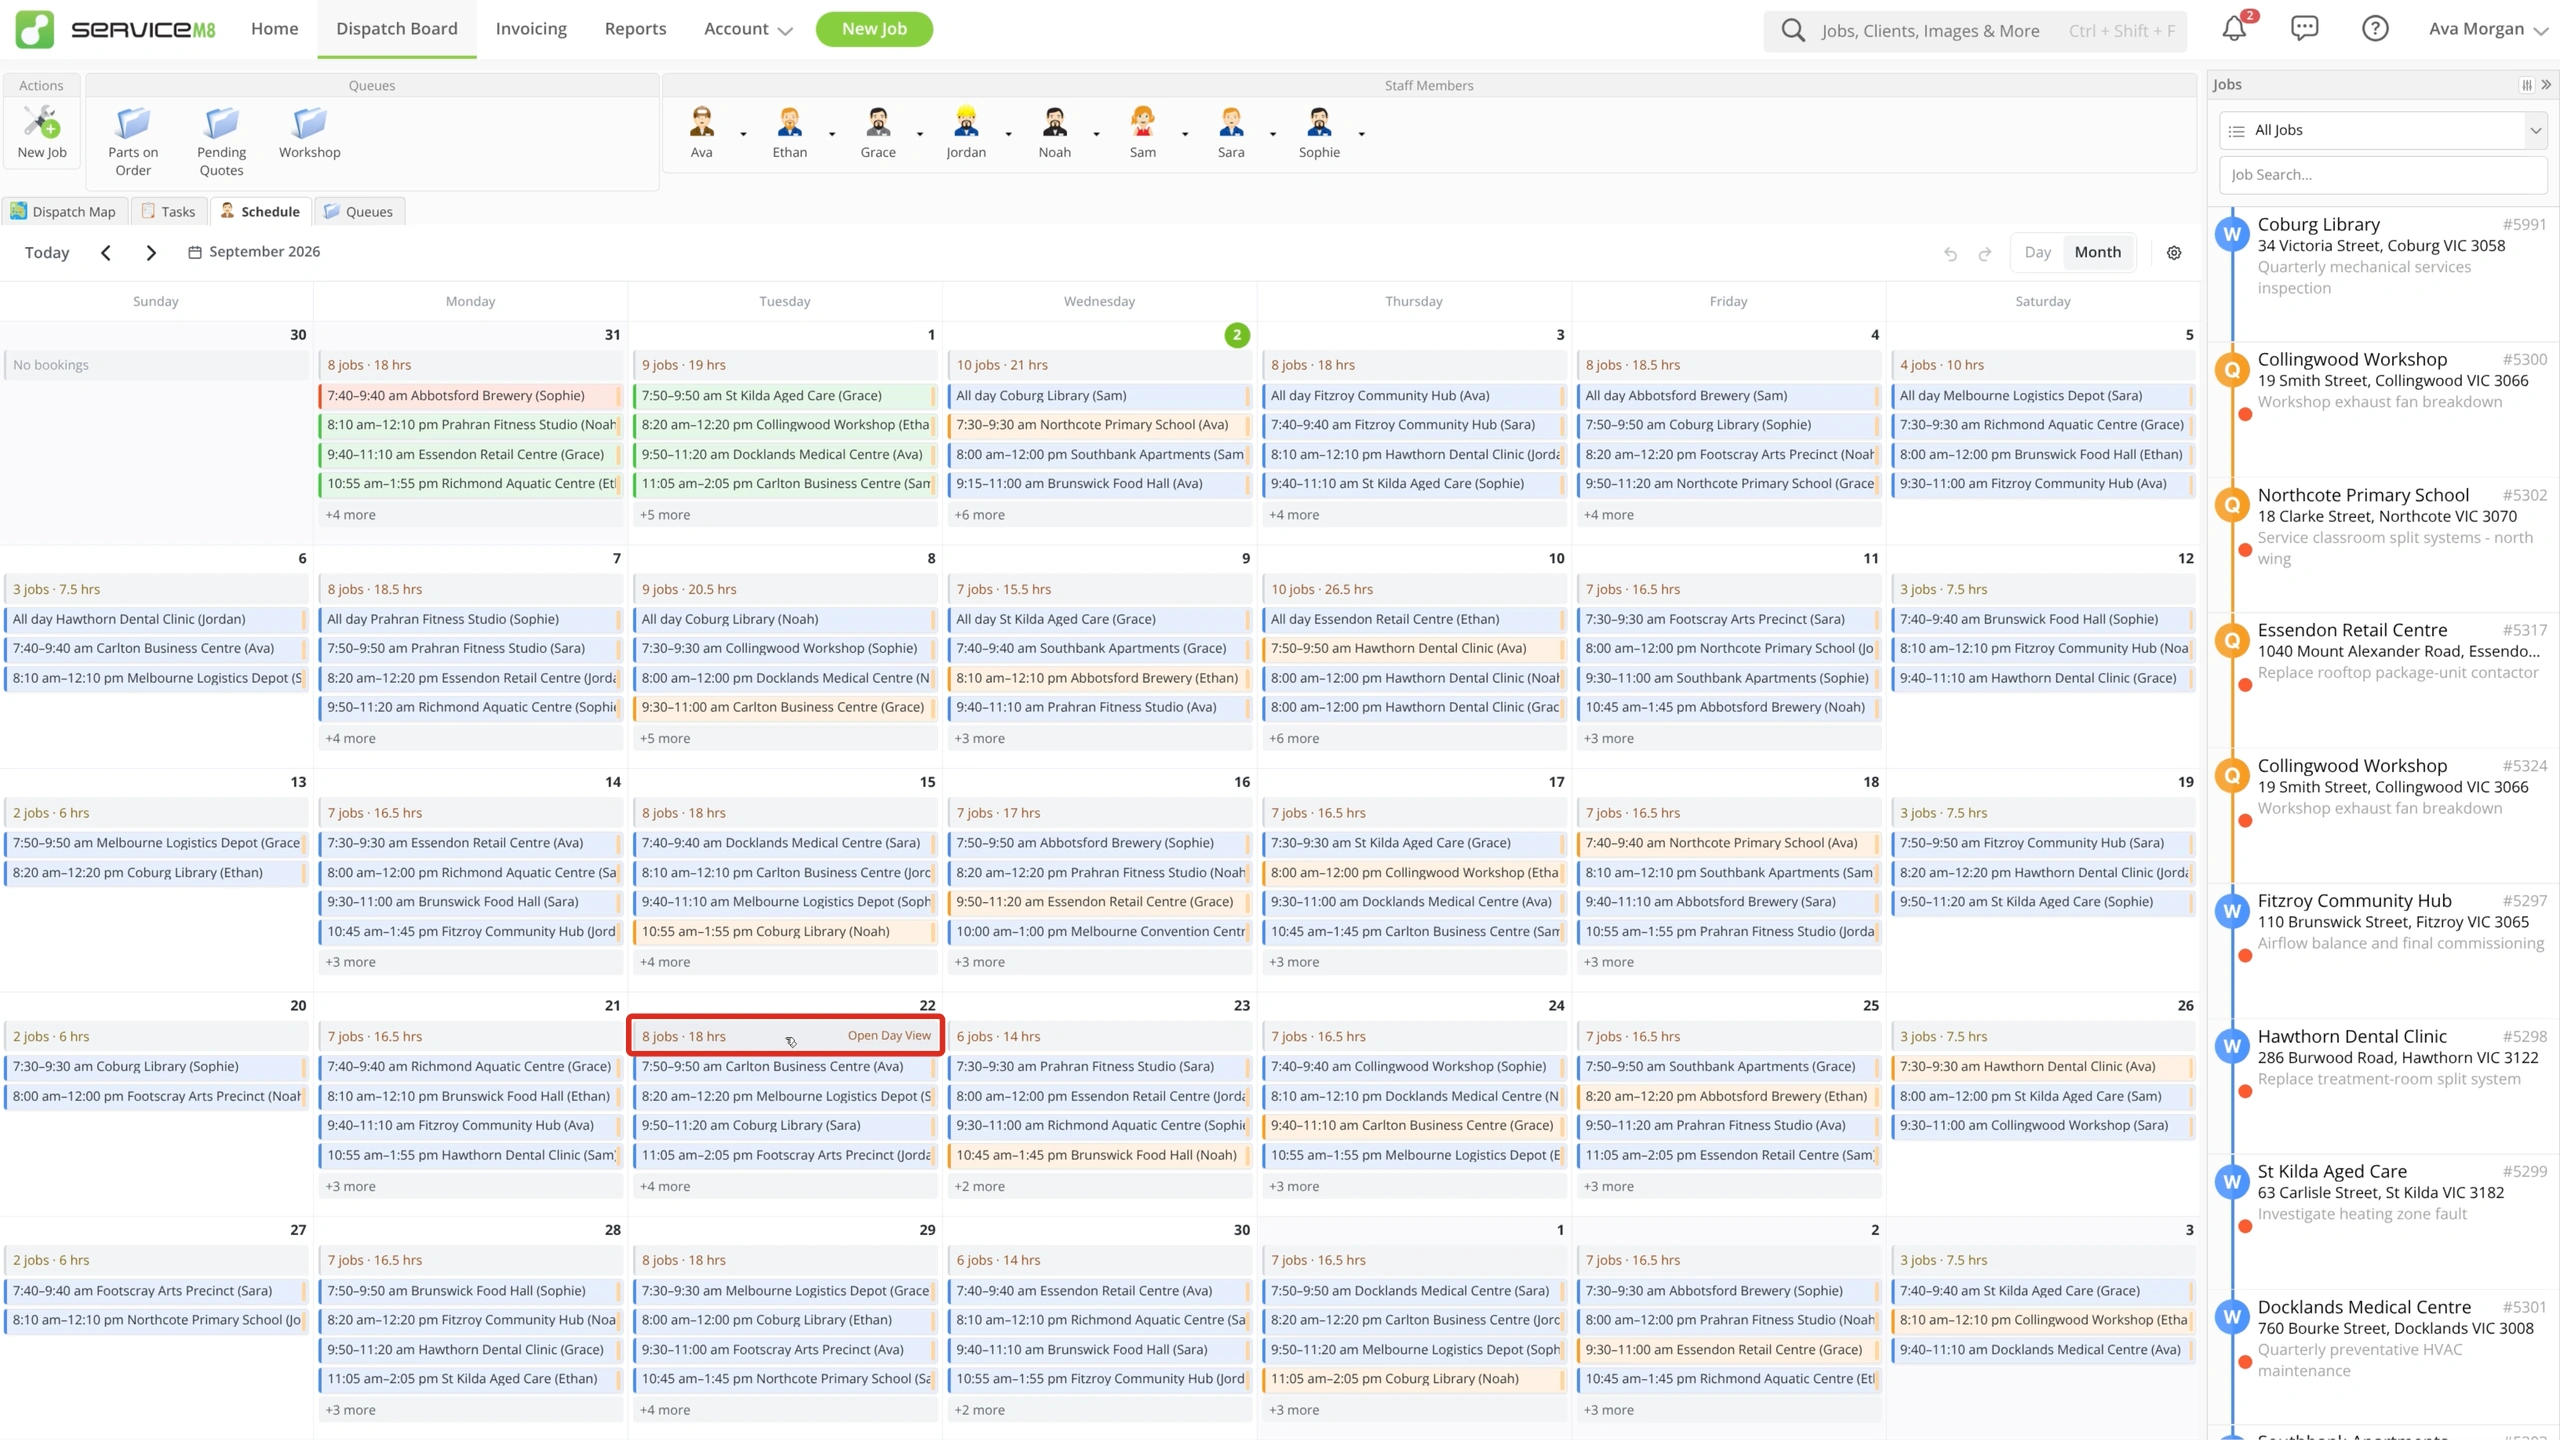
Click the date heading to choose another date, use the arrows to move through the current range, or click Today. Staff leave and other unavailable time appear as grey blocks; they are excluded from Month’s booked-hours totals.
Choose which staff you see
-
Click the gear icon, then Staff Members.
-
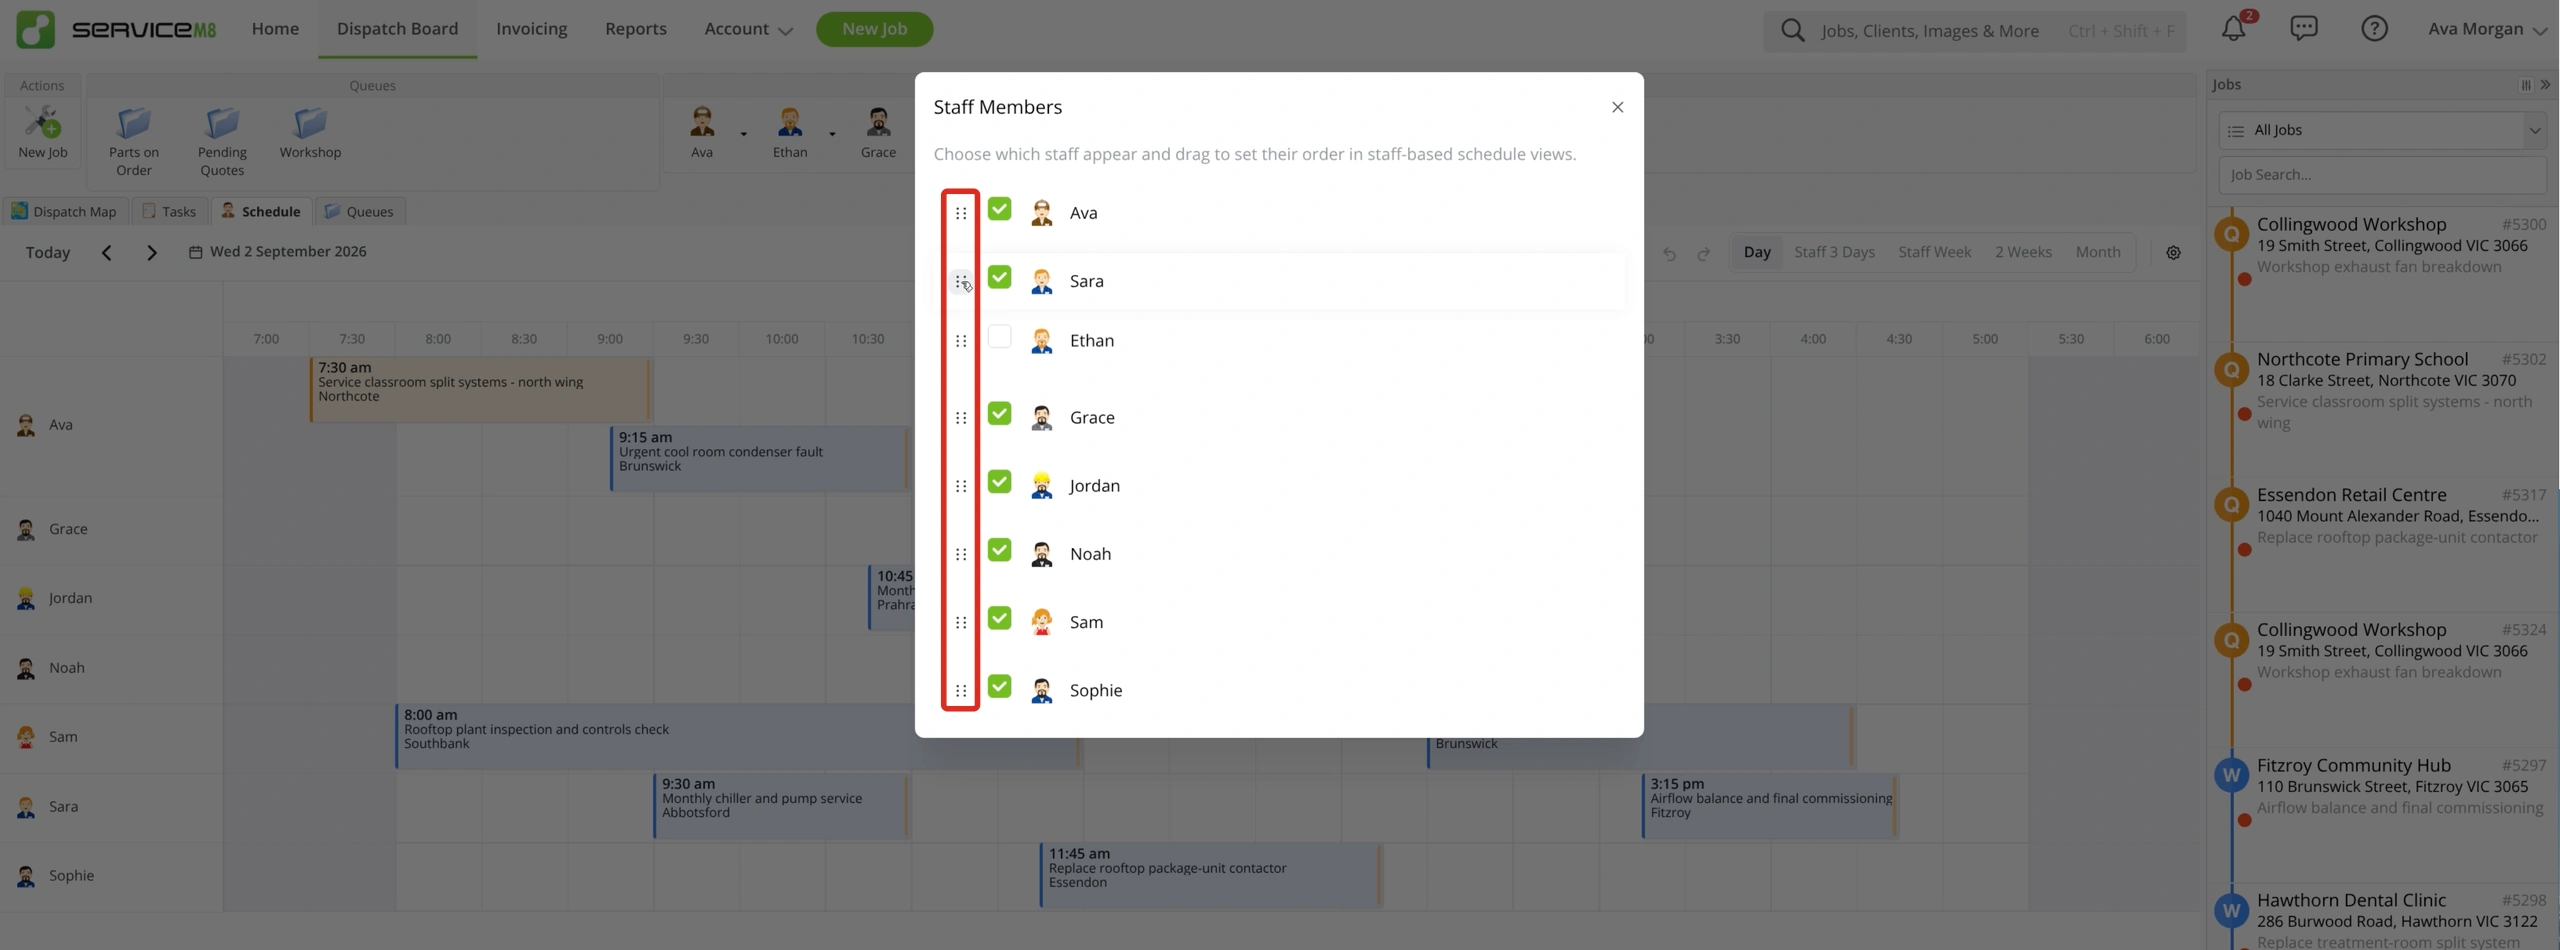
Select the staff you want to show. Drag the dotted handles beside their names to change their order, then close the window.
In Week by Day, click a staff avatar or name in the left-hand selector to show or hide their bookings. Expand the selector to use the person icon beside a name to show only that staff member. Click Show all staff to restore everyone in the selector.
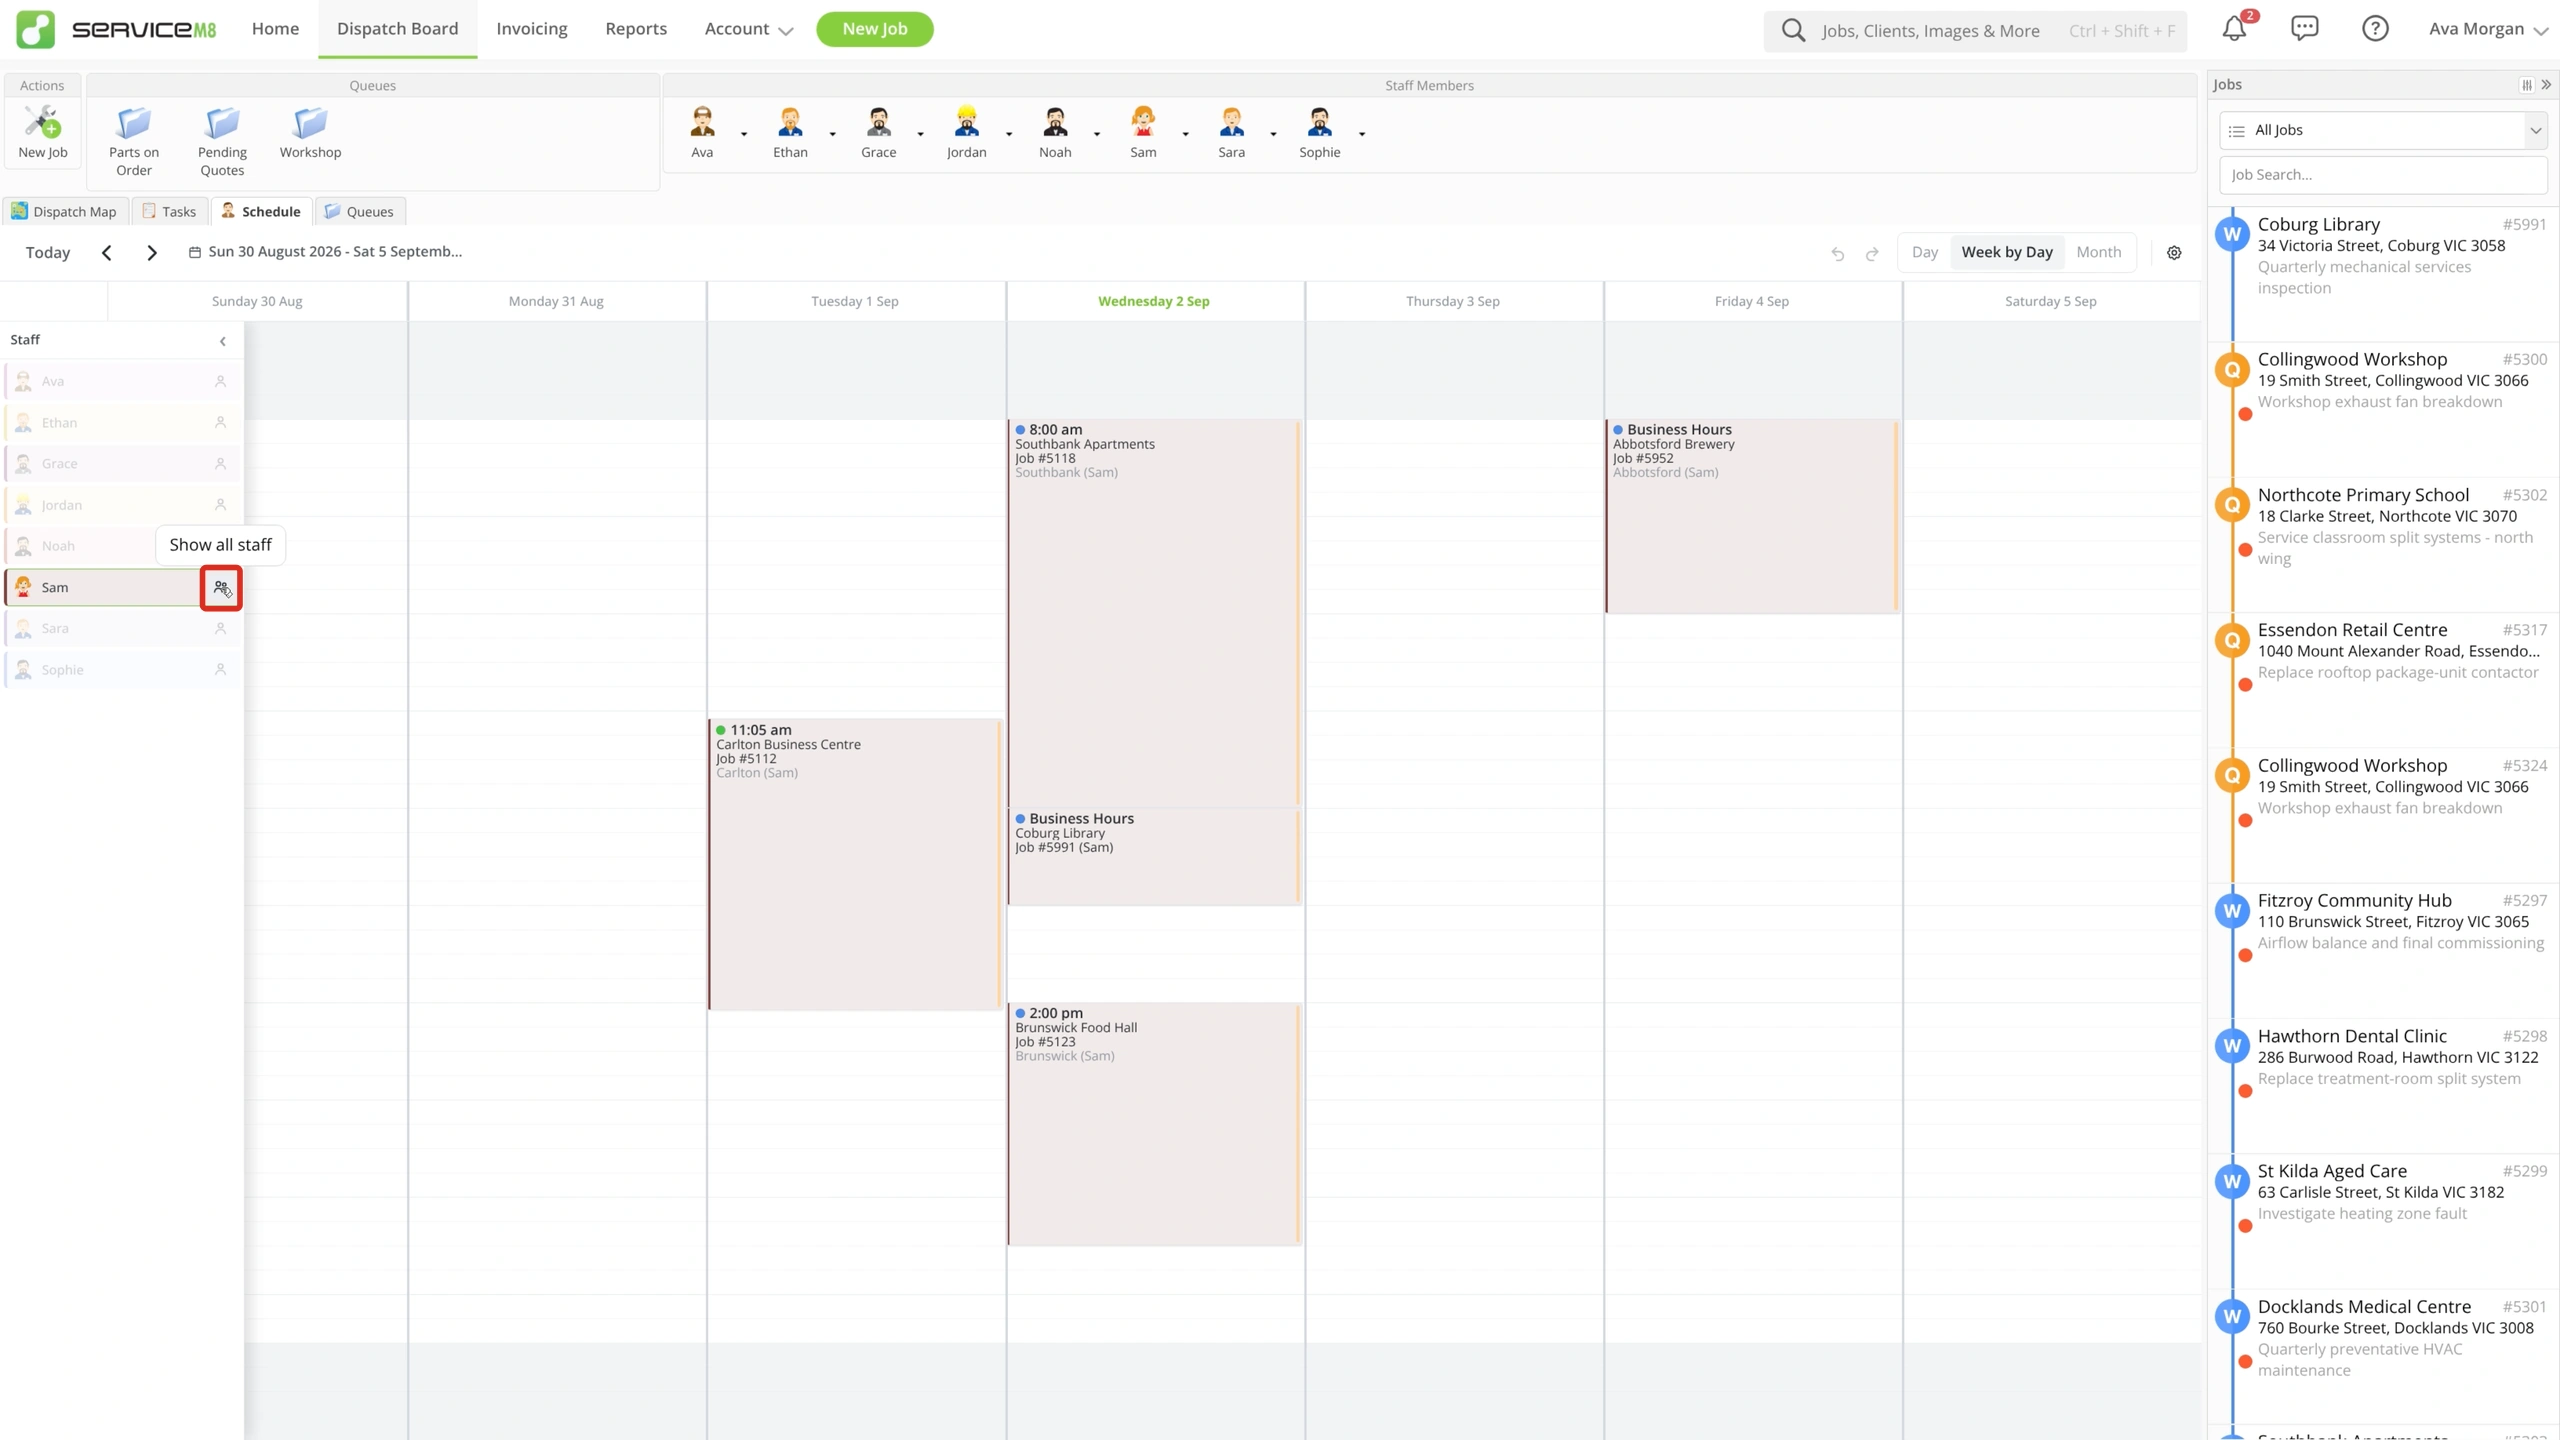
These controls change what you see, not who is assigned to a booking. Staff Members saves your preferred staff list and order; Week by Day’s selector temporarily filters that list.
Choose booking-card details
-
Click the gear icon.
-
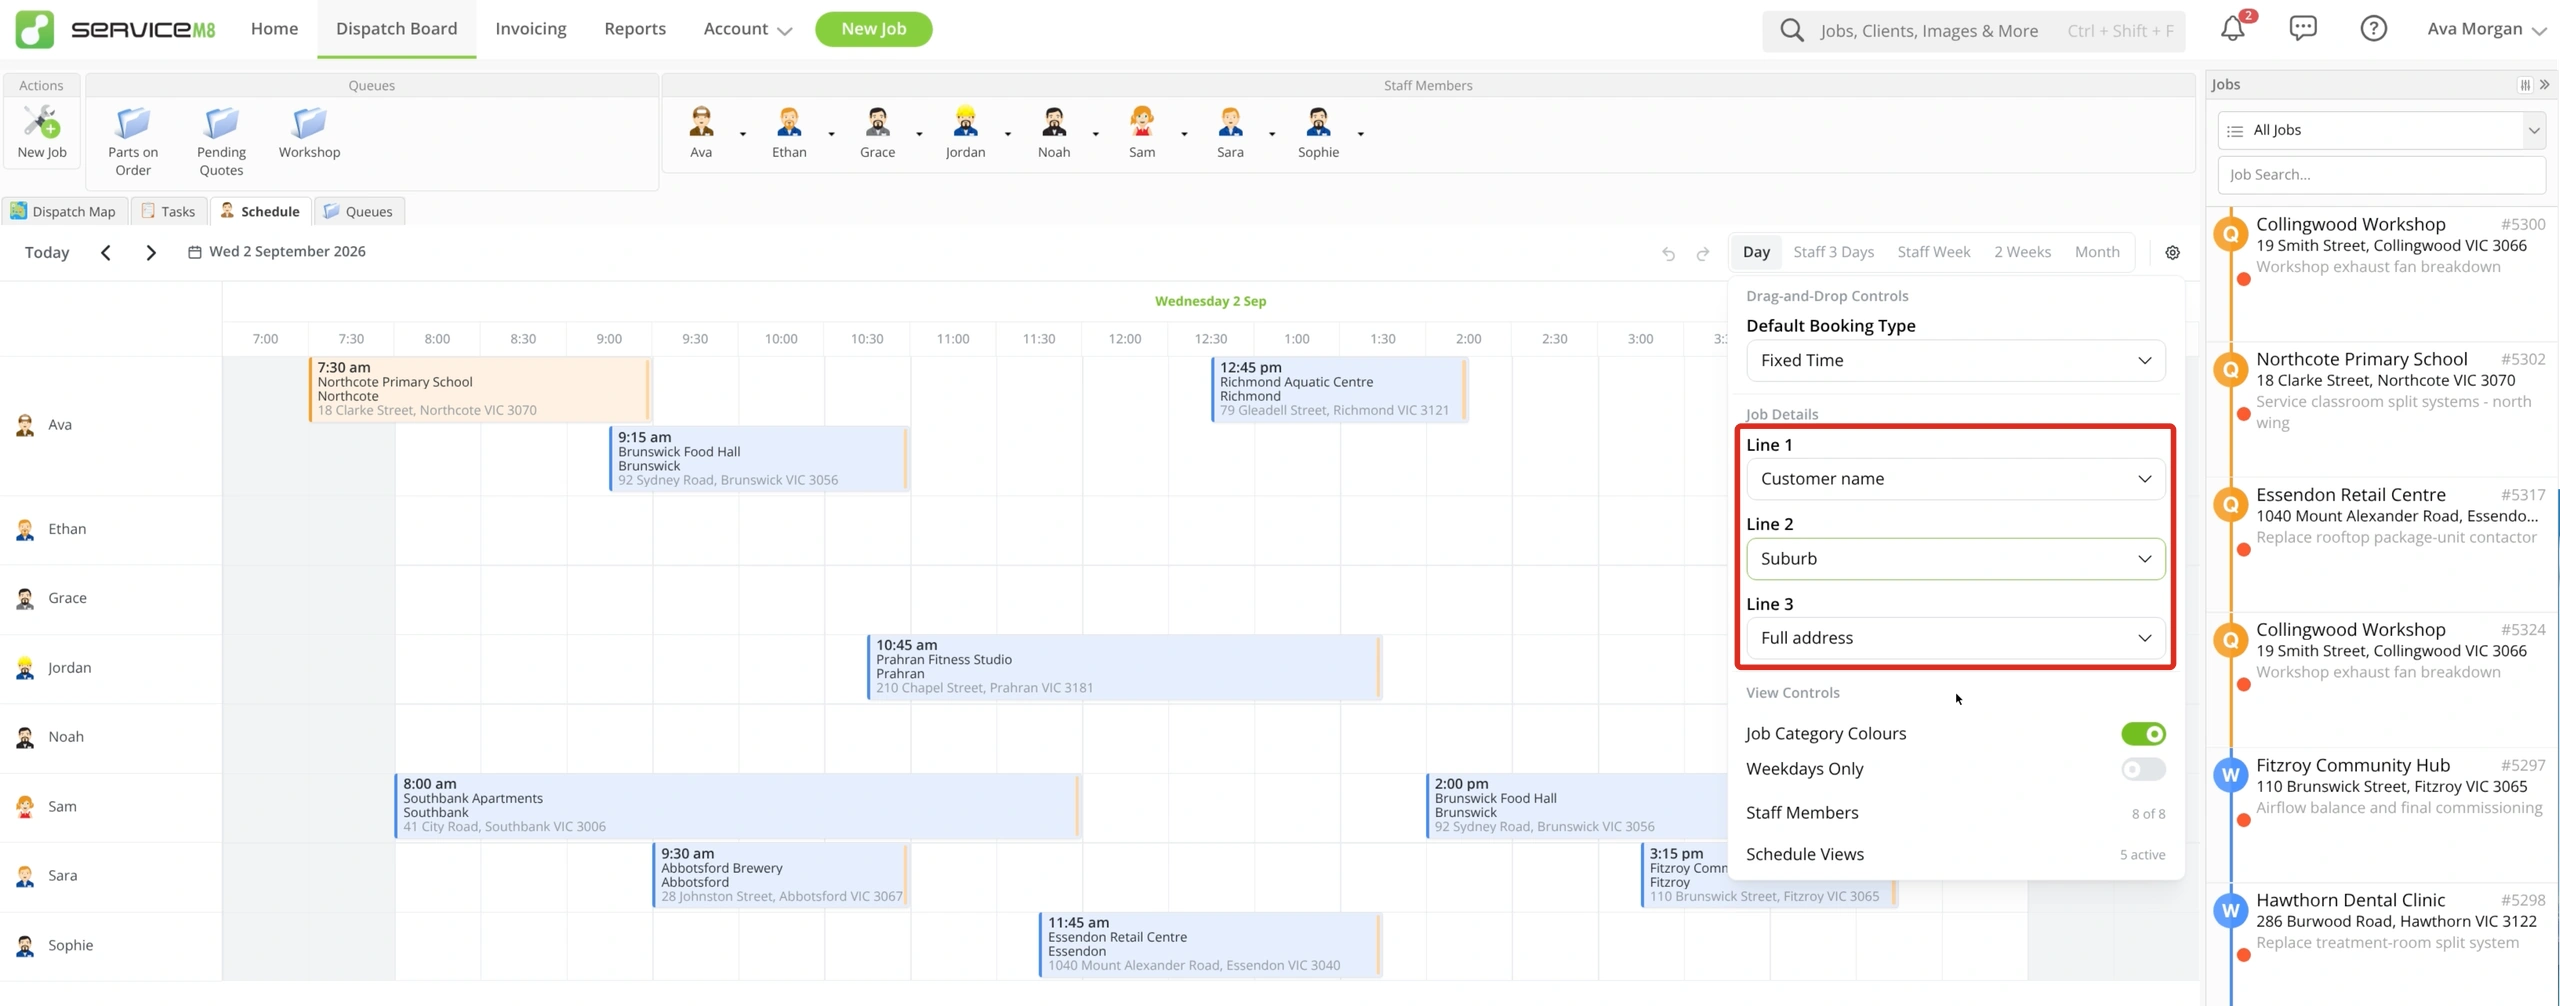
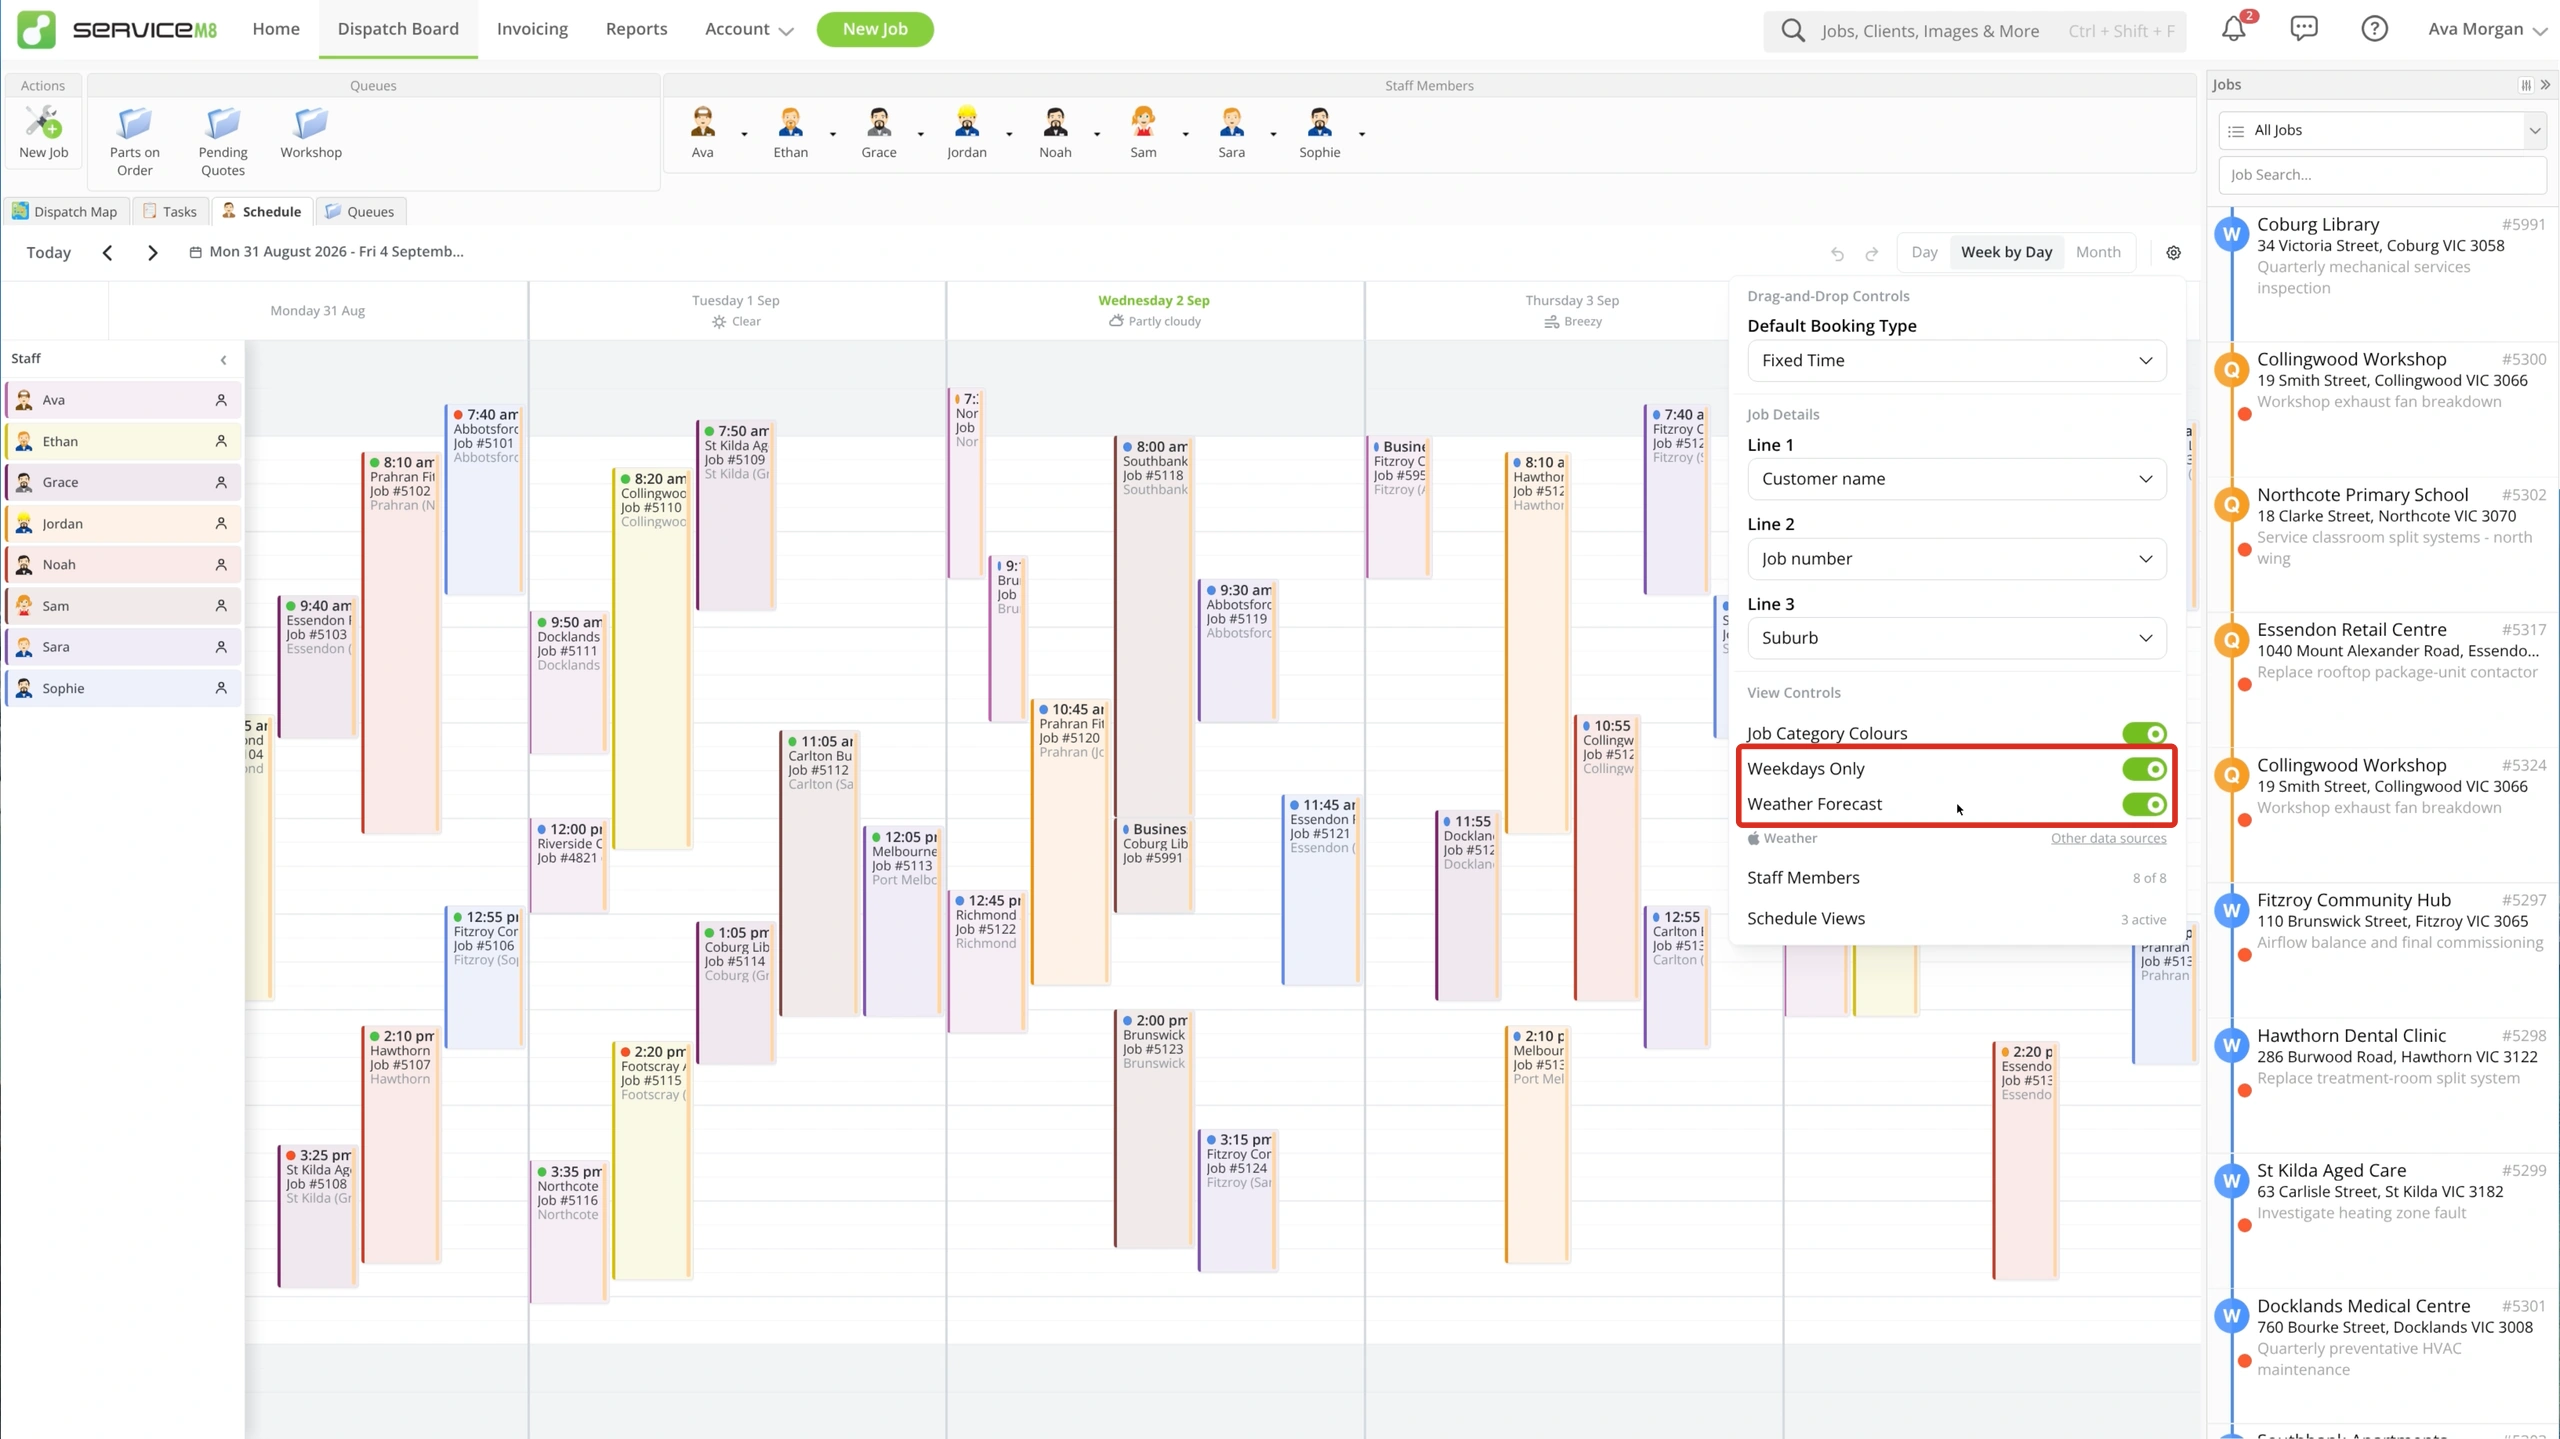
Choose the details for Line 1, Line 2 and Line 3. Options include customer name, job number, suburb, full address, post code and the first line of the job description. Choose None to leave a line out.
-
Turn Job Category Colours on to add a category-colour stripe to bookings.
Set weekends and weather
In the gear menu, turn Weekdays Only on to hide weekends in multi-day views. Where Weather Forecast is offered, turn it on to show the forecast alongside dates.
Book and adjust jobs
- Find the job in the Jobs list.
- Drag it onto a staff member and time. In Week or 2 Weeks, drop it onto the staff member and day.
To move an existing booking, drag it to another staff member, date or time. In a timed view, drag its starting or ending edge to adjust its duration; times snap to 15-minute increments. Moving or resizing a linked multi-staff booking updates its related bookings together.
Click a booking to edit it. You can also drag across an empty time range to open a booking window with the staff member, date and time filled in. Choose the job and save the booking.
Choose the default booking type
To allocate work within a flexible window, first enable the Job Allocations add-on. See How to allocate jobs in booking windows.
-
Click the gear icon and open Default Booking Type.
-
Choose Fixed Time or Business Hours Allocation. Jobs you drag from the Jobs list use this setting.
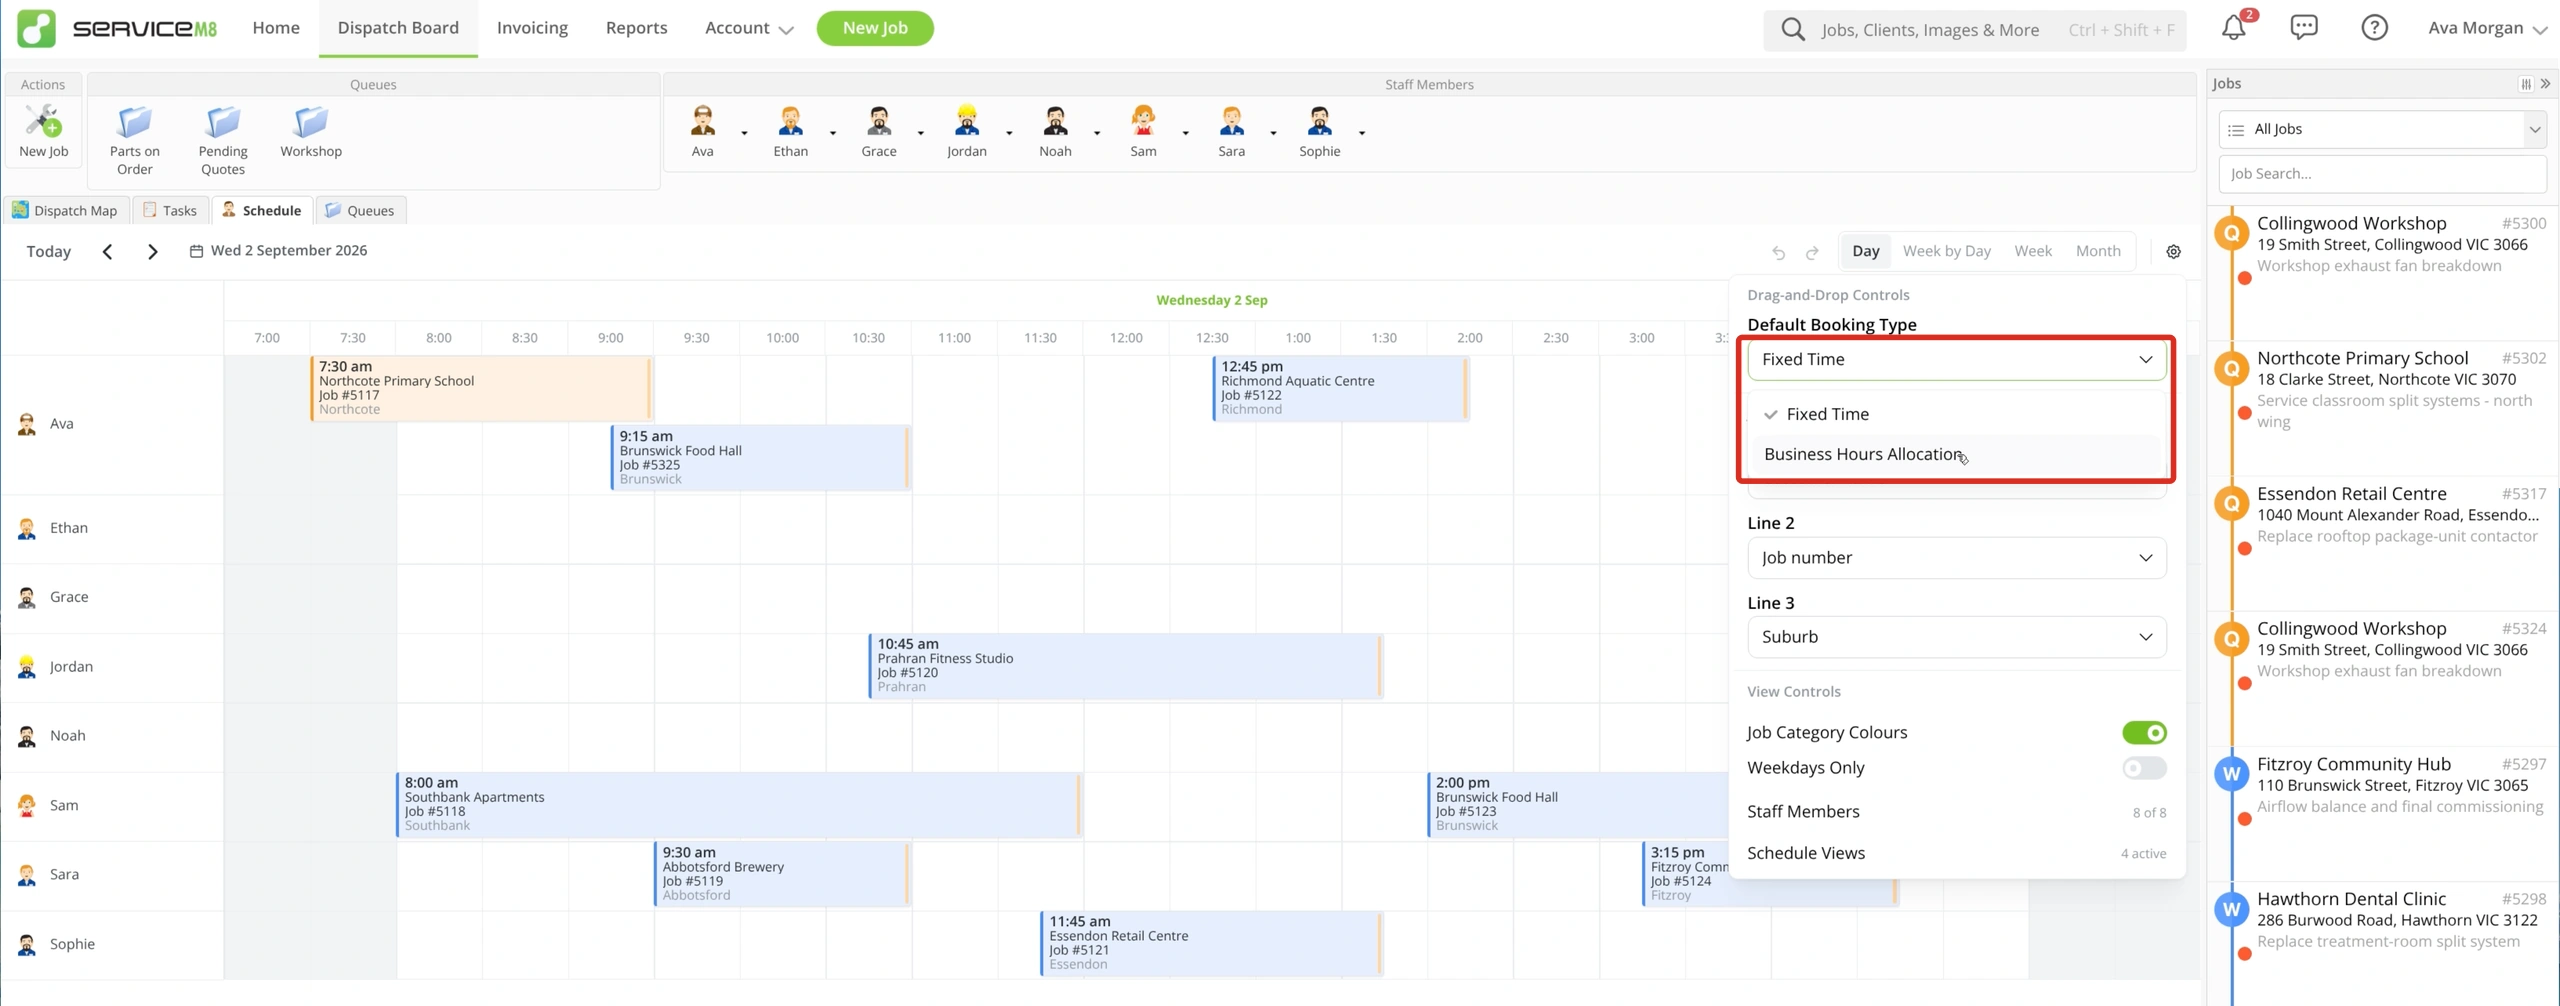
Business Hours allocations appear alongside fixed bookings. They give you a flexible window for the work rather than a fixed appointment time. Dragging an empty time range still creates a fixed-time booking.
Use booking shortcuts
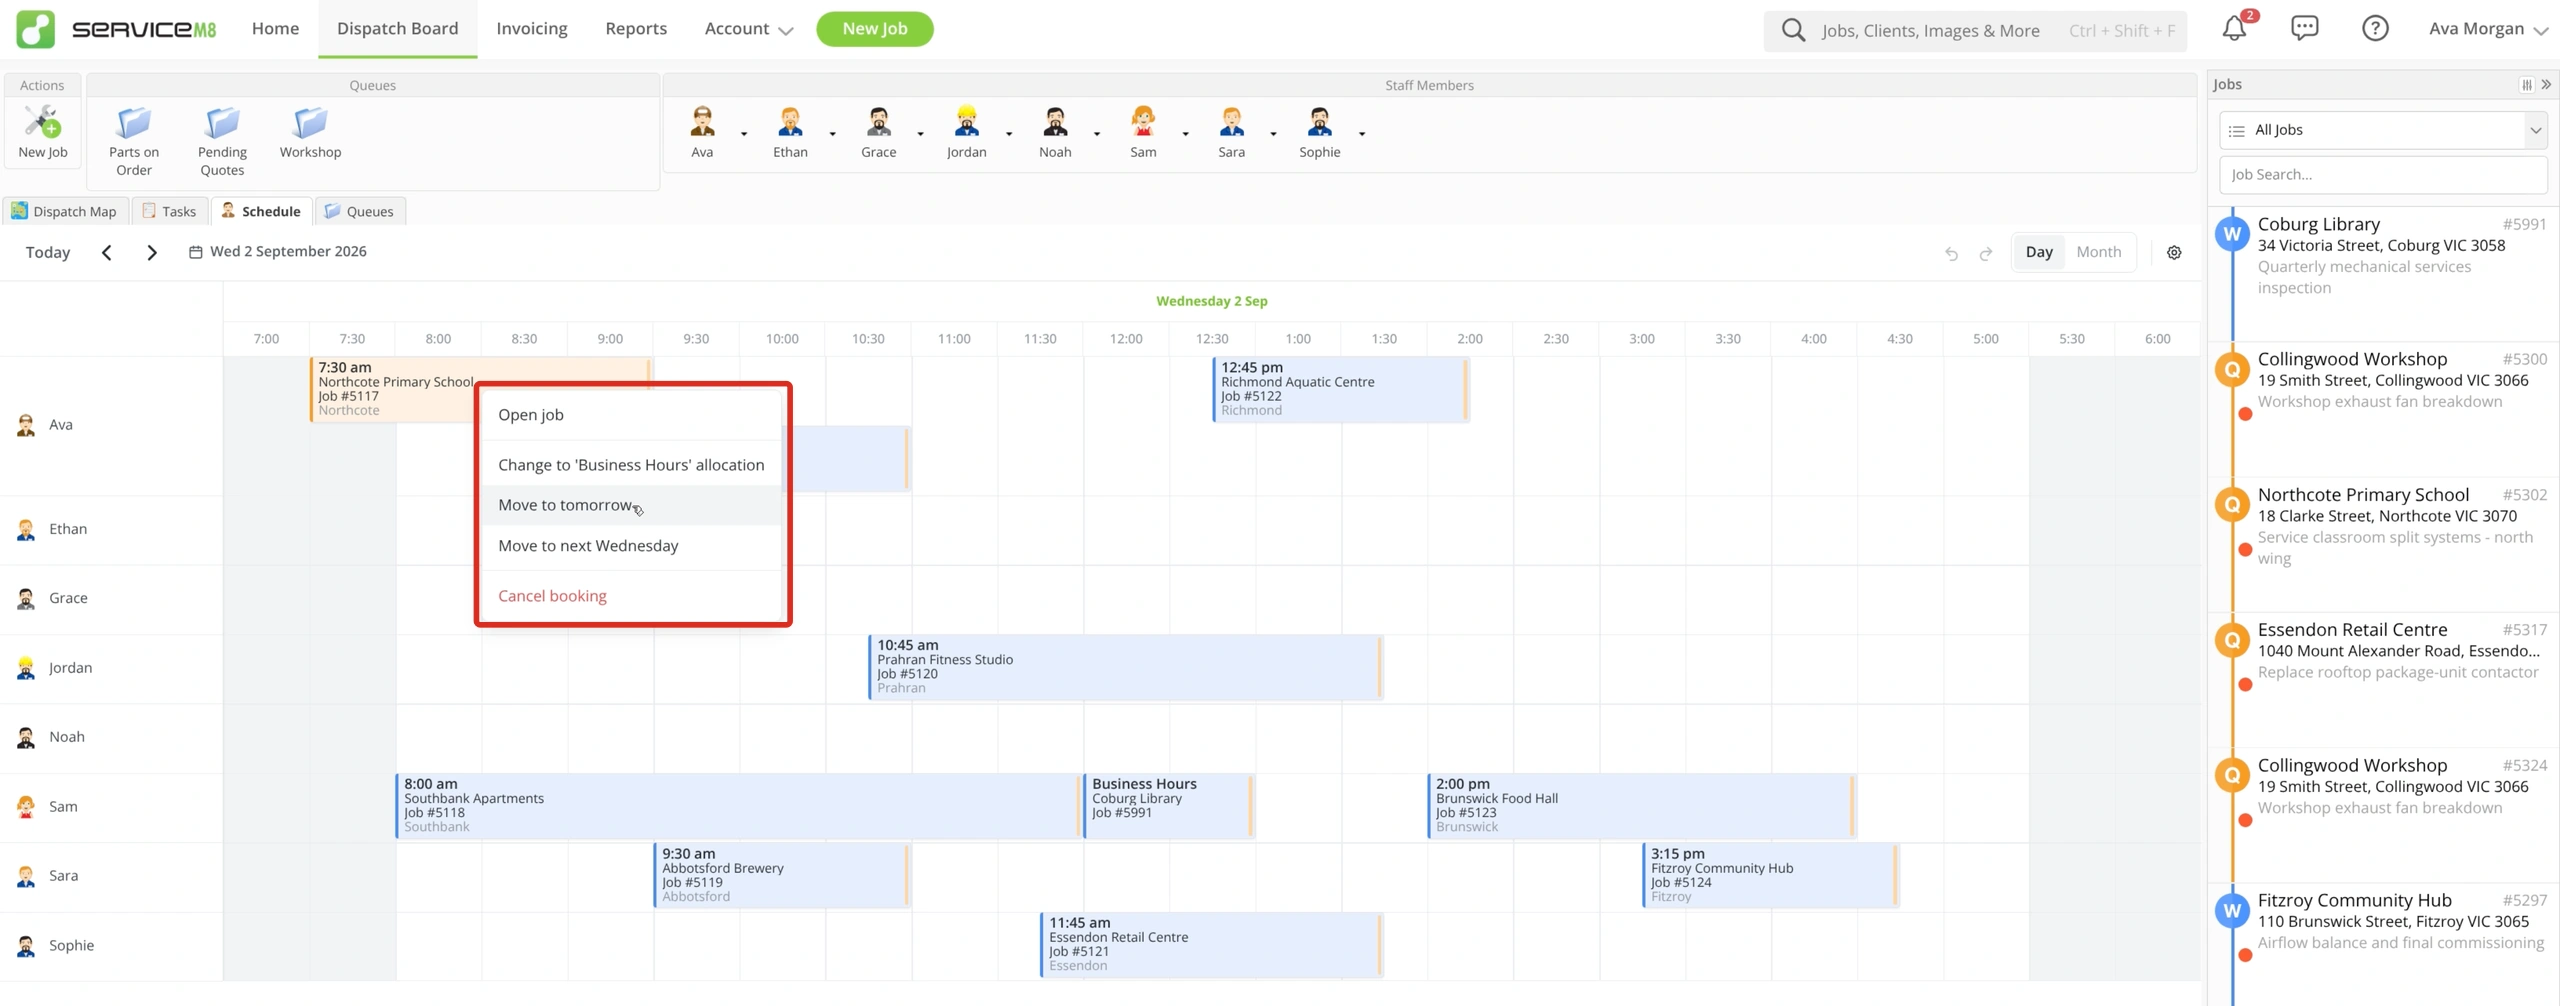
Right-click a booking, then choose Move to tomorrow, Move to next [weekday], Change to ‘Business Hours’ allocation, or Cancel booking. An allocation offers Change to fixed booking instead.
Undo or redo a schedule change
Click Undo last schedule change in the toolbar to reverse a supported change.
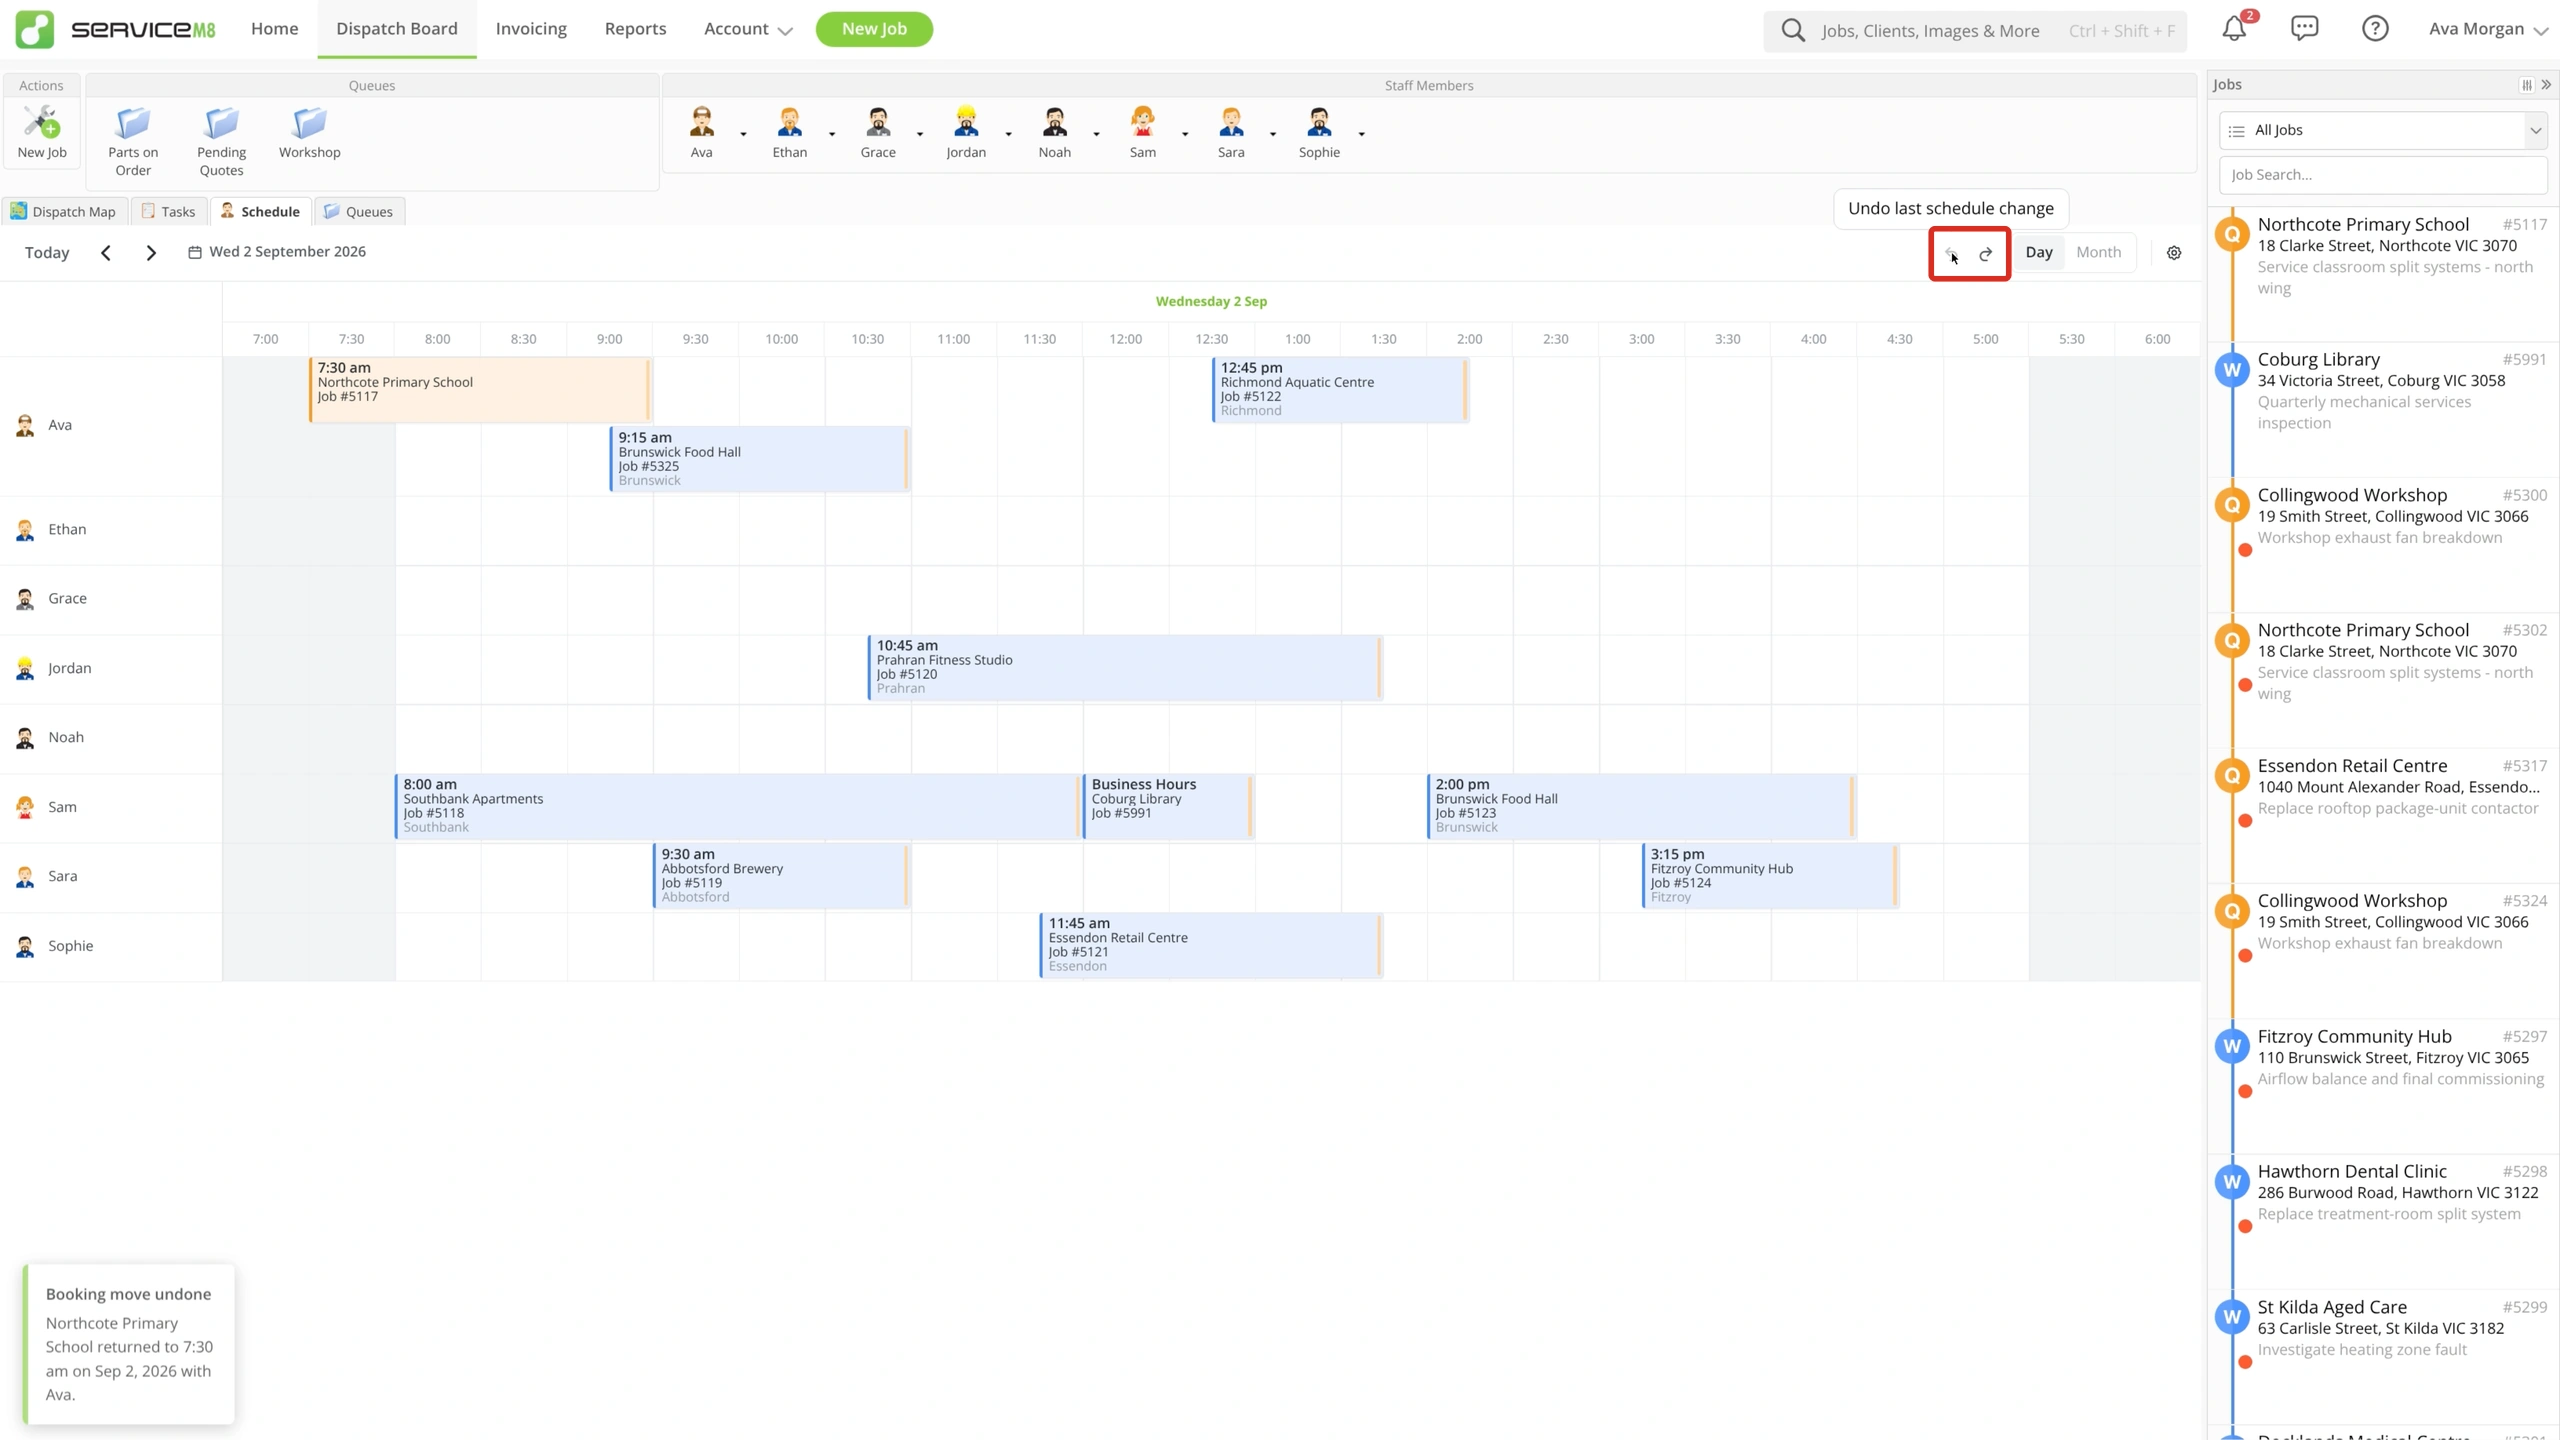
Click Redo last undone schedule change to reapply it. With the Schedule focused, use Ctrl+Z on Windows or Command+Z on Mac to undo; add Shift to redo.
History holds up to 20 changes in the current Schedule session, including supported booking and allocation creations, moves, resizes, edits and cancellations. A successful new change clears Redo history. Changes made through the recurring-booking editor are handled separately.
Find a booking from the Job Diary
-
Open the Job card and find the booking in its Diary.
-
Open that booking entry’s menu and click Show on Schedule.
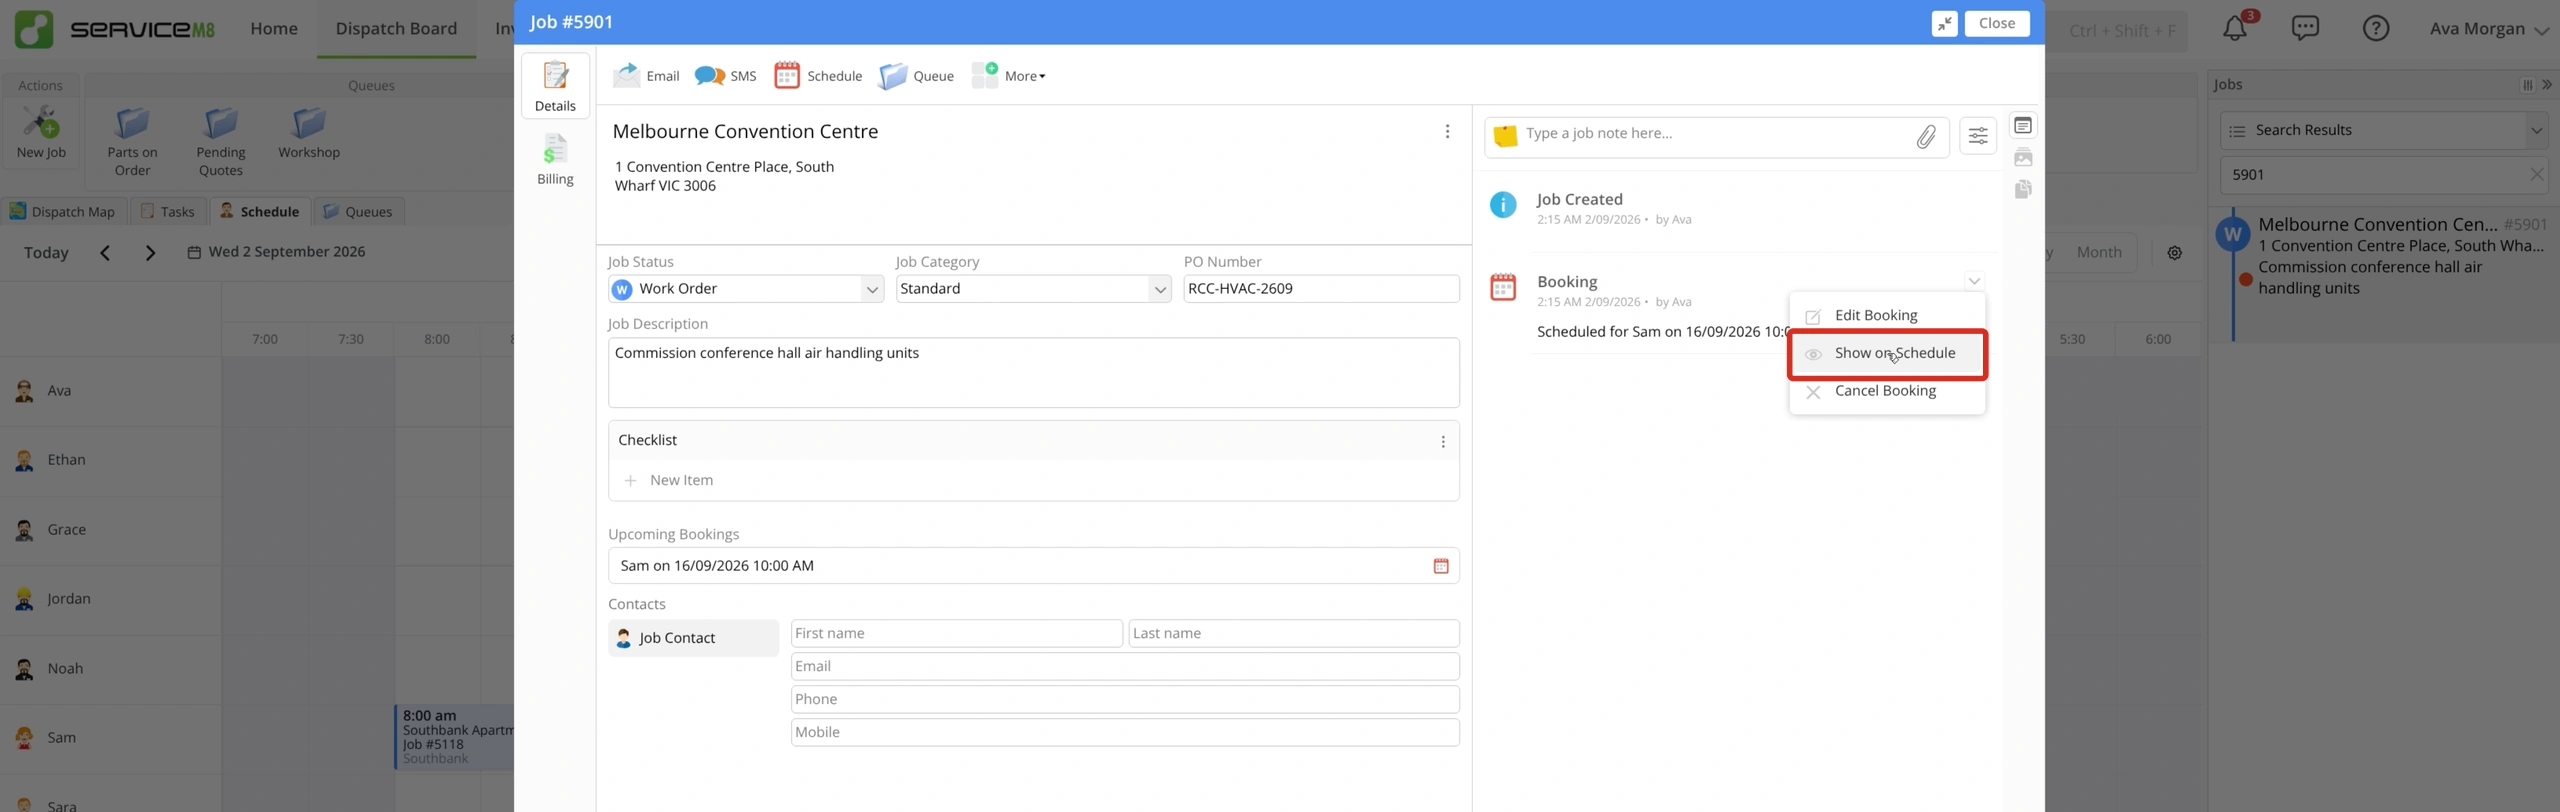
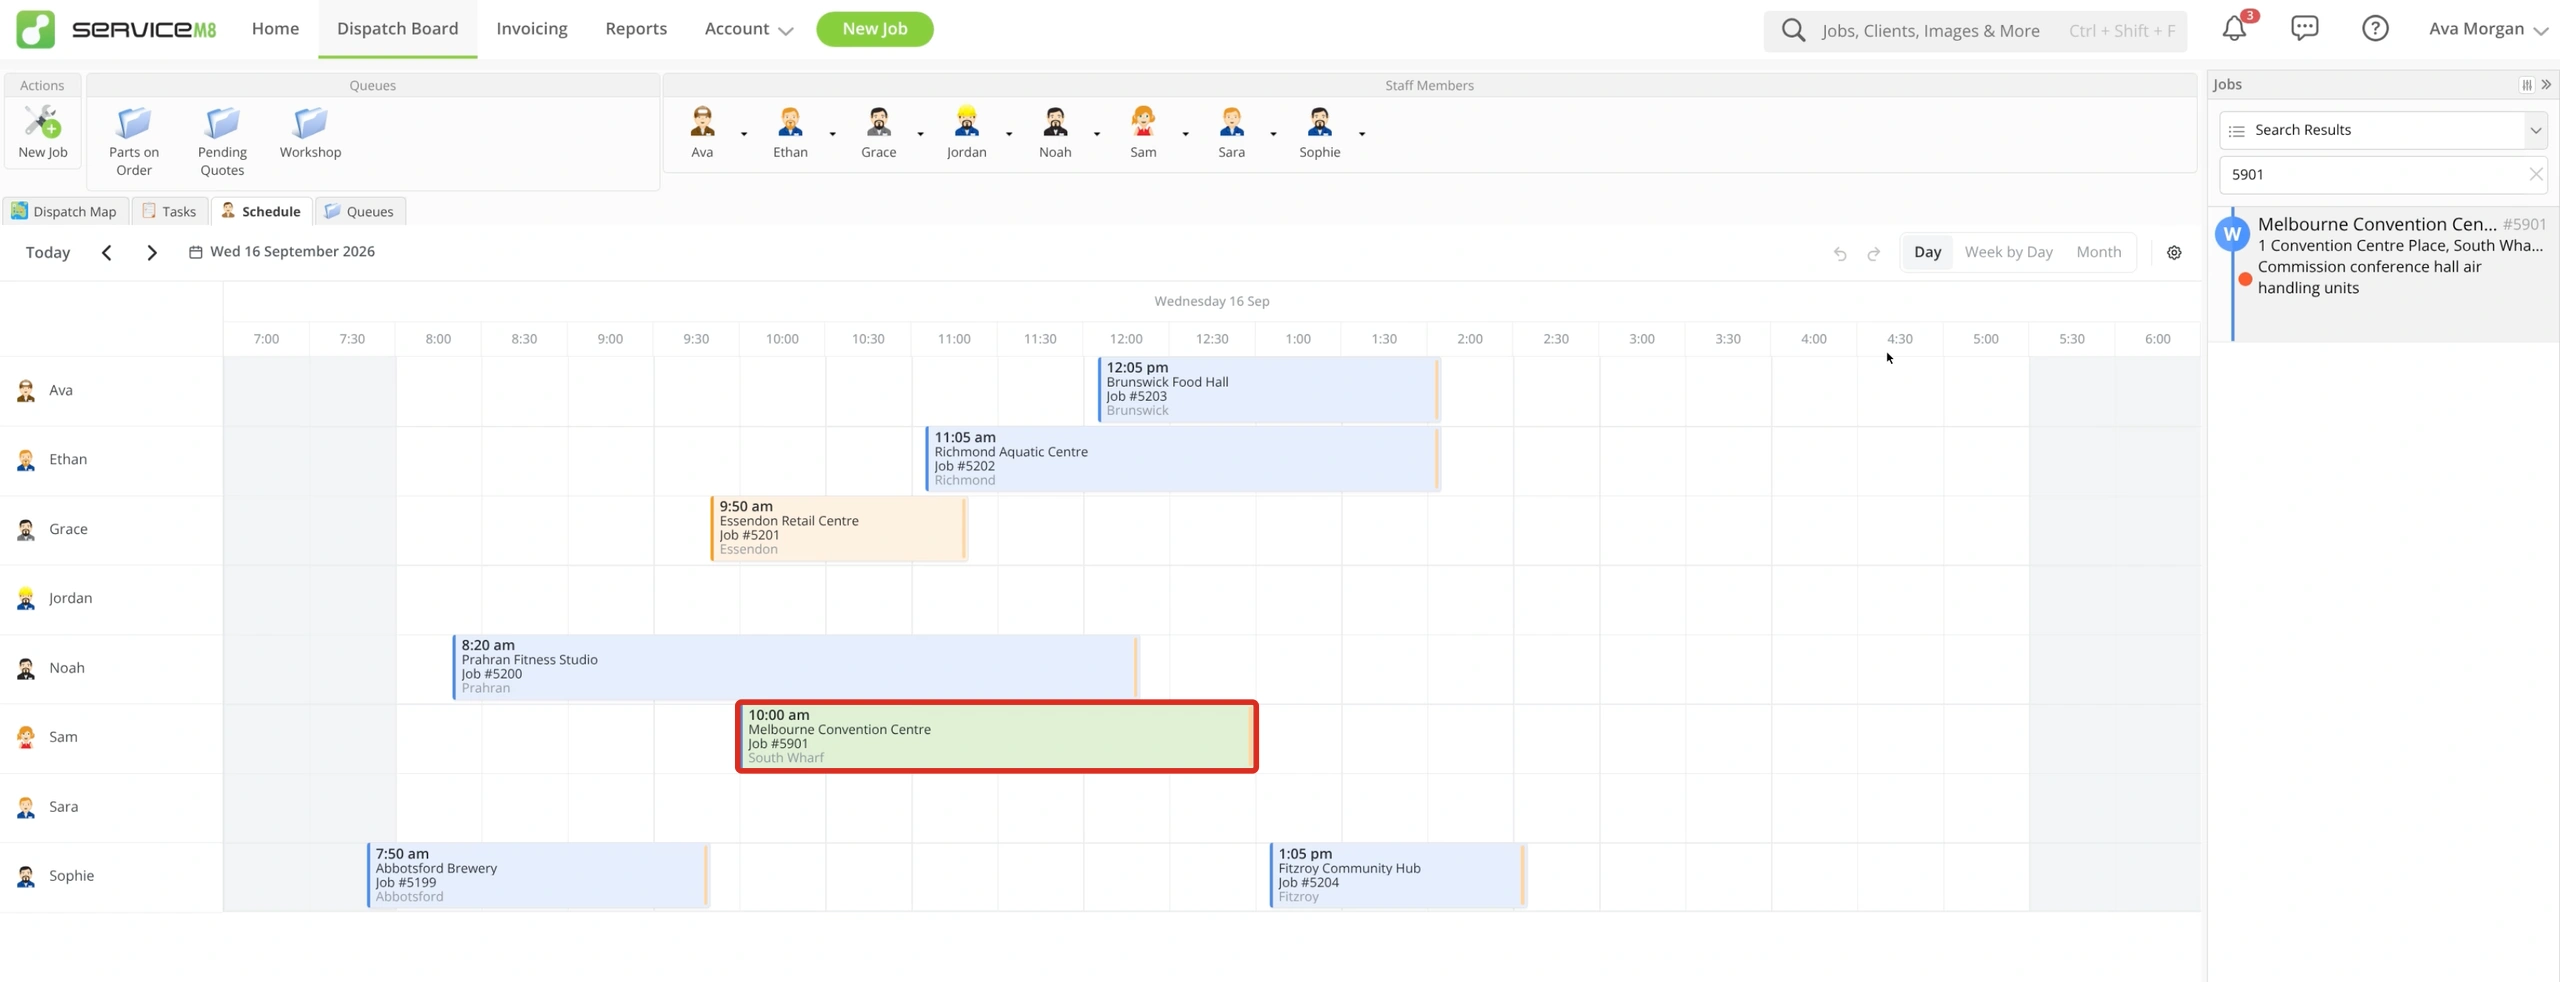
The Schedule opens the booking’s date and highlights it, keeping your current view when it can display the booking.
Follow work as it happens
In staff-based views, a car indicates navigation to a job, a stopwatch shows a check-in and elapsed time, and a tick indicates a completed visit. Hover over booking or staff indicators for more detail, such as an estimated arrival time or time on site. These indicators update while the Schedule is open.
Keep recurring work in context
Future recurring-job occurrences appear as yellow tentative bookings marked TBC and contribute to workload summaries. Moving a tentative occurrence opens the recurring-booking editor, where you choose This booking only or This booking and all following bookings.