This article covers:
- How to create and manage Checklists in the Online Dashboard
- How to add a photo requirement to a checklist
- How to add a Form requirement to a checklist
- How to add an Asset Management-related requirement to a checklist
- How to create and manage Checklists in the ServiceM8 iOS app

How to create and manage Checklists in the Online Dashboard
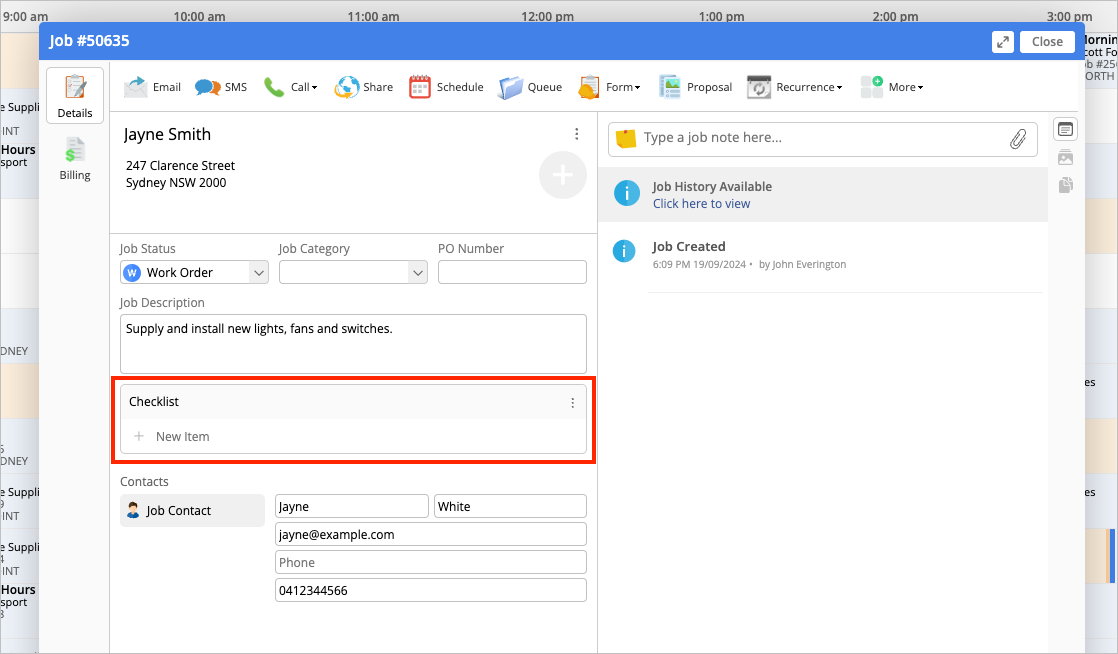
This section explores how to create a new checklist, set task assignments and reminders, create multiple checklists, copy and paste checklists between jobs, and remove checklists or checklist items from the Online Dashboard.Creating a new checklist
- From the Details tab of an open job card, under Checklist, click New Item.
- Enter the first item. Each item will appear as a separate checklist item in the job card.
- To add another item, either hit your Return/Enter key, or click New Item.

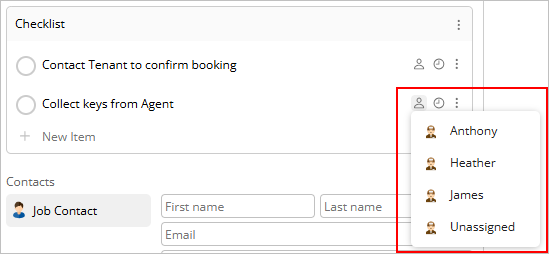
Setting task assignments and reminders
You can assign specific checklist items to individual staff members, who will receive a notification and see the items in their Tasks menu (More > Tasks), My Tasks list and the For My Review jobs list in the app. You can also set reminders for specific checklist items, either to a specific person or to whoever checks into the job. To set task assignments:- As you type a task, hover and click the Assignee button.


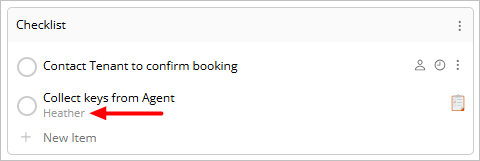
- Select the appropriate staff member.


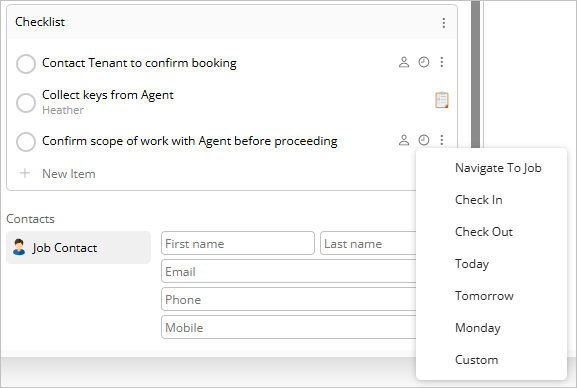
- As you type a task, hover and click the Reminder button.


- Select the desired reminder type. The types of reminder are:
- Navigate to Job: Reminder appears when technician checks into the job. Useful for tasks that should be done on the way to the site, but before arrival.
- Check In: Reminder appears when technician checks into the job. Useful for tasks that should be done before work begins.
- Check Out: Reminder appears when technical checks out of the job. Useful for tasks that should be done after the job’s done, but before leaving.
- Today: Reminder appears 1 hour before end of business day.
- Tomorrow: Reminder appears 1 hour after the start of the next business day.
- Monday: Reminder appears at the start of the next Monday.
- Custom: Set a specific date and time.

Creating multiple checklists
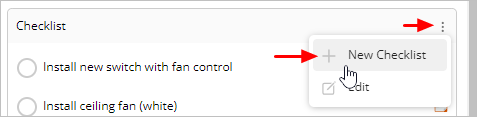
If you want to divide a job’s requirements by category, such as by room, stage, or staff member, you can create multiple checklists per job card. To create another checklist:- On the right of the checklist beneath which you want to add a new checklist, click ⋮ .
- Click New Checklist.

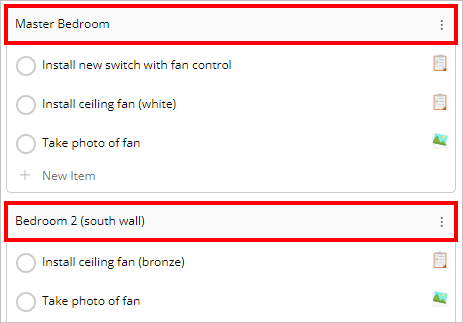
- A new checklist section will appear below. To rename each of your checklists, click and select the checklist name, and enter the new name.

Copying and pasting checklist items
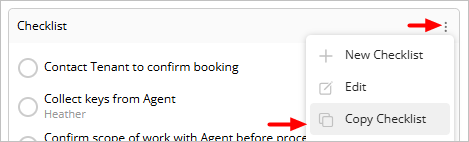
You can copy a checklist from one job to another, and you can also create checklist tasks by pasting one or more rows of text from a document (such as a procedure in Word or PDF) right into a checklist. To copy a checklist from one job to another:- Open the job card with the original checklist to be copied and, to the right of the checklist, click ⋮.
- Click Copy Checklist. The checklist will be copied to your virtual clipboard.

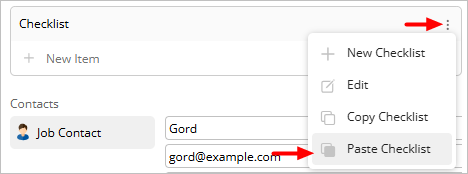
- Open the target job card and, to the right of the checklist, click ⋮.
- Click Paste Checklist. The checklist will appear as a new checklist.

- Copy the text from your original document.
- Open the job card and in the checklist, right-click on + New Item.
- Click Paste.

Deleting checklists and checklist items
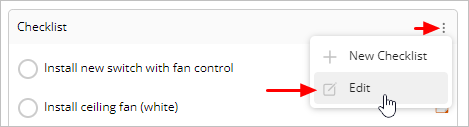
To delete an entire checklist:- On the right of the checklist you want to remove, click ⋮ .
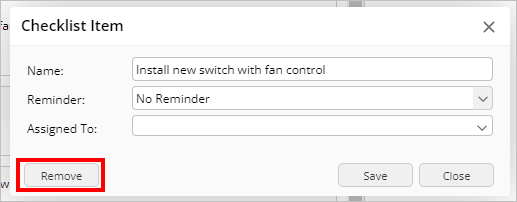
- Click Edit.

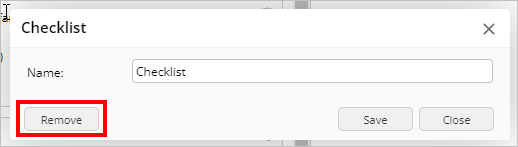
- Click Remove.

- Click into text field of the task, or hover over the task and click ⋮
- Hover over the task and click ⋮ .
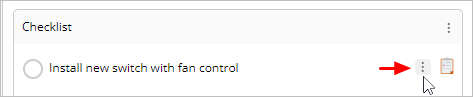

- Click Remove.

How to add a photo requirement to a checklist
If you create a checklist item that has the word “photo” in it, ServiceM8 creates a photo task. When the field technician taps the checklist item within the ServiceM8 app, the camera will open automatically. Taking the photo will automatically mark the task as completed and save the photo to the Diary.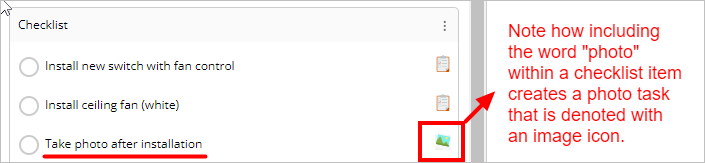

How to add a Form requirement to a checklist
If you use the Forms Add-on to complete various reports, inspections and/or certificates digitally on site, you can set the completion of a specific Form as a checklist requirement. To add a Form, search the name of the Form when creating your checklist tasks, and click the desired Form.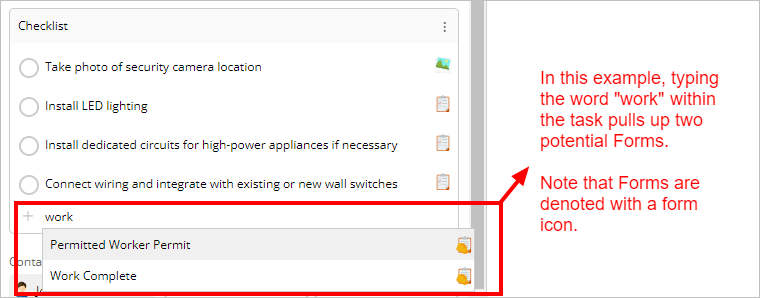

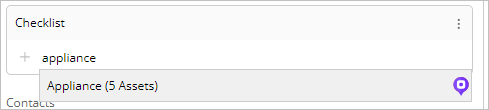
How to add an Asset Management-related requirement to a checklist
If you use the Asset Management Add-on to catalogue and manage client assets, equipment, installations, or appliances, you can set the inspection or servicing of Assets as a checklist requirement. You can add tasks related to individual Assets, or tasks related to all Assets of a specific type on site (for example, Fire Extinguishers, Appliances, Solar Panels, Smoke Alarms, etc.). Note that all checklist tasks related to Assets are denoted by the Asset icon.To add the inspection or service of an individual Asset:
- Search the name of the Asset when creating your checklist tasks, and click the desired Asset.


To add the inspection or service of all Assets of a specific type:
- Search the Asset type when creating your checklist tasks, and click the desired type.

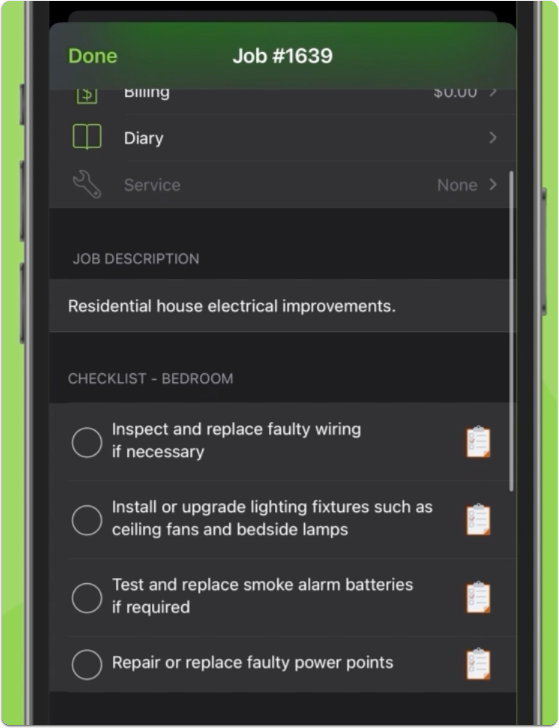
How to create and manage Checklists in the ServiceM8 iOS app
Note: While checklist items can be marked as complete in the field using both the ServiceM8 iOS app and the ServiceM8 Lite app for Android, checklists can only be created or edited using the ServiceM8 iOS app. This section explores how to create a new checklist, set task assignments and reminders, create multiple checklists, and delete checklists and checklist items using the ServiceM8 iOS app.Creating a new checklist in the app
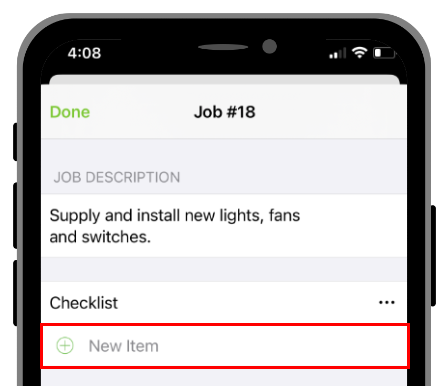
NOTE: Before creating a new checklist in a job card on the app, the job card must be saved. To create a new checklist:- From the job card, under Checklist, tap New Item.

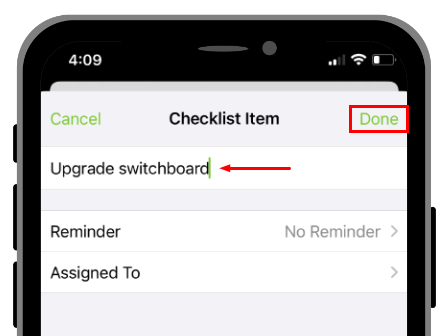
- In the Checklist name field, enter the checklist task.
- Tap Done.

- To add another item, tap New Item. Each item will appear as a separate checklist item in the job card.

Setting task assignments and reminders in the app
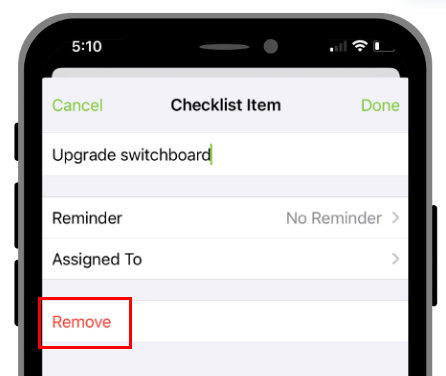
When creating a new checklist item, you have the option of adding a task reminder or assigning a staff member, or both. (See Setting task assignments and reminders for more information.) Tap on the Reminder or Assigned To field to open and tap your selection, then tap Done.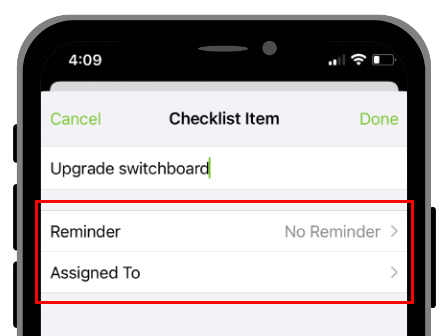


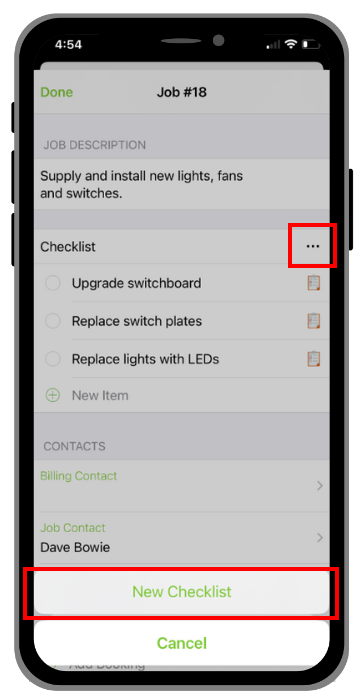
Creating multiple checklists on the app
- On the right of the checklist beneath which you want to add a new checklist, tap ⋯ .
- Tap New Checklist.

- To rename the Checklist, tap its name.
- Enter the new name and tap Done.
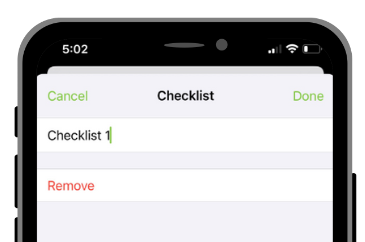

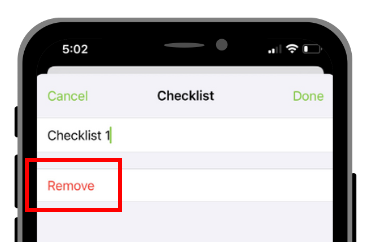
Deleting checklists or checklist items from the app
To delete an entire checklist:- Tap the checklist name.
- Tap Remove.

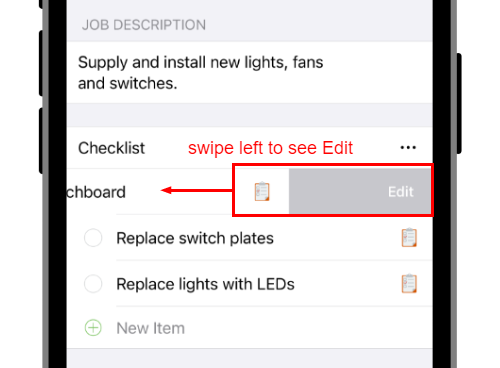
- Swipe left on the item and tap Edit.


- Tap Remove.
Task Visibility in the App
In the ServiceM8 mobile app, the ability to see individual tasks within a Checklist is based on:- Whether the Task has been assigned to someone;
- If it has been assigned, who the Task is assigned to (i.e. yourself, or someone else); and
- What your Security Role is.
- Business Owners = All Tasks
- Finance = All Tasks
- Staff = My Tasks & Unassigned Tasks
- Staff (No Pricing) = My Tasks & Unassigned Tasks
- Staff (No Material Creation) = My Tasks & Unassigned Tasks
- Contractor = My Tasks
- Strict Contractor = My Tasks
- All Tasks;
- My Tasks & Unassigned Tasks; or
- My Tasks