Displaying bookmarks in Word
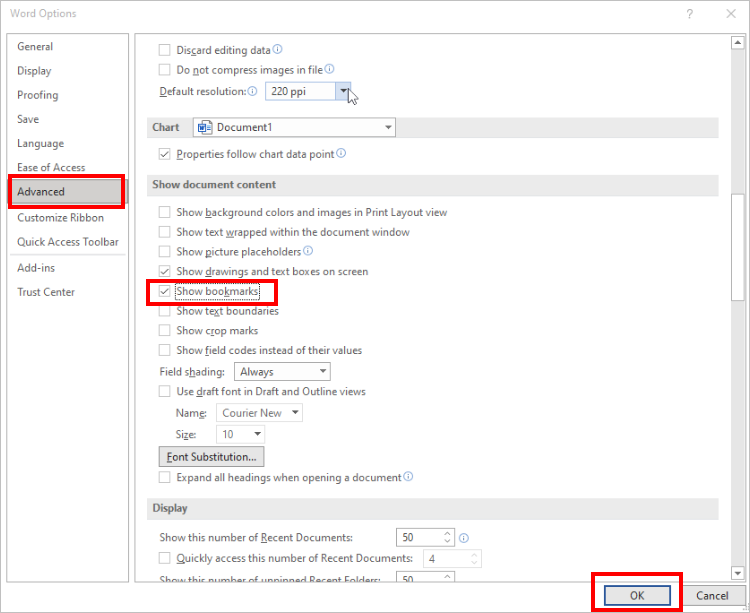
To begin, you will need to display bookmarks in Word. From your opened template file:- Go to File > Options.
- Click Advanced.
- Scroll down until you see the Show document content section, then tick Show bookmarks.
- Click OK to save the settings and close the window.

Adding bookmarks for material lines
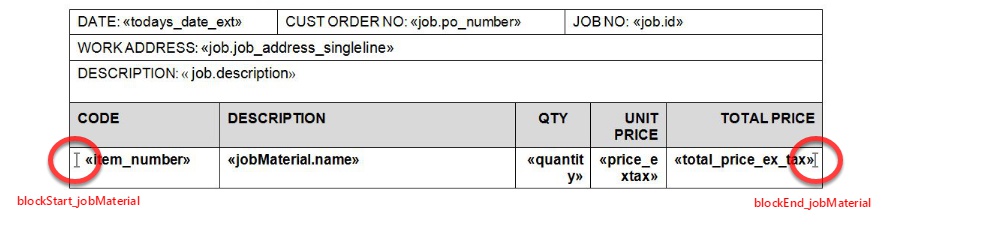
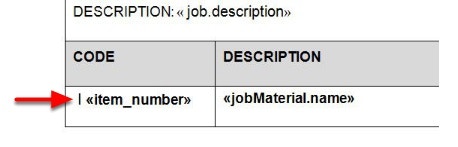
Per the best practices noted in Tips for designing your own invoice or quote template, you should always design your template layout within tables in Word. You will need to place your bookmarks on both sides of the table row where the material items will be located. If you do not add bookmarks, the entire row will appear blank. Use the bookmark names blockStart_jobMaterial and blockEnd_jobMaterial.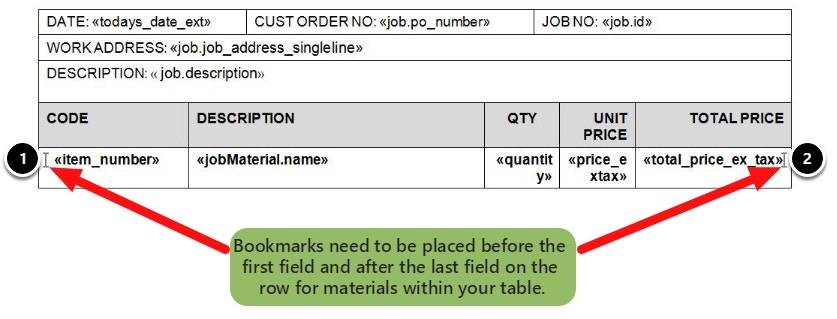

- Place your cursor on the left of the first field of the material line to add the first bookmark.

- From your toolbar, click Insert > Bookmark.


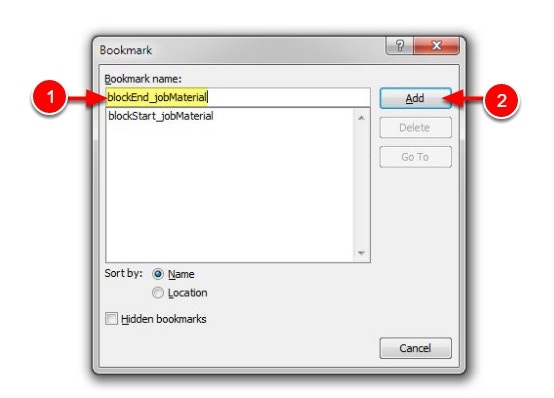
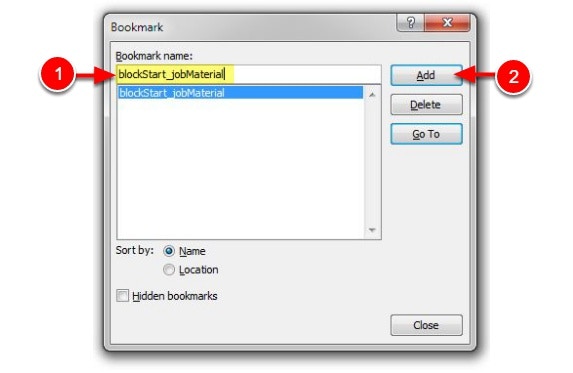
- Enter blockStart_jobMaterial as the Bookmark name. Note that bookmark names are case sensitive and must be exactly as written here.
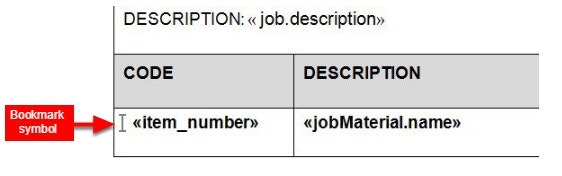
- Click Add. The Bookmark window will close, and you should now see the bookmark symbol displayed on the left of the material line.

- Place your cursor on the right of the last field of the material line to add the second bookmark.


- From your toolbar, click Insert > Bookmark.
- Enter blockEnd_jobMaterial as the bookmark name. Again, bookmarks are case sensitive and must be exactly as written here.
- Click Add.