- I want to add or change my logo
- I added a new logo but my ServiceM8 templates didn’t update
- I am using a custom template and having issues with an image
Adding or changing a logo
When you first set up your ServiceM8 account, you had the option of uploading a logo file. You may have chosen not to add a logo at the time, or you may have an updated logo you would like to use now. To upload a new or modified logo file to ServiceM8:- From your Online Dashboard, go to Settings > Preferences.
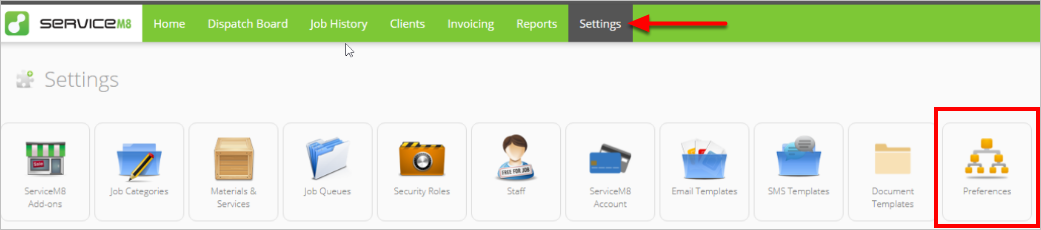

- The Company Information section will open. Scroll down to Company Logo and click Select.
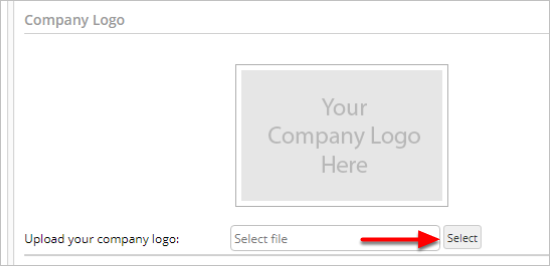

- Find the updated logo on your computer and click Open.
- On the lower right, click Save.
Refreshing a template to include an updated logo
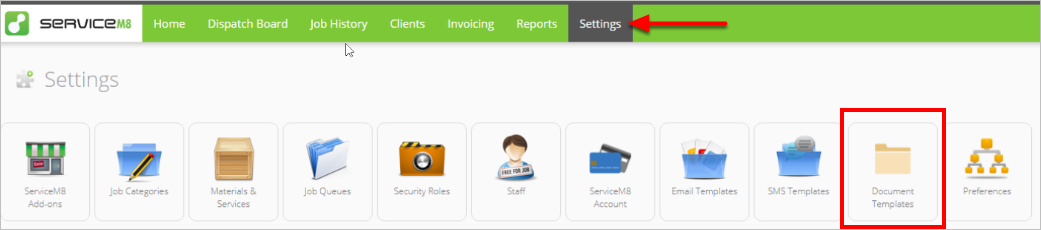
ServiceM8 automatically updated built-in templates if you added a logo when you initially set up your account, but you need to manually refresh your templates if you add or replace a logo after setup. Once you have uploaded a new logo, to refresh your templates:- From your Online Dashboard, go to Settings > Document Templates.

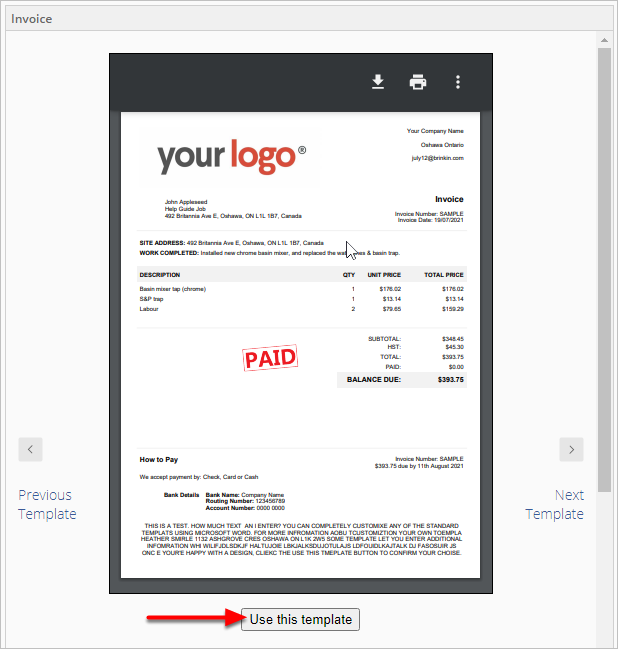
- Select the template type you want to refresh (e.g., Invoice or Quote). You will see your current template with the old logo (or no logo if you hadn’t uploaded one yet).
- Click Next Template.
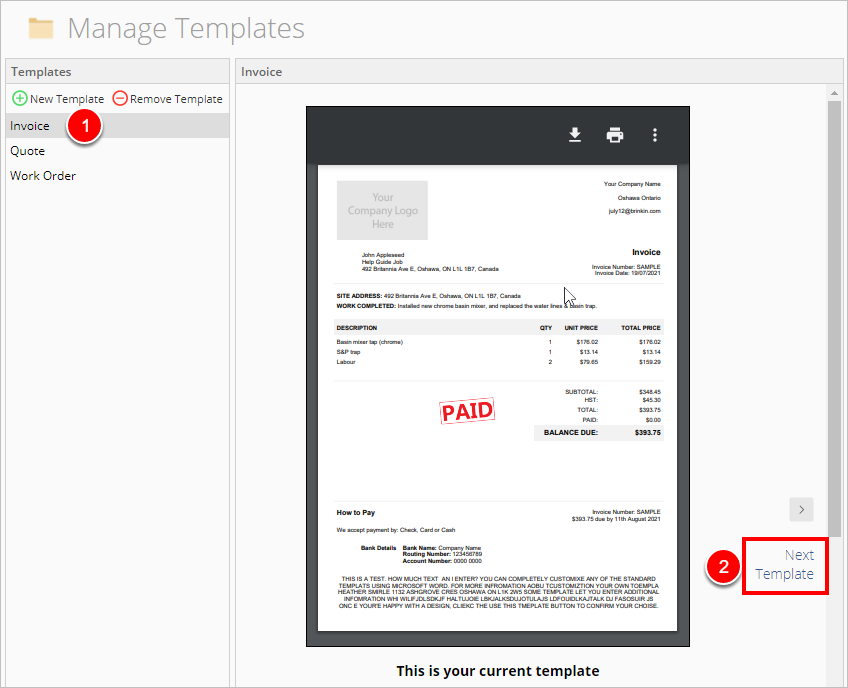

- Your current template will appear with your updated logo. Click Use this template.

Tips for working with images in custom or modified templates
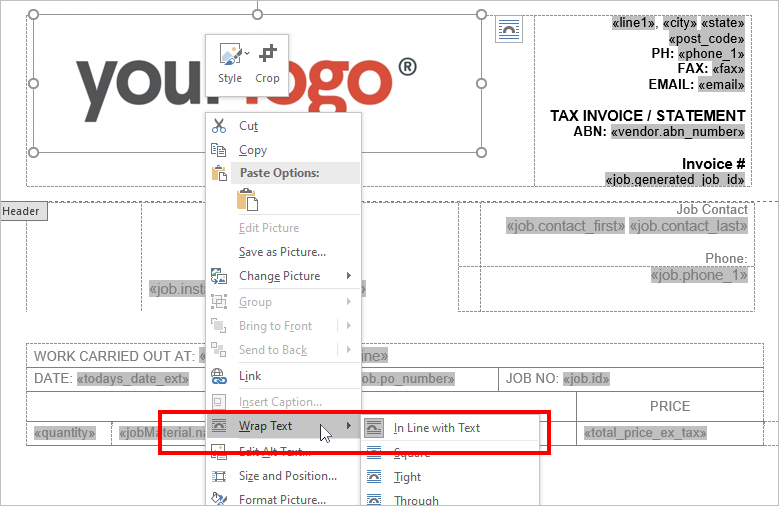
Certain settings in Word may cause images to disappear in quotes or invoices upon printing or merging. If you are encountering issues with images in a customised or modified template, download and open your current template in Word (see how to download your template for more information) and check the following:- Right-click on the image that is not appearing. Go to Wrap Text and ensure that In Line with Text is selected. This keeps the image on the text layer instead of the drawing layer, which eliminates many Word-related image errors. If you need to move the image or wrap text around the image, use margins and tables.

- Right-click on the image and go to Size and Position.
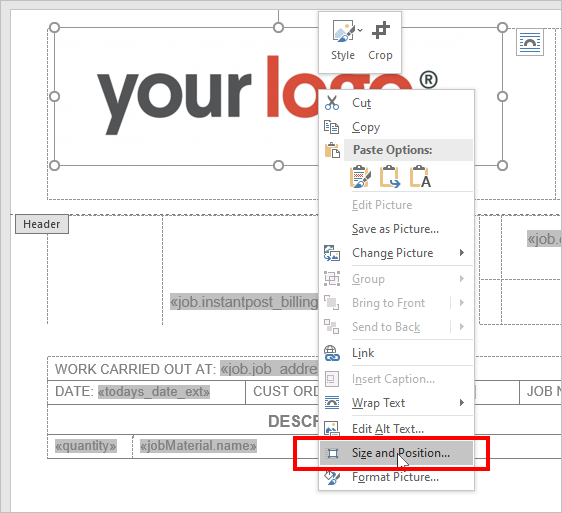

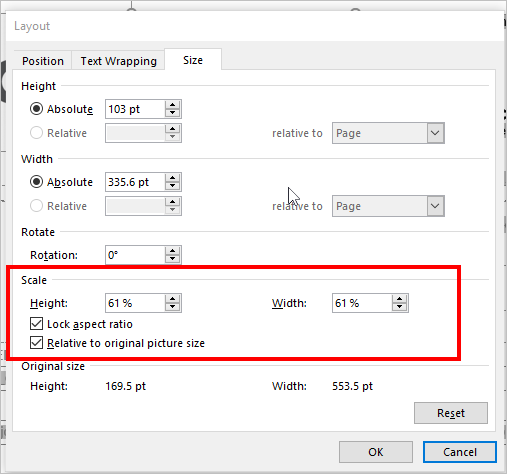
- Set the Height and Width under Scale to a percentage such as 60%. To prevent distortion, keep the Lock aspect ratio and Relative to original picture size checkboxes selected.
- Click OK.
- Check the sizing. You may need to try a couple different percentages until you’re happy with the results.

- If you are working with a custom or modified template, you can ask one of our ServiceM8 Partners for assistance.
- If you are working with a built-in invoice or quote template that you have not modified, you can submit a request for assistance.