

Photos, notes and attachments
How to use Imagine with job photos
Learn how to use Imagine to create AI-generated visualisations from job photos in ServiceM8.
Use Imagine to turn a job photo into an AI-generated visualisation of a proposed change. Save the result with the job to show your client what the finished work could look like. You need an internet connection to generate an image.
Imagine is available in the ServiceM8 mobile apps and the Online Dashboard.
Before you start
- Imagine must be enabled for your account.
- If you can’t see Imagine in the app, make sure you’ve updated ServiceM8 and your device’s operating system to the latest versions.
Online Dashboard
-
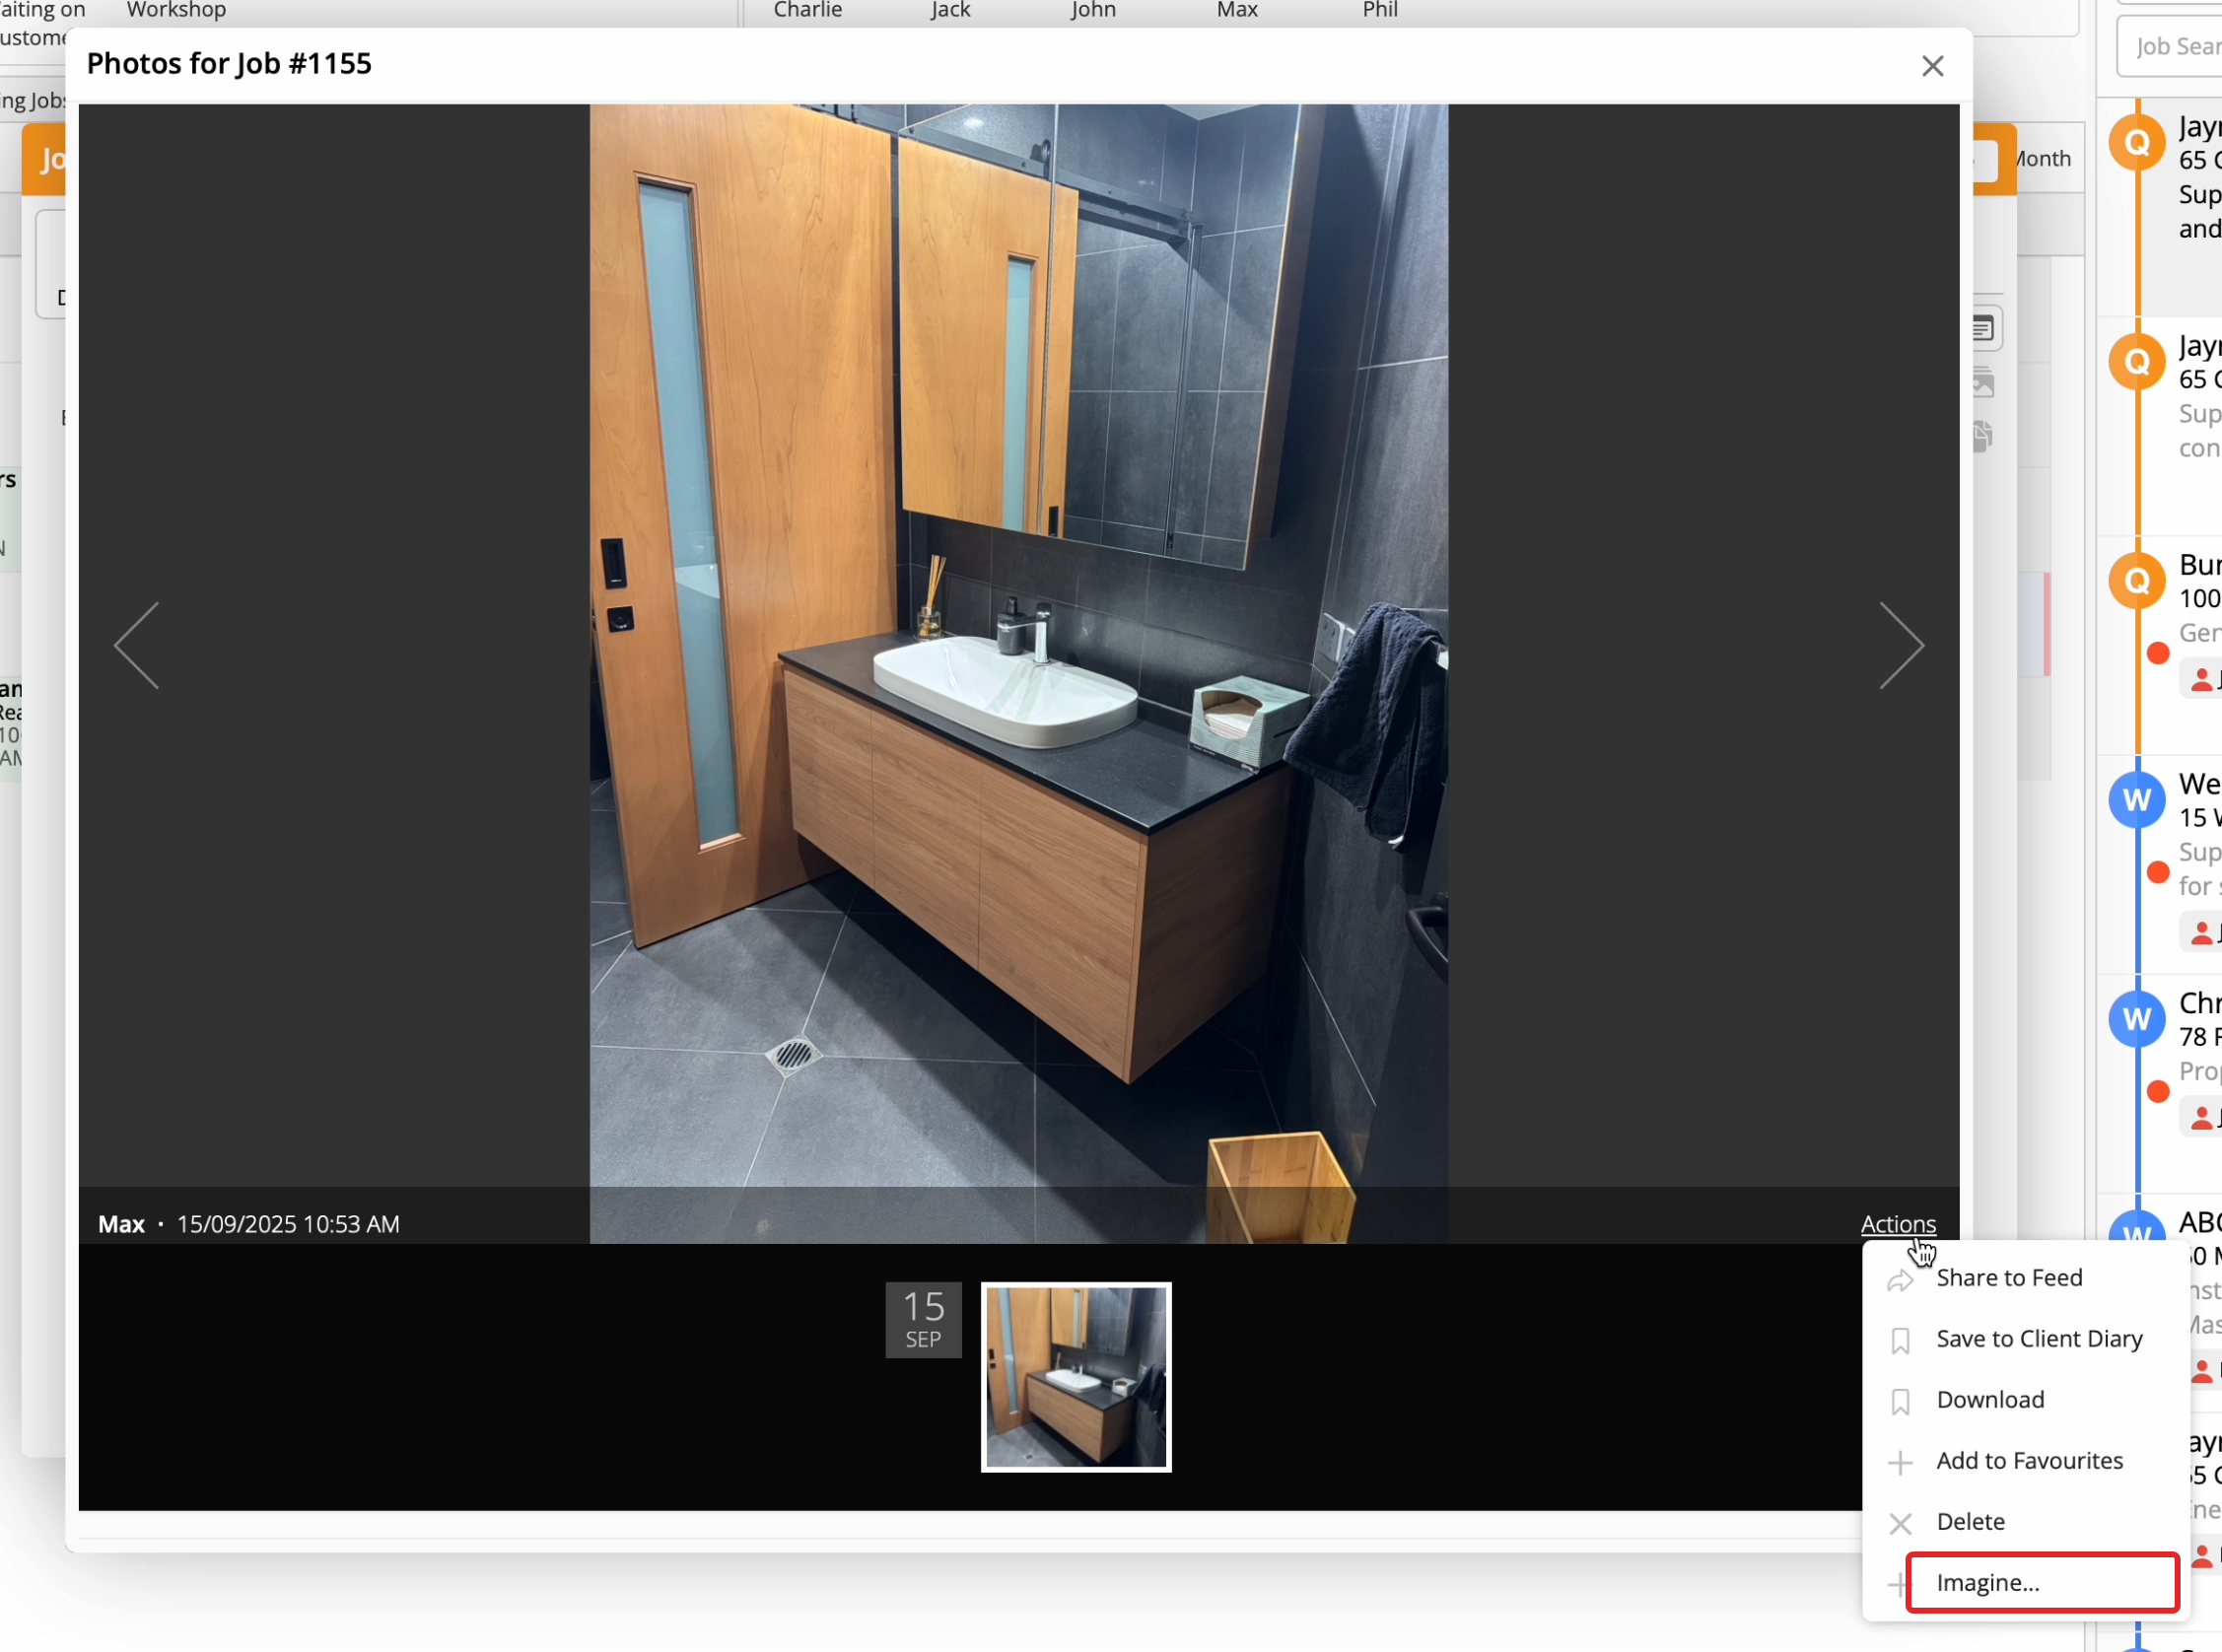
Open the Job card and a photo from its Diary. Click Actions, then Imagine….
-
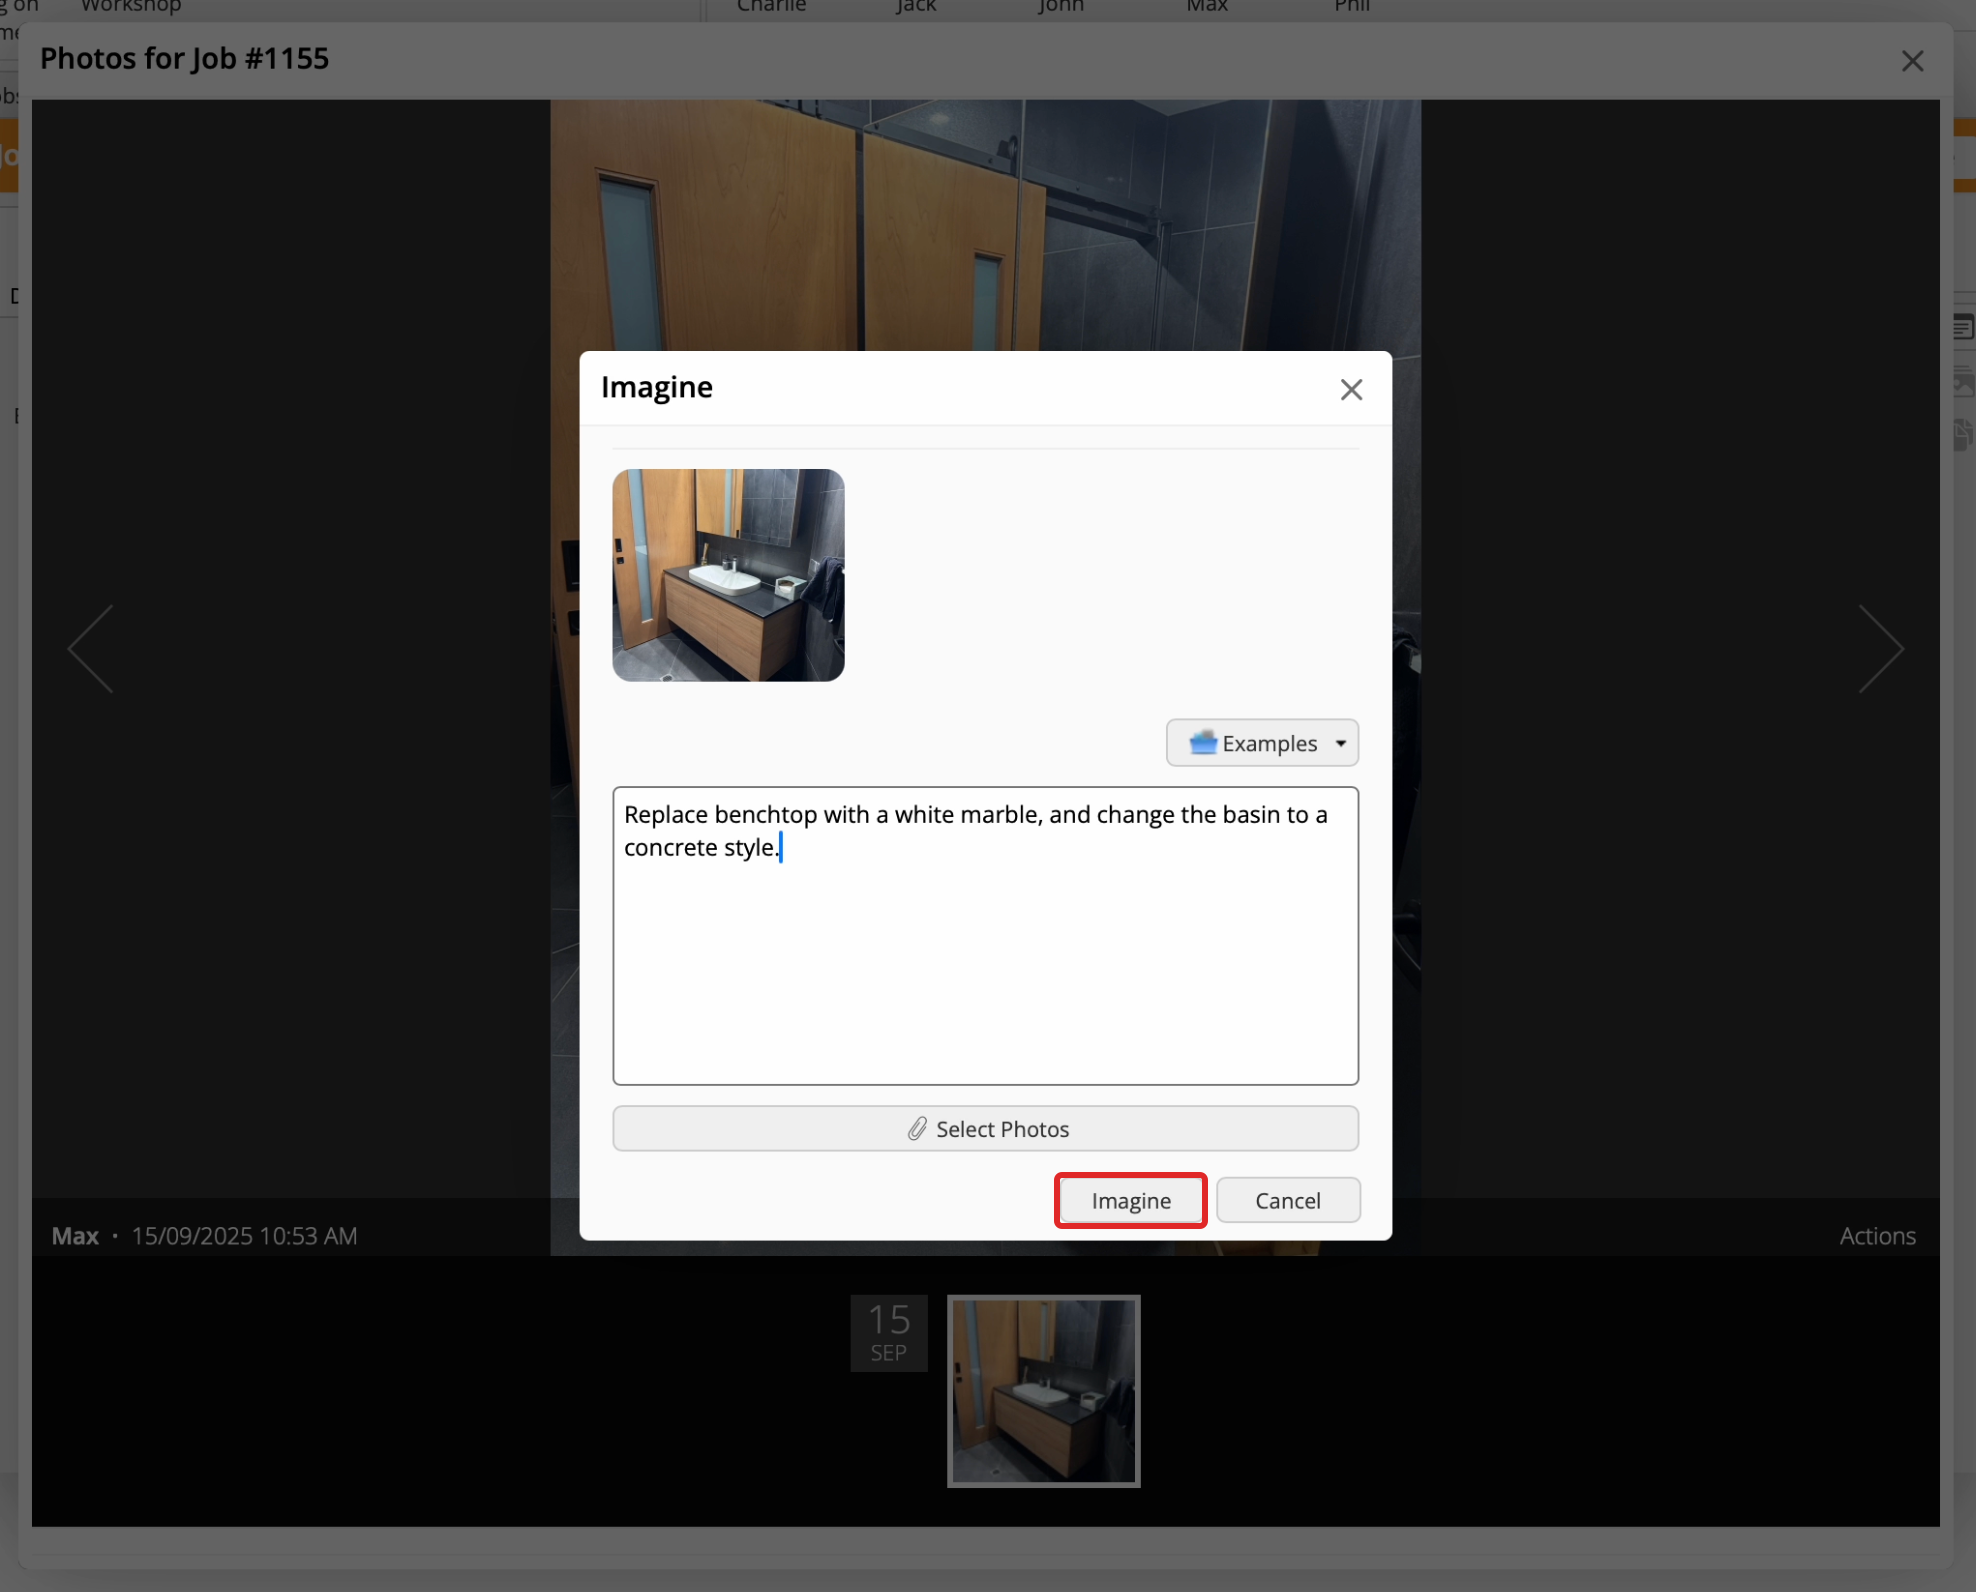
Describe the change you want, or choose a prompt from Examples and edit it. To include other job photos, click Select Photos, choose up to three photos in total, then click Select.
-
Click Imagine.
-
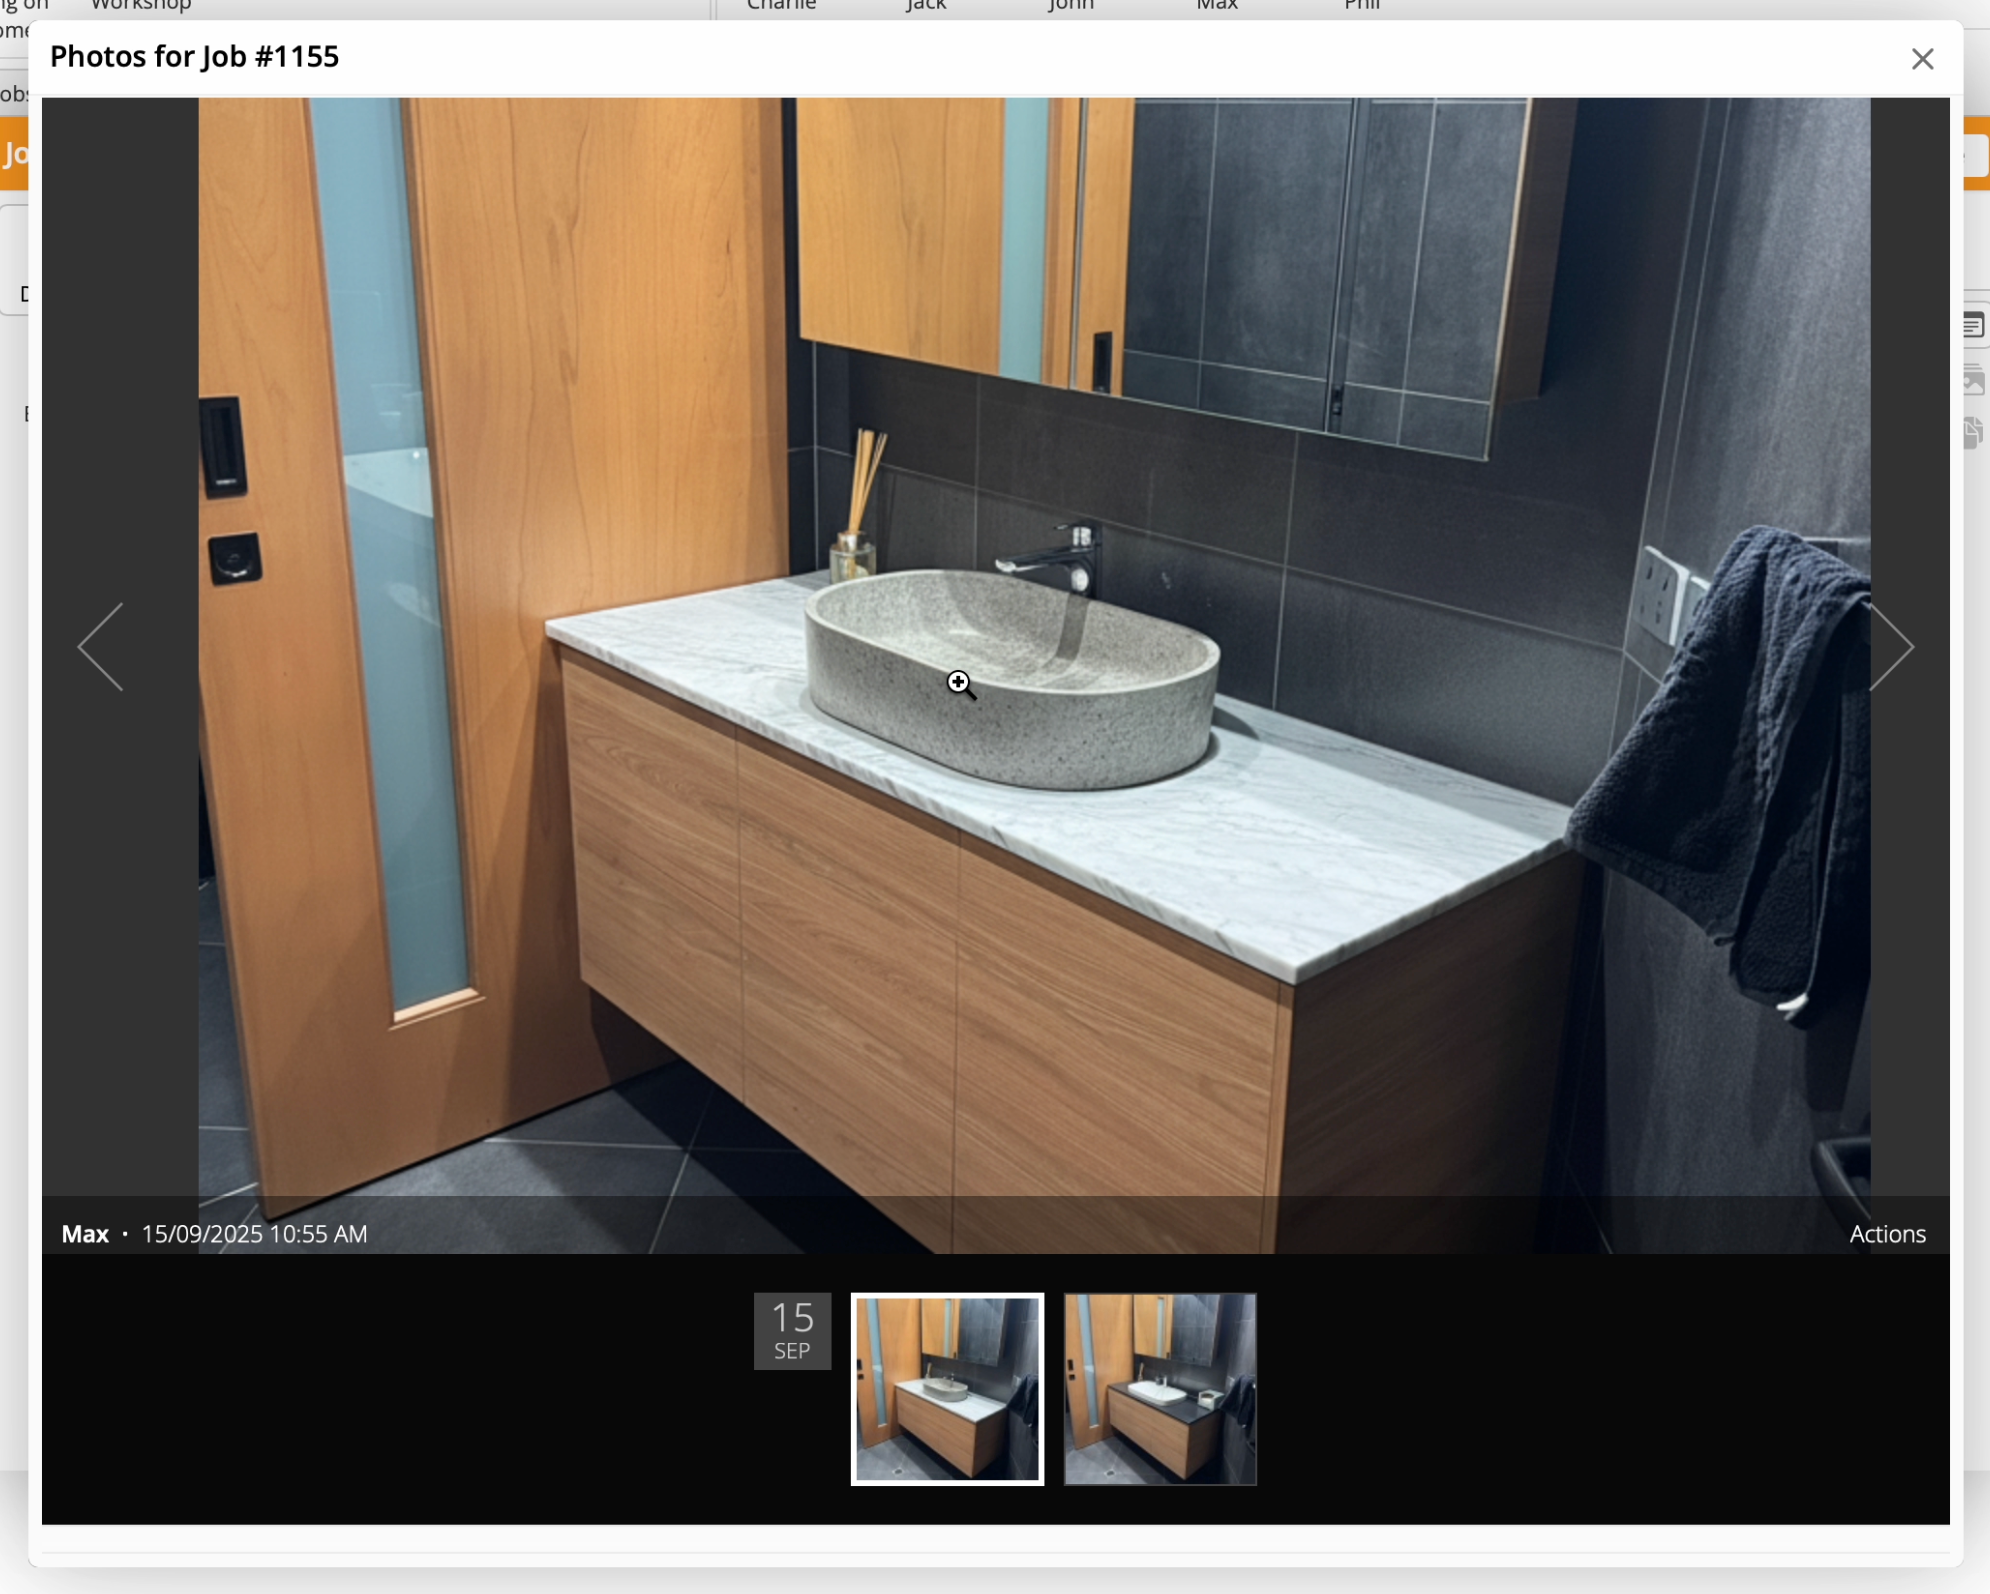
Review the generated image. It is saved to the job Diary as a new photo, alongside the original.
In the app
-
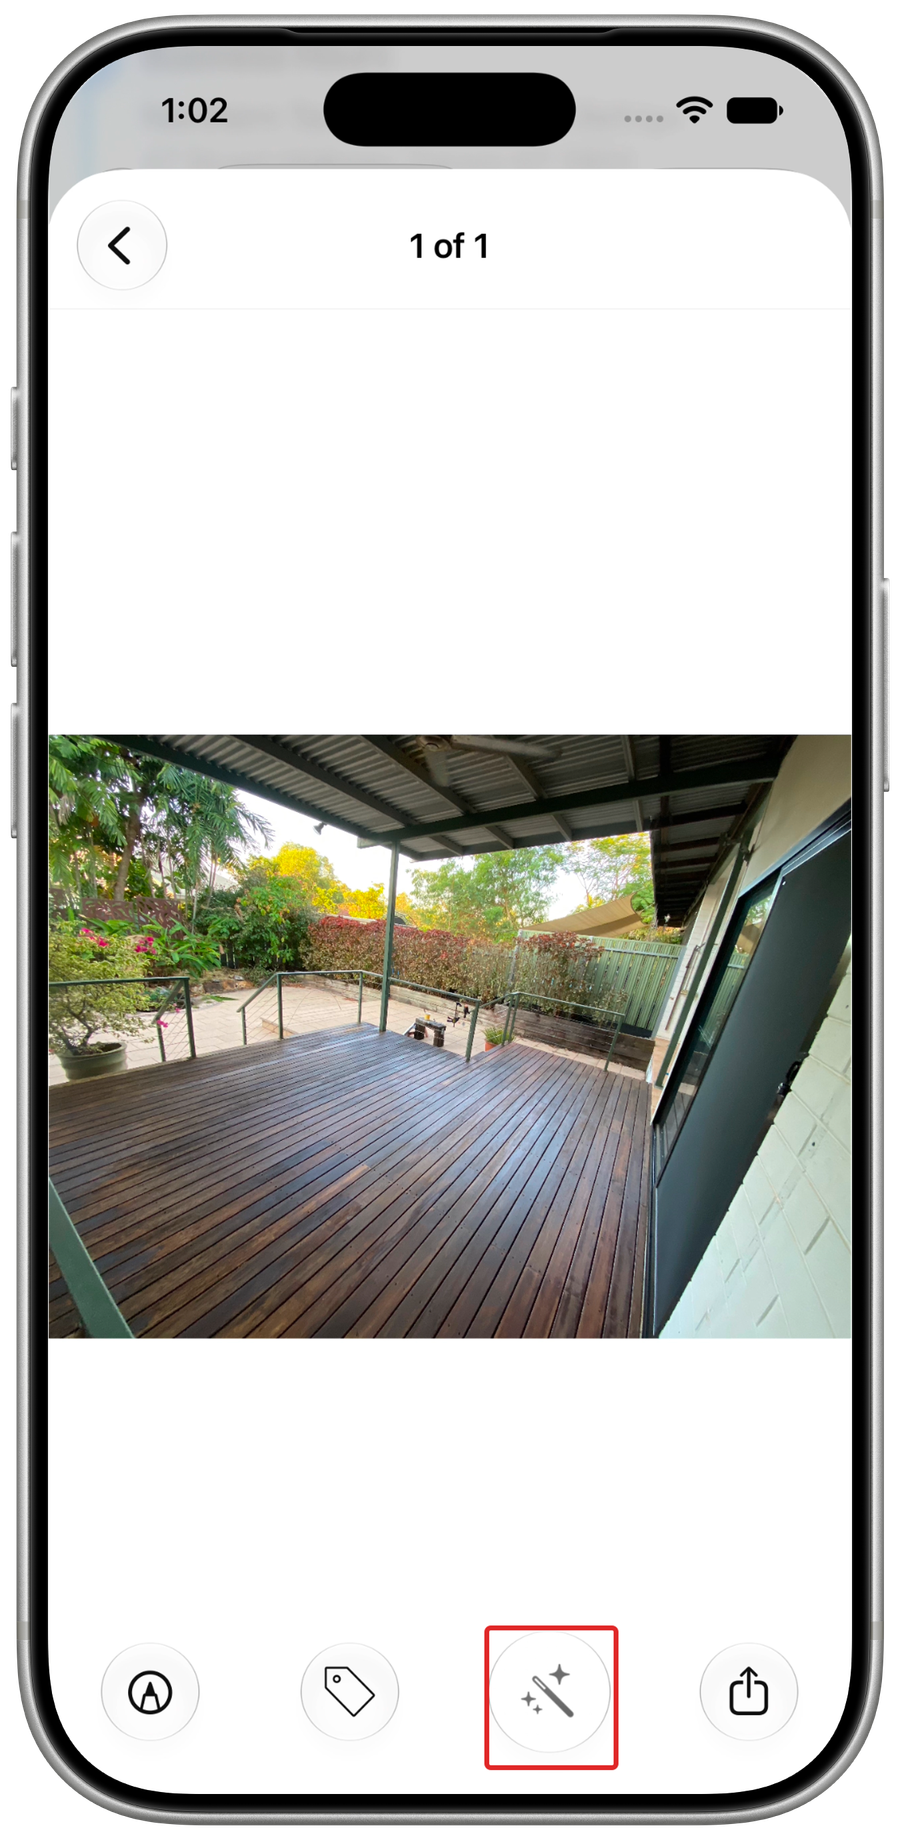
Open the job Diary, open a photo, then tap Imagine (the wand icon).
-
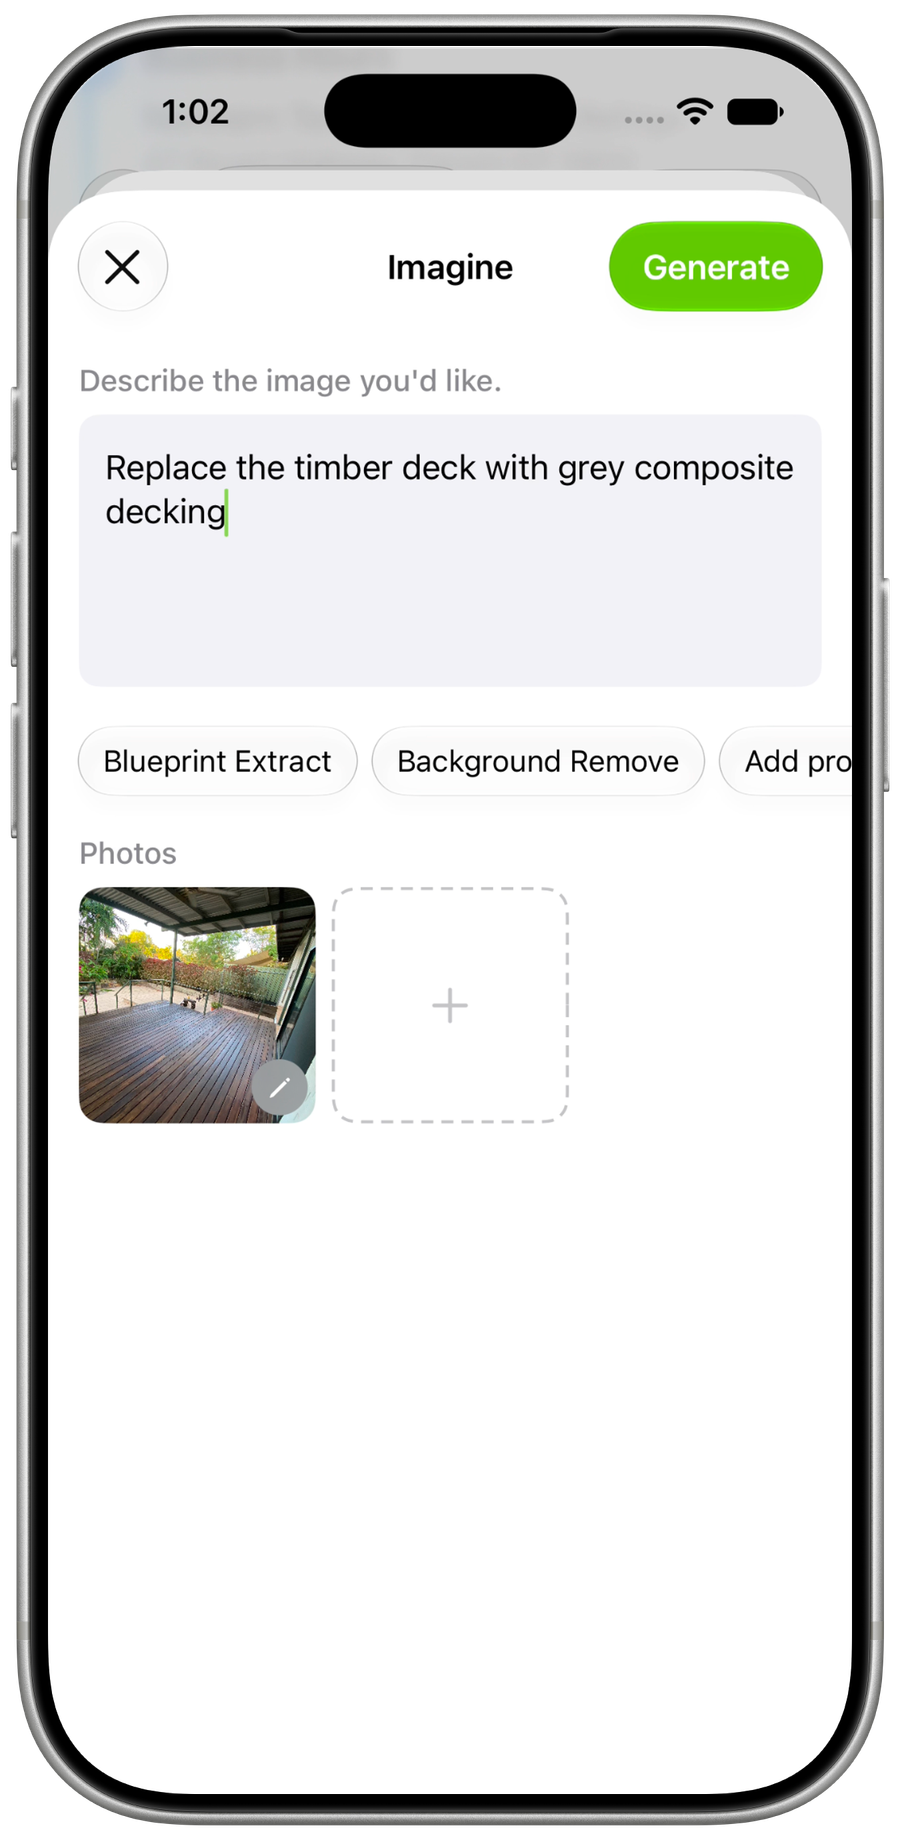
Enter your request under Describe the image you’d like. You can also tap an example prompt and edit it.
-
Tap Generate.
-
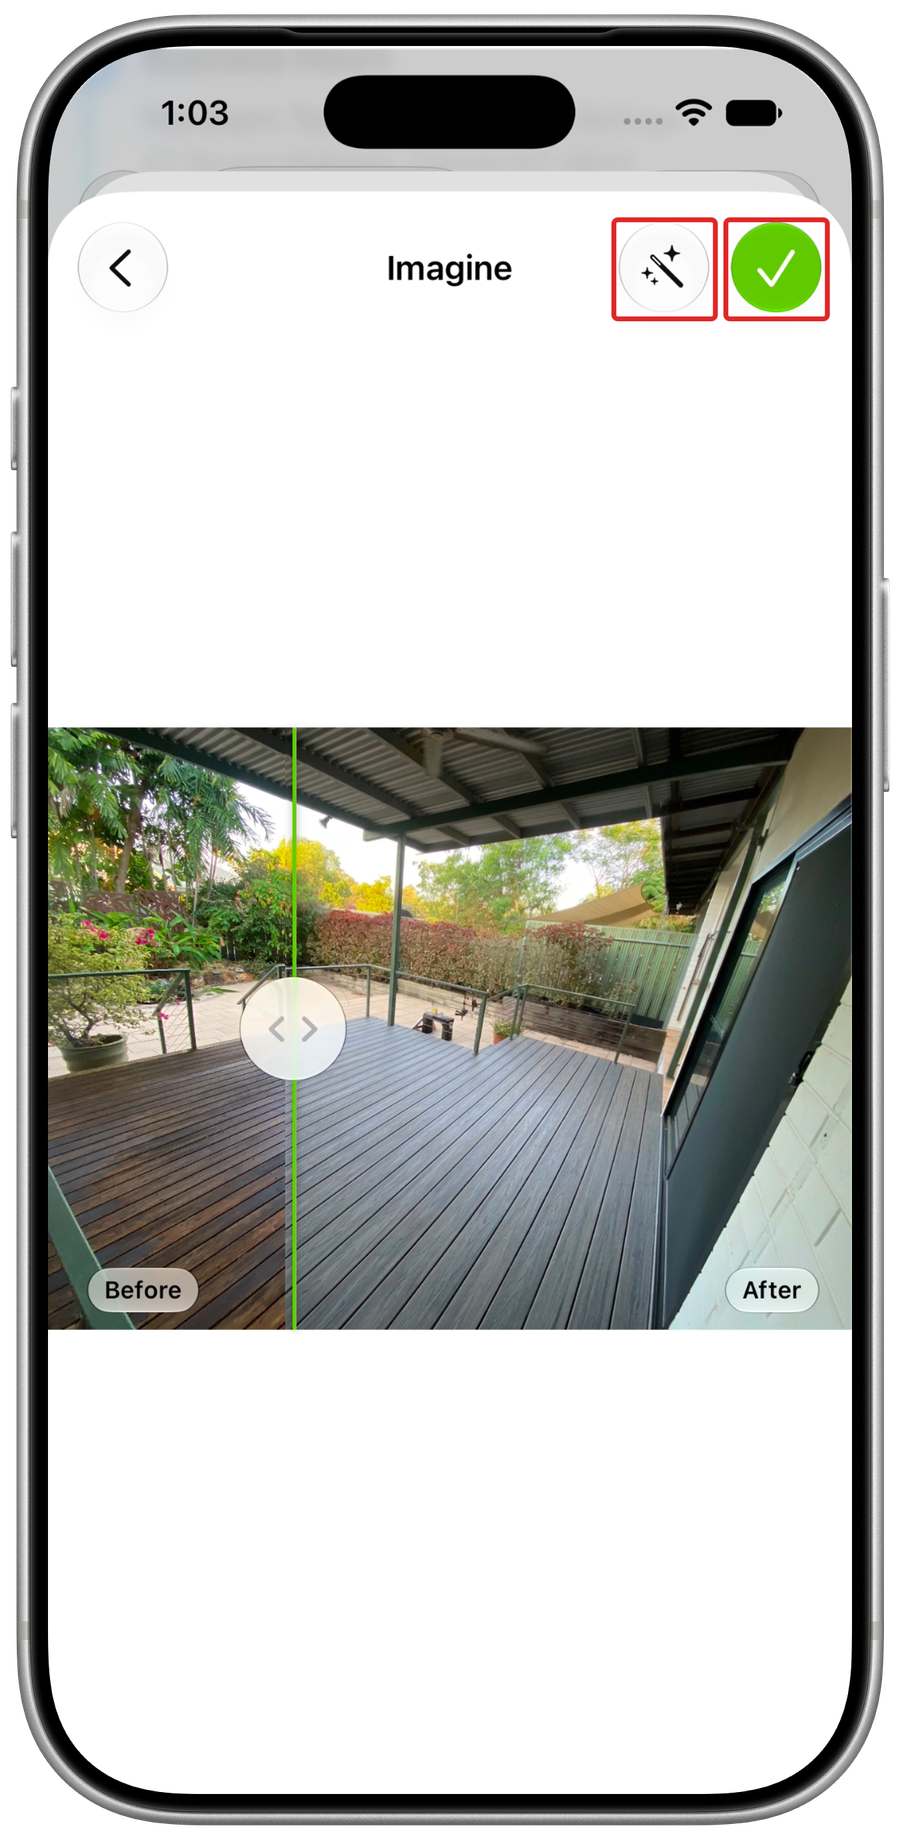
For a single source photo, drag the divider to compare Before and After. To refine the result, tap Try Again (the wand icon), edit your prompt and generate again. The generated image becomes the source for your next request.
-
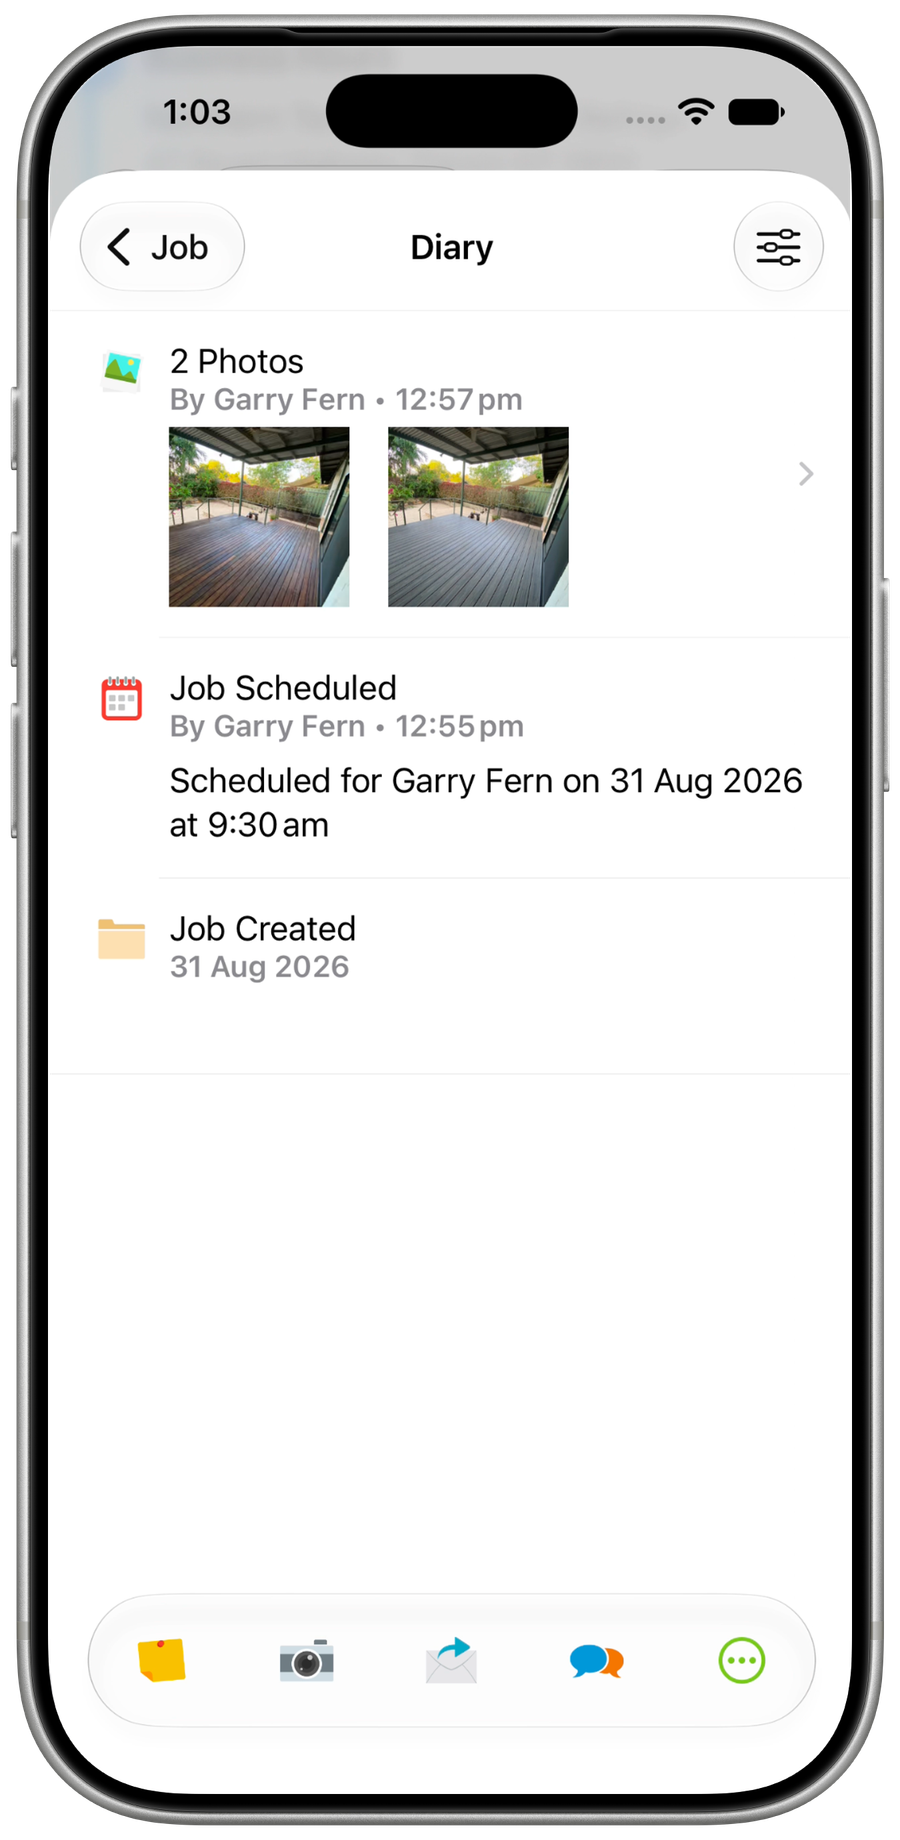
Tap Save (the checkmark) to return to the Diary. The generated image is a separate photo; the original remains available.
Add reference photos
-
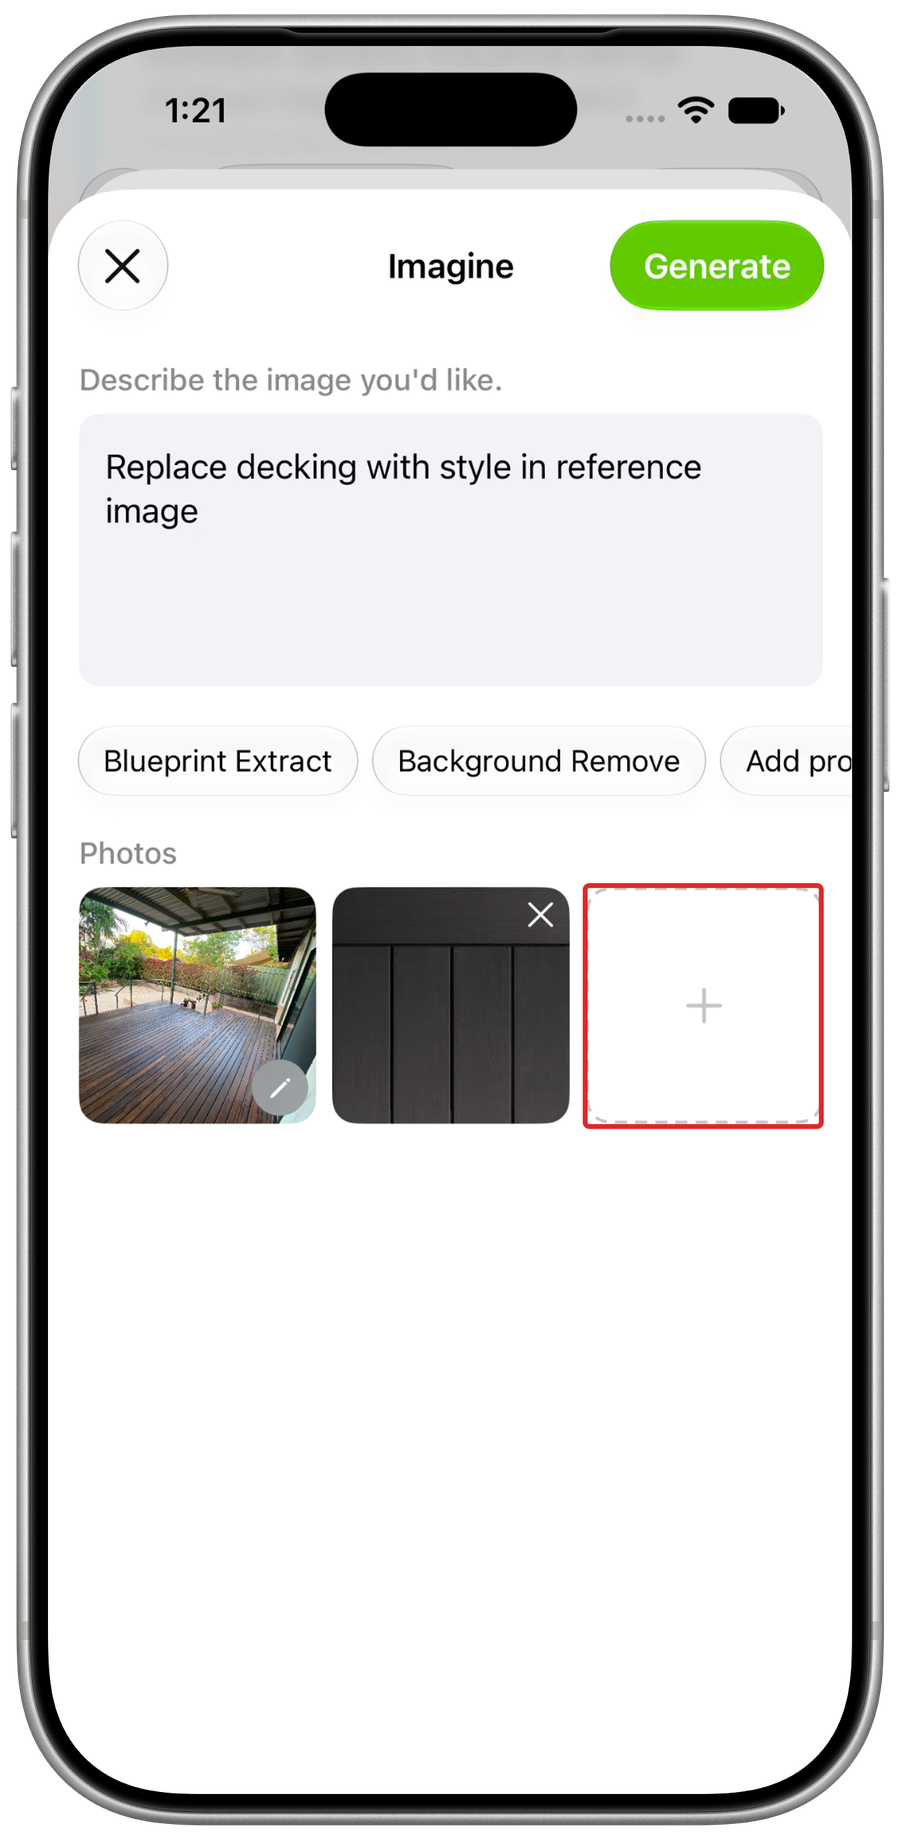
Before generating, tap + under Photos to add reference photos. On iPhone or iPad, you can select up to two other job photos. On Android, you can use two photos in total: the source photo and one reference photo.
-
Tap Generate. With reference photos, Imagine shows the generated image on its own. Review it, then tap Save.
Draw on the source photo on iPhone or iPad
-
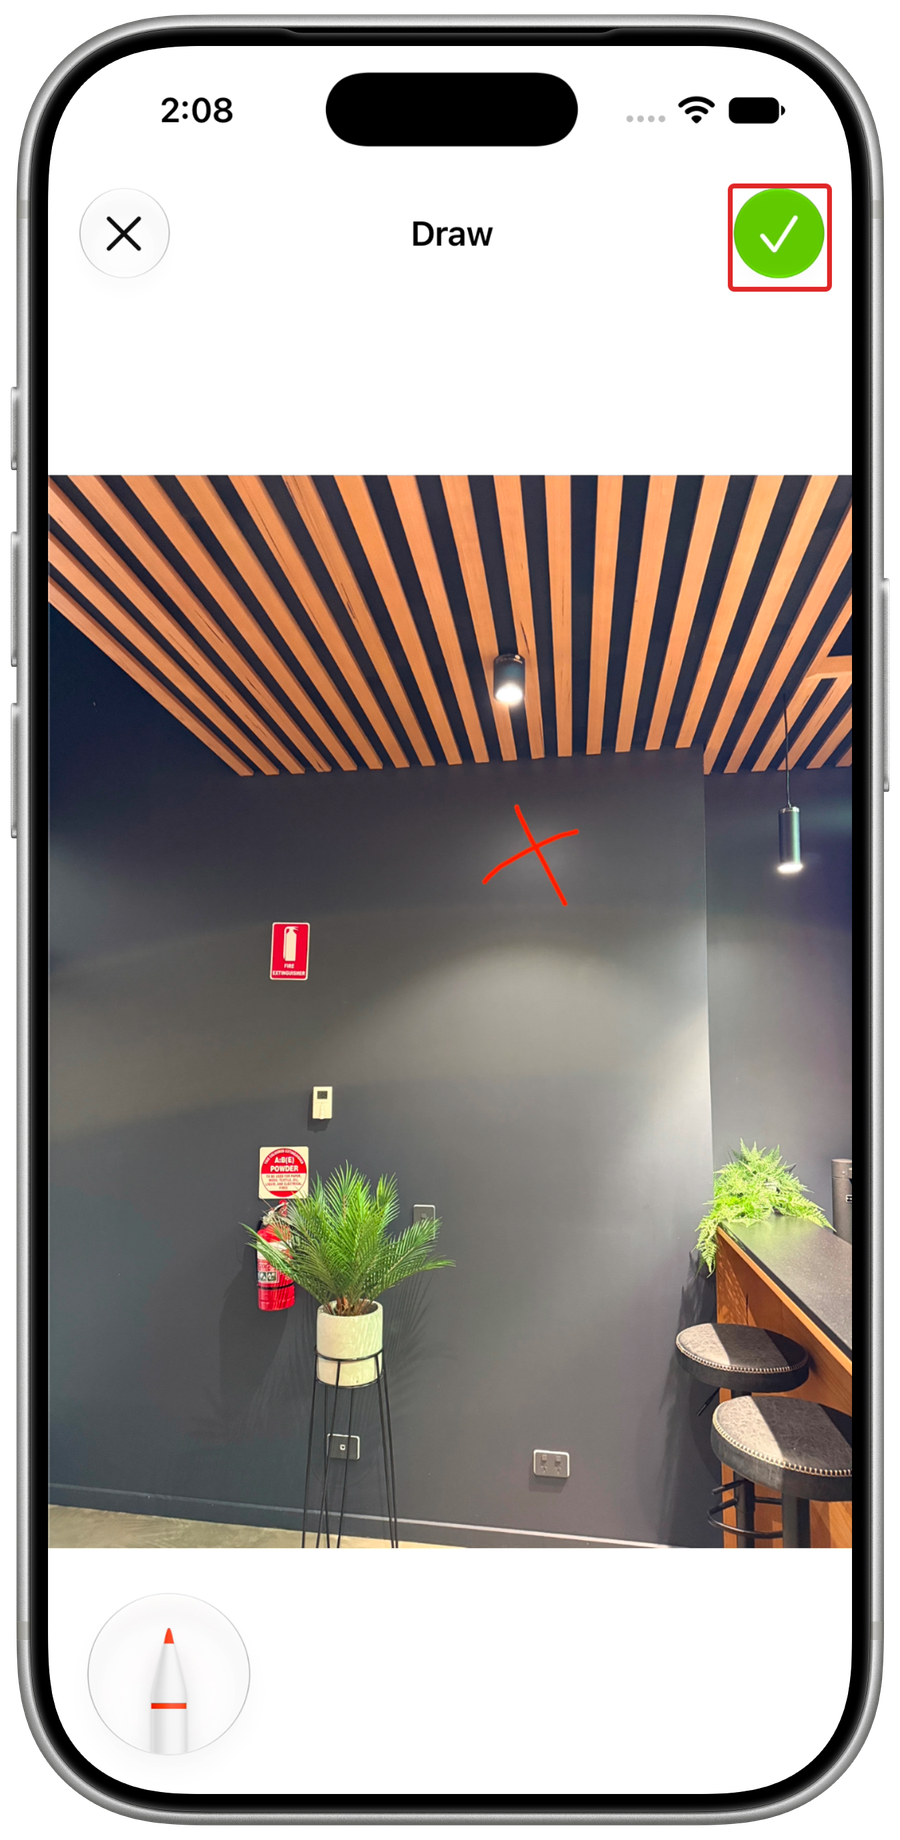
Before generating, tap the source photo thumbnail or its pencil icon.
-
Draw on the photo to indicate where you want the change, then tap the checkmark.
-
Tap Generate. Drag the divider to compare your marked-up source photo with the result, then tap Save.
Start from a Proposal photo on iPhone or iPad
-
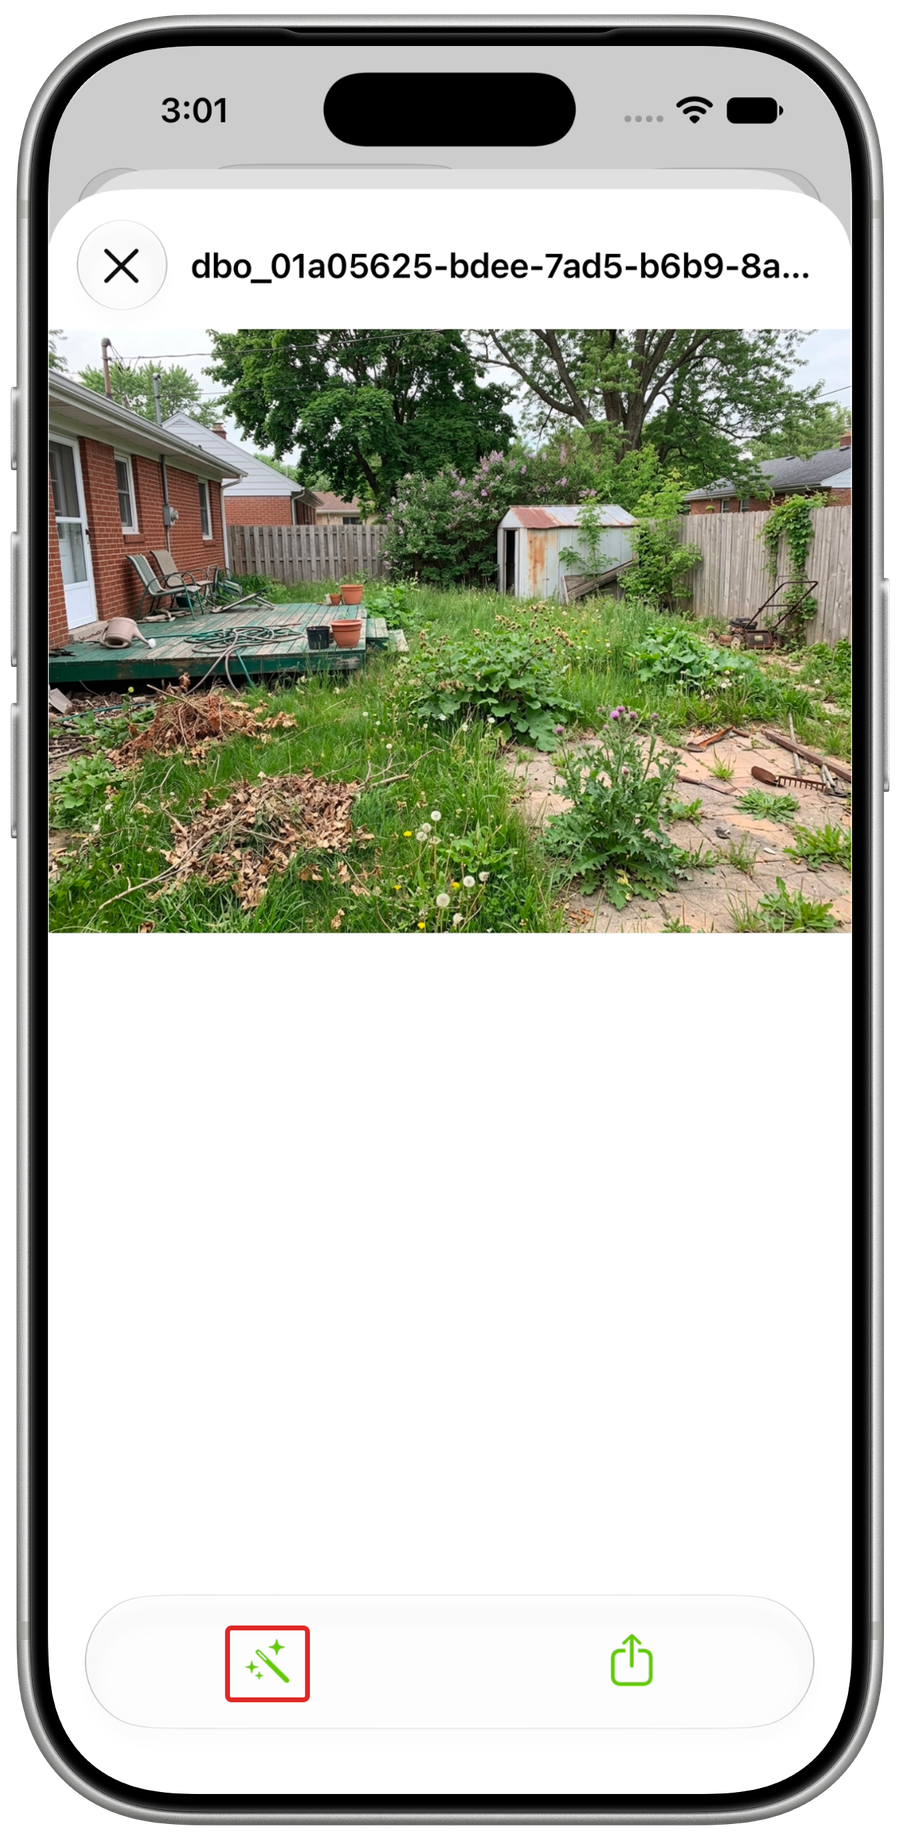
Open an existing Proposal’s gallery section, open a photo, then tap Imagine (the wand icon).
-
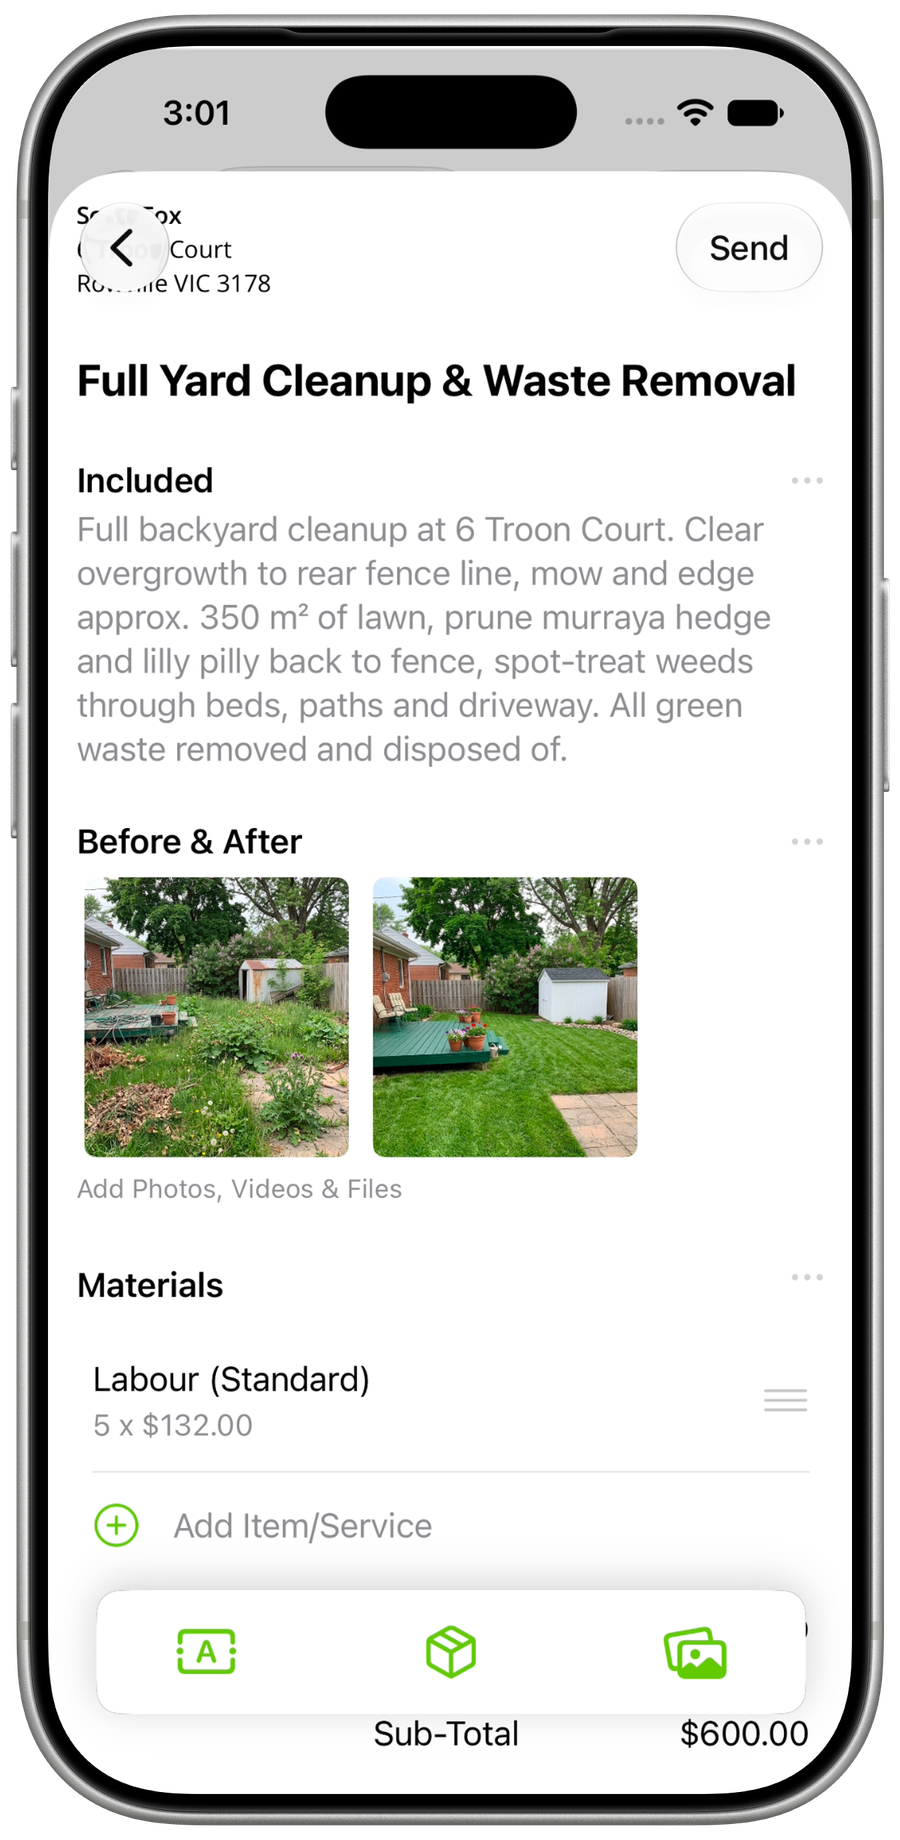
Describe the change, tap Generate, review the result, then tap Save (the checkmark). This updates the selected photo in the gallery.
-
Close the photo viewer, then tap Save to save the gallery section.
Tips for better results
- Be specific about what should change, where it should appear, and any colour, finish, model, or style that matters.
- Keep the request focused on one clear outcome.
- Use a clear source photo with the relevant area visible.
- Add reference photos when they help show the item, finish, or style you want.
- Review the result before you share it with your client.