When field staff forget to Check In or Out of jobs, there are a few ways to correct this:Documentation Index
Fetch the complete documentation index at: https://support.servicem8.com/llms.txt
Use this file to discover all available pages before exploring further.
- Online: if a staff member has forgotten to Check In to a job altogether, recorded time can be added in the Billing tab of the relevant job card.
- iOS App: if a staff member has Checked In and forgotten to Check Out, they can proceed to Check Out, then edit their Job Time during this process.
- iOS App: if a staff member has recorded incorrect Job Time (e.g. they Checked In and/or Out too early/late), then this Job Time can be edited via the Diary.
How to add or edit Job Time in the Online Dashboard
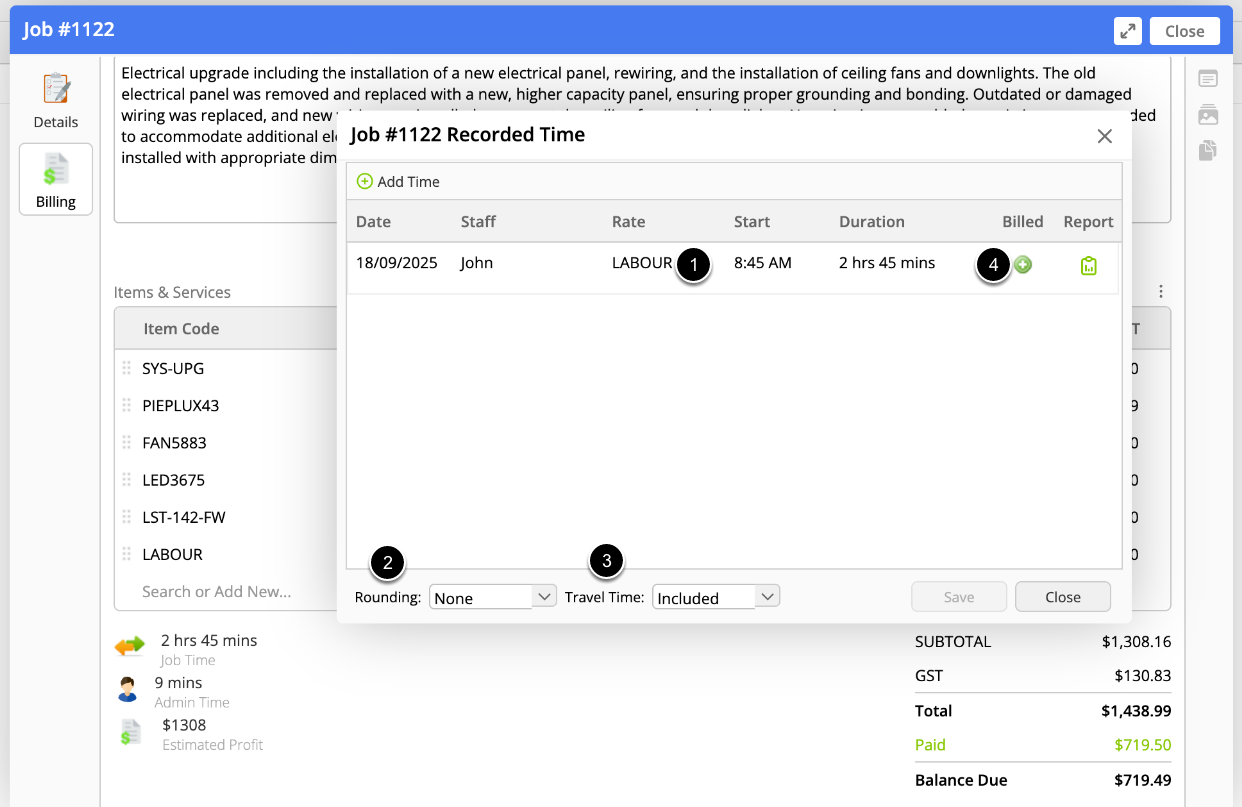
To add or edit recorded time against a job in the Online Dashboard, open the relevant job card, go to the Billing tab, click Job Time, and either “Add Time” or edit an existing entry, as needed. TIP: click the Report icon in far-right column of a recorded time entry, to see a detailed breakdown of what occurred while the staff member was Checked In, including GPS arrival and departure timestamps you can cross-reference.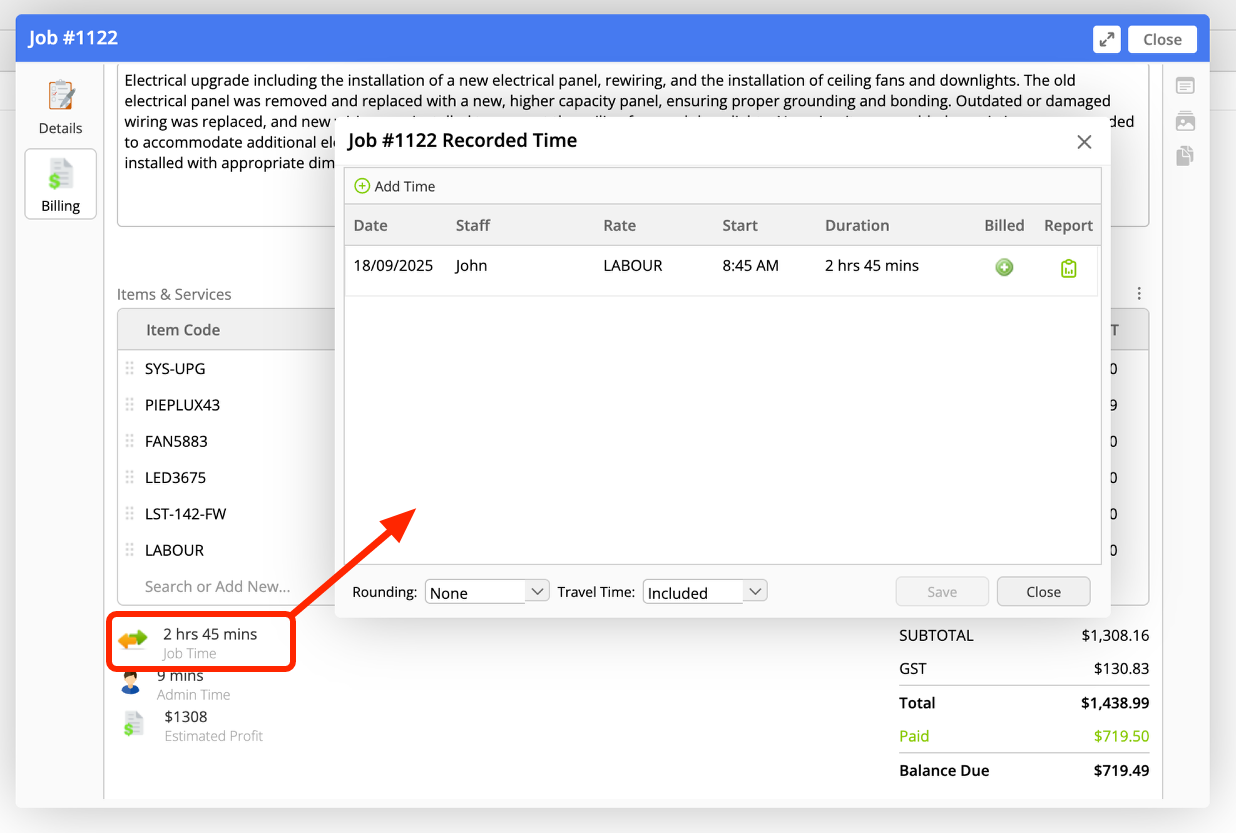
How to edit Job Time in the app, during Check Out
1. When Checking Out of a job, if you know (or suspect) that you Checked In or Out too early or late, you can correct this data at the time you Check Out of the job. Simply proceed to Check Out, then tap Job Time: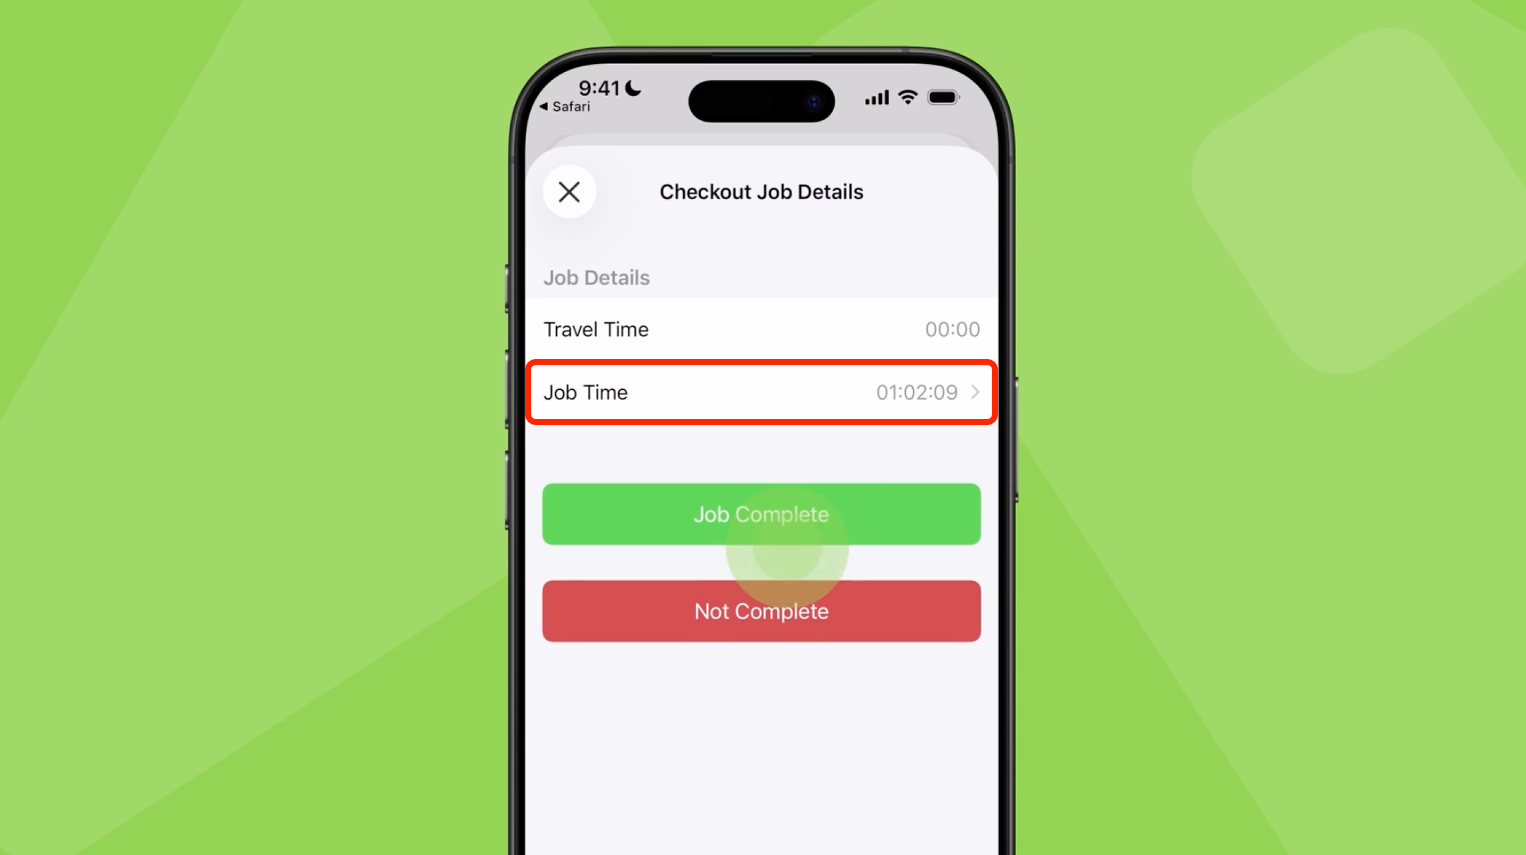 2. Tap the Check In and/or Check Out time to edit. You can use your GPS arrival and departure timestamps as a reference.

How to edit Job Time in the app, after Check Out
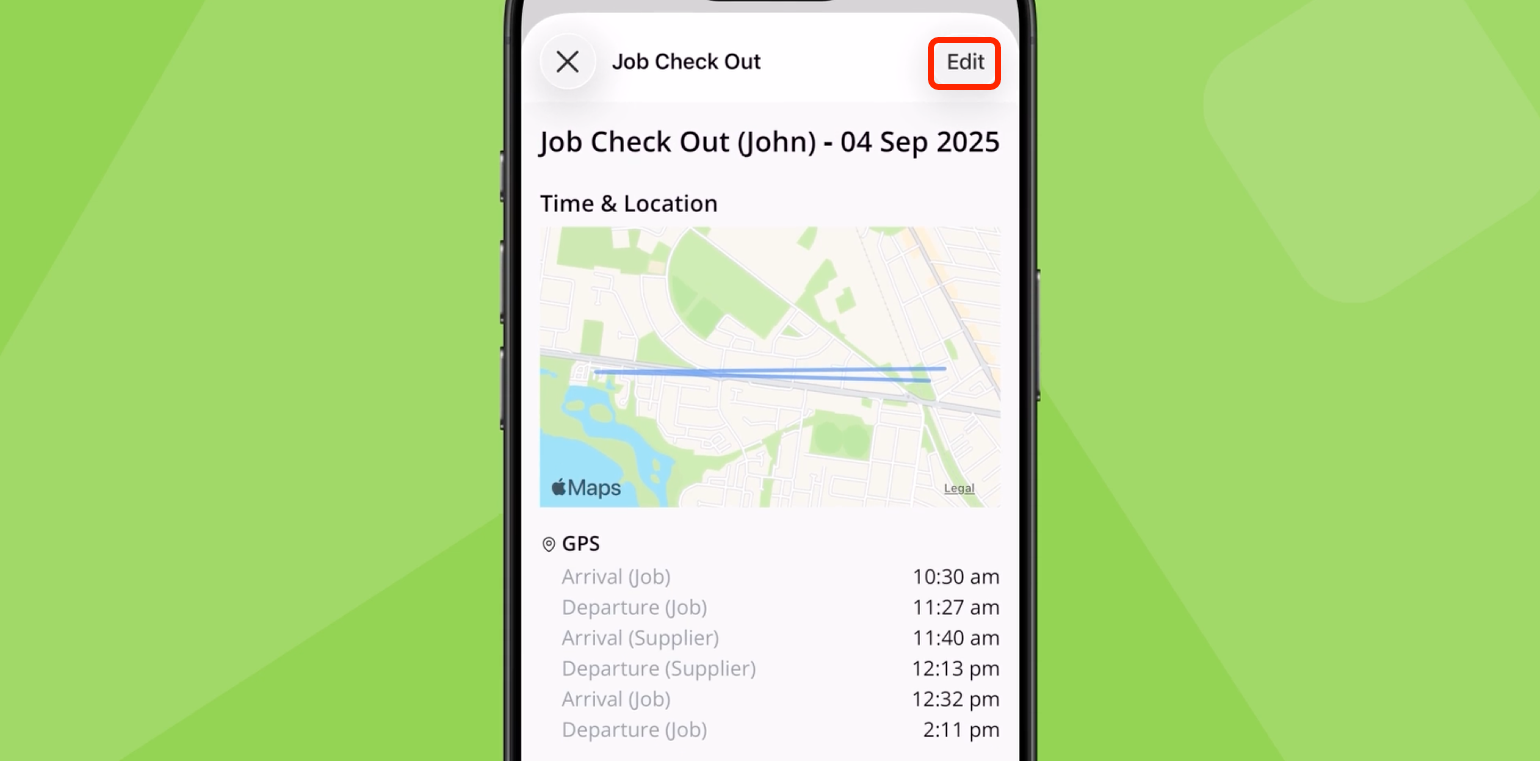
If you need to edit the recorded Job Time, hours or days after Check Out, you can do so via the Checkout Report in the job’s Diary. 1. Find the recorded time in the job’s Diary, and tap it to open the Checkout Report. 2. In the top-right corner of the Checkout Report, tap ‘Edit’.
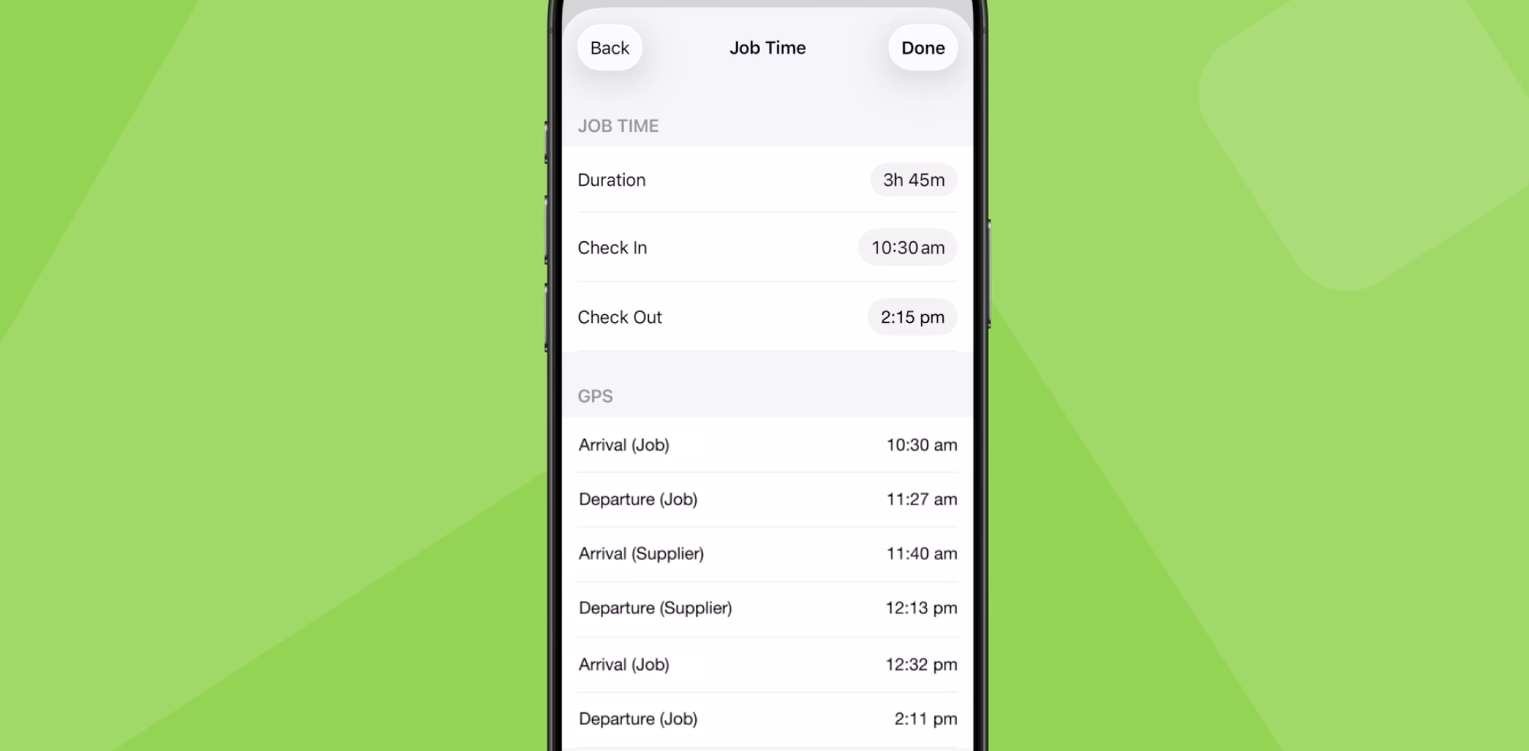
 3. Tap a time to edit it.
How to convert recorded Job Time to an invoice line item
As an alternative to using the Smart Labor feature in the app, you can convert recorded Job Time/Check In data to invoice line items online, too.- Select a Labour Rate
- Set your rounding (if any).
- Set whether you want to include Travel Time.
- Click the green ”+” icon to add the line item to your invoice. This Job Time will be rounded UP to the nearest multiple of your rounding preference when added to your invoice. (e.g. if you set your Rounding to “60 mins”, then an entry of 1 hr 10 min will round up to 2 hrs on the invoice)
- The icon changes to a check-mark, and the row is coloured grey after it has been added to the invoice.
How to delete recorded Job Time
To delete an entry, right-click on the row, then select ‘Delete recorded time’.