This lesson will show you how to build a simple quote using the ServiceM8 Online Dashboard. You can add labour and materials, produce a professional PDF, and send it to your customer for review - all directly from the Job Card!
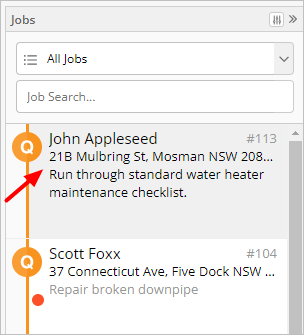
1. Open the job.
From the main menu , click Dispatch Board.


2. From the Job Card, click Billing.
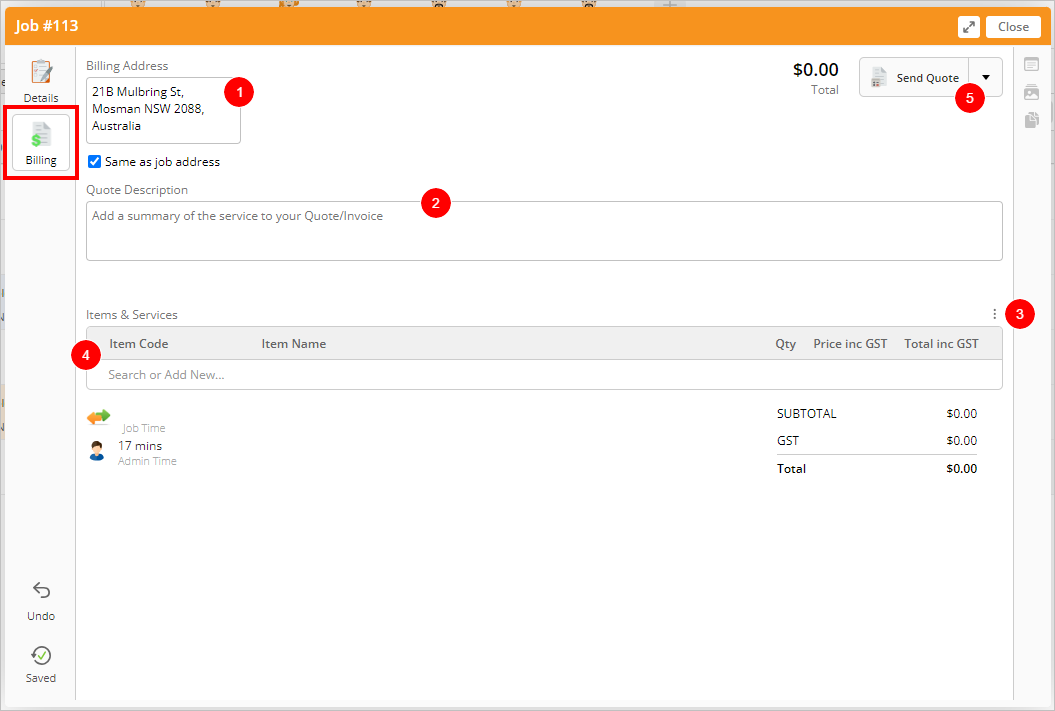

- Billing Address: This is the address that will be used when generating an invoice. If the billing address is different from the job address, add it here.
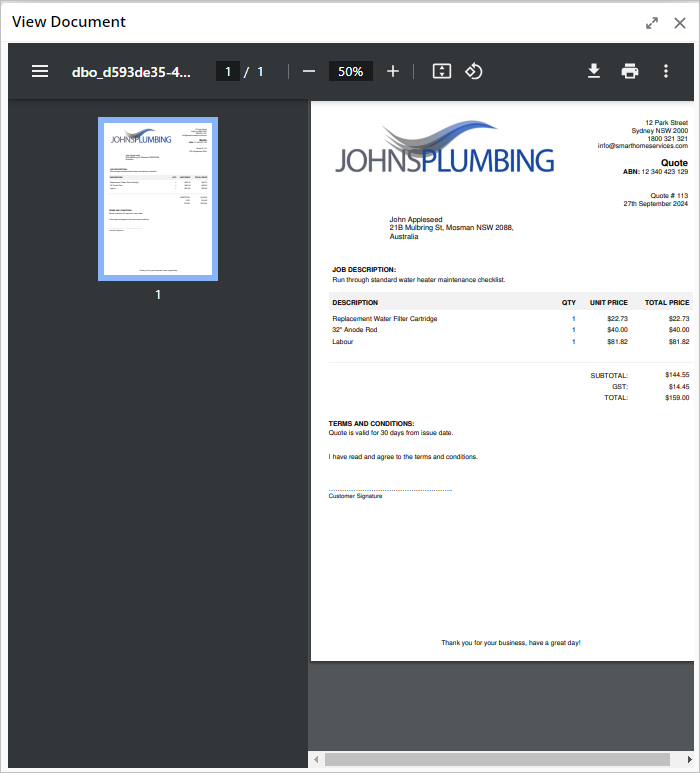
- Quote Description: Enter a description of the work to be done for the client. This information will be included on the quote, unless you are using a quote template that does not contain the description field. (Tip: Take advantage of the Smart Writing Helper when populating this field!)
- Tax Setting: Clicking ⋮ displays your default tax settings for your account. Best practice is to set all of your jobs as either tax inclusive or tax exclusive, and then don’t change it. See this article for more information.
- Items & Services: This is the area where you add items, materials, and labour rates, or more general services you’ve created.
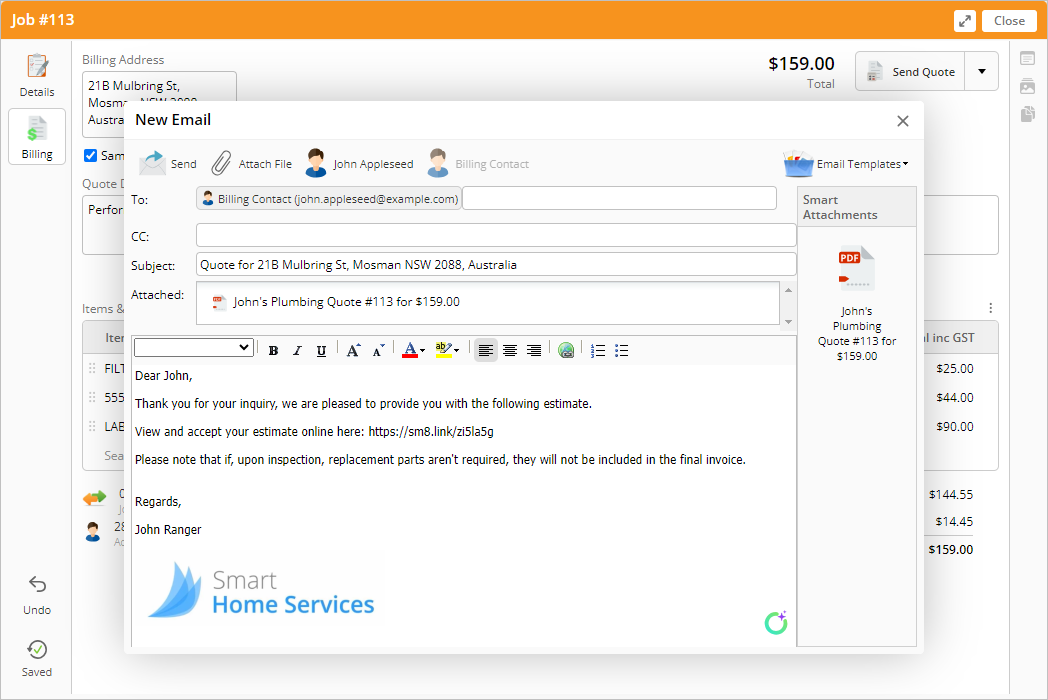
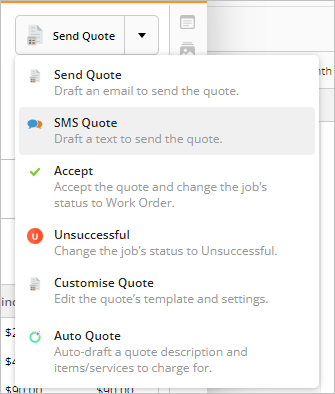
- Workflow Action: This dropdown contains the common actions associated with the current job status - in this case, Send Quote, which will automatically create a PDF of your quote and open a new email to send it to the customer. Click the dropdown to see other potential actions.
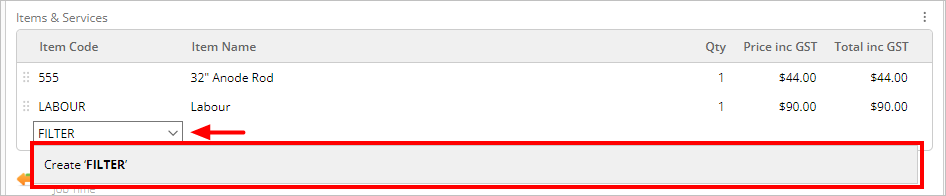
3. Enter the materials and services that will be included in the quote.
To add an item from your inventory, click in the Item Code field and search for it by typing the name or code. ServiceM8 will pull up suggestions as you type. When your item appears, click on it and then adjust the quantity as needed. If needed, you can change the item name or price of an item right within the quote, without the change impacting the item anywhere else.


4. Send the quote to the customer.
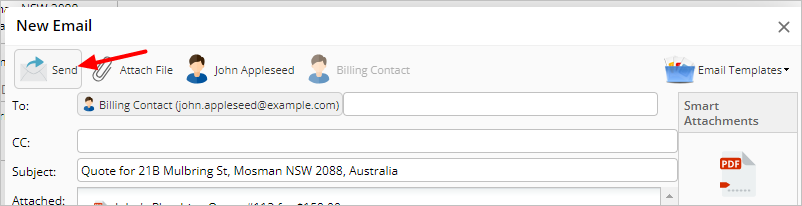
When you are satisfied with your quote, it’s time to send it to the customer. To send the quote via email, click Send Quote.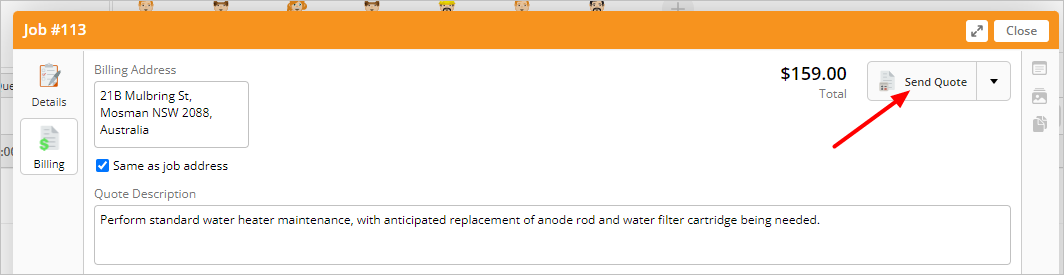


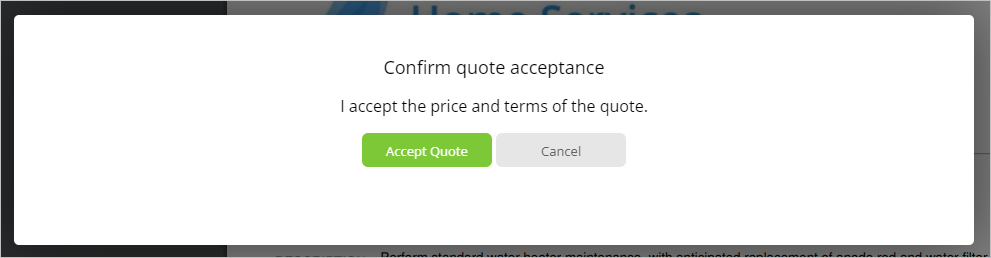
5. Schedule the job upon customer acceptance.
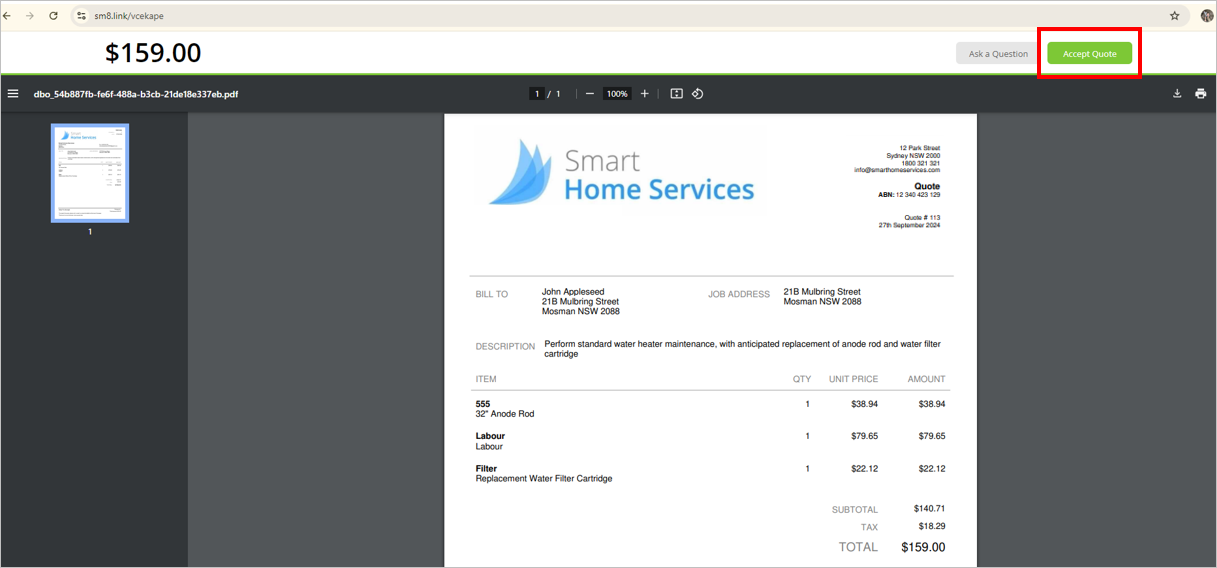
When the customer receives the email with the PDF attachment, they will also find a link to view and accept the quote online.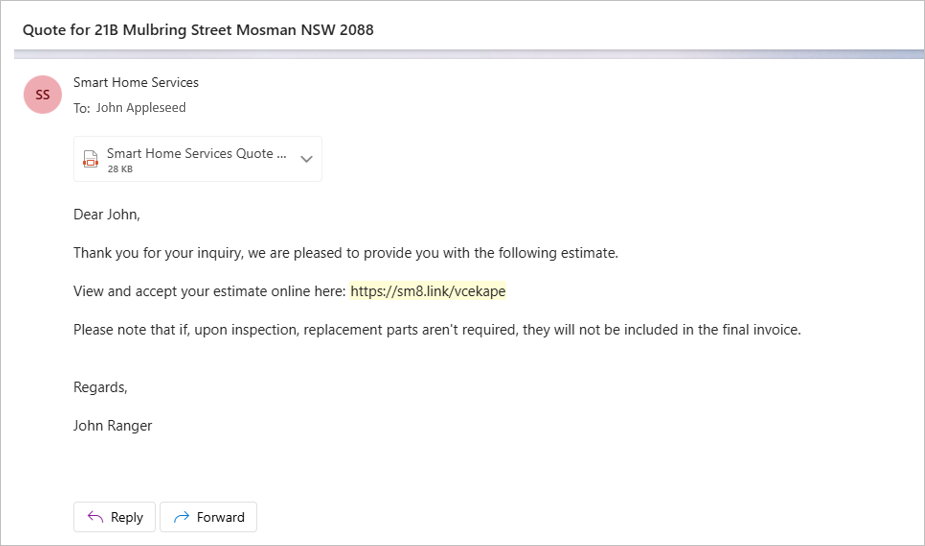


Related FAQs
Additional resources
- How to add a deposit requirement to a quote
- How to change your quote template
- How to add a quote follow-up automation
- Learn about Pending Quote job queues