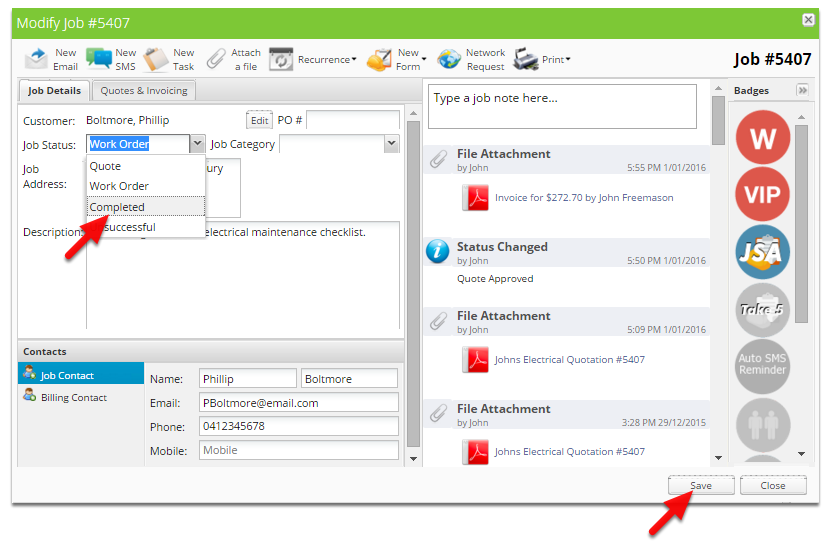
Open the job

Change the job status to Completed, click Save
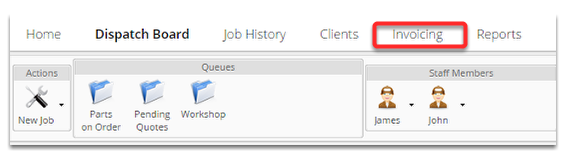
Click Invoicing
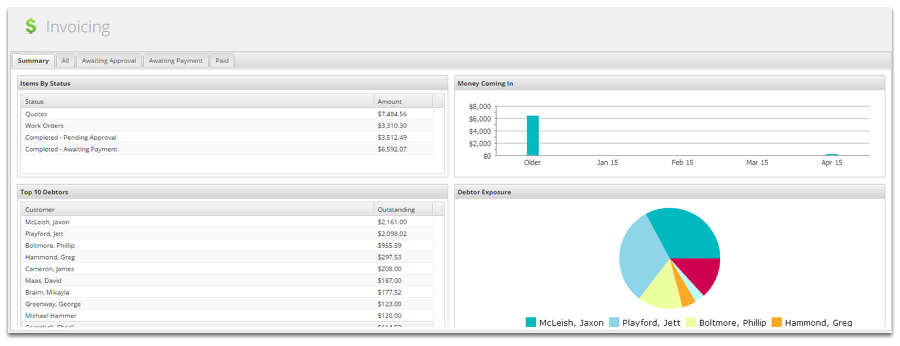
This is the Invoicing Summary page
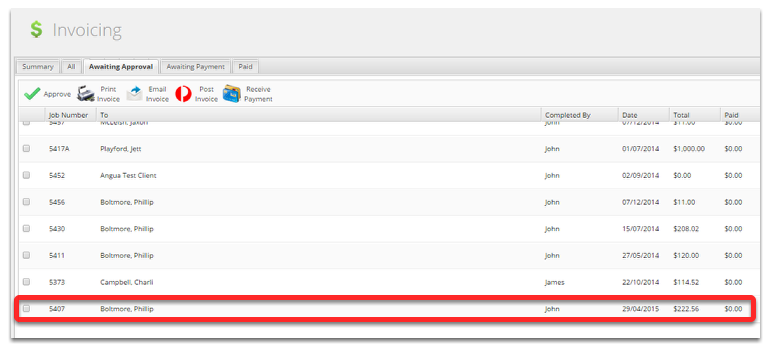
 The job we just completed will be inside the Awaiting Approval tab.
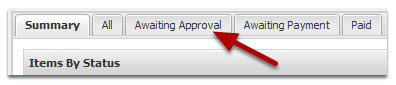
Click Awaiting Approval
The job we completed is now Awaiting Approval
- If your field techs don’t add materials they can be added here.
- If your field techs add material but they need to be checked, it can be done here.
- A final check that your invoicing amount is correct.
- For marking invoices as transferred to a non-integrated accounting package. (Approve invoices once the information has been transferred)
- When integrated to an accounting package approving sends the invoice to the accounting package to be tracked.
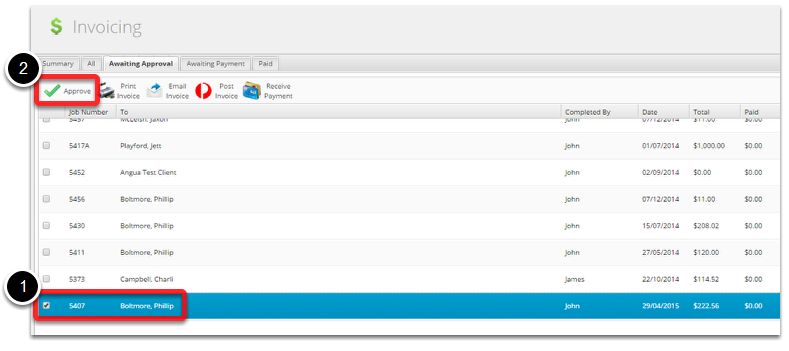
Approve the Job by ticking the tick box and clicking Approve
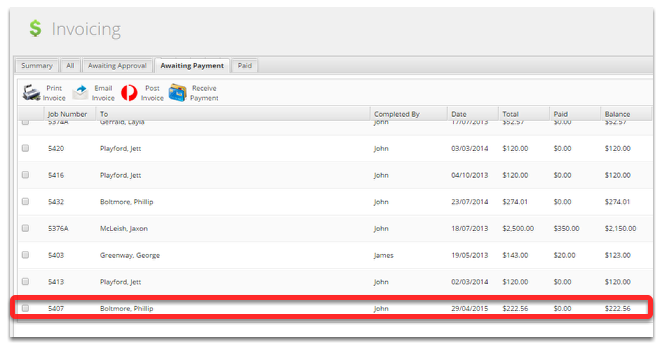
The job is now in the Awaiting Payment screen
To receive payment, tick the job and click Receive Payment

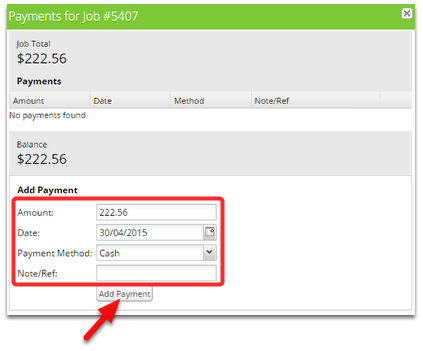
Set the fields, click Add Payment
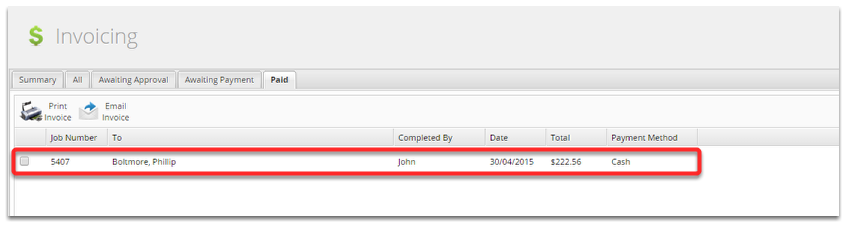
Your Done! The job has now been paid and is on the Paid tab.