In ServiceM8, a job is a record that is created when a new or existing client is interested in new billable work. It tracks progress from initial inquiry or quote through to completion and invoicing. Every new job starts as either a Quote or a Work Order.
You can create a job from the Online Dashboard or from the ServiceM8 iOS app.
(Note: To keep it simple, this article focuses on creating a new job and understanding job card fields, not immediately scheduling or allocating the job to a staff member. As you get comfortable with ServiceM8, you will likely combine both steps into one workflow.)
- From the Online Dashboard
1. Create a new job.
From the main menu, click New Job.

2. Complete the job card fields.
Complete the job card fields as described below to the best of your knowledge. The job card will auto-save as you work.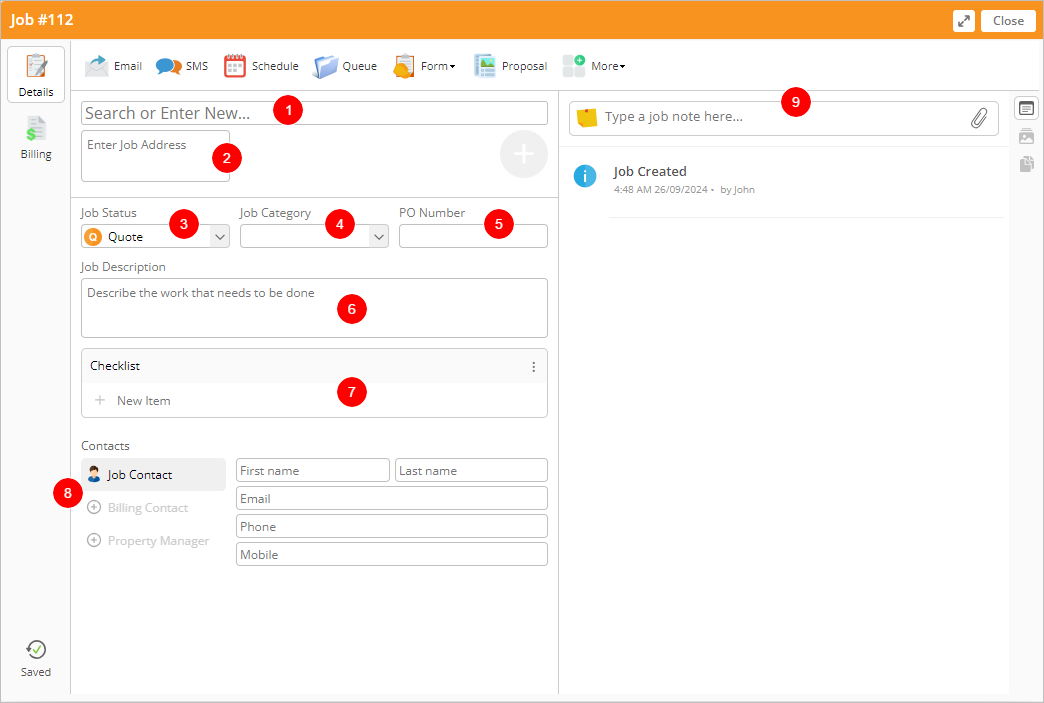

- Customer: Use to search for existing customers, or to enter a new customer name. This can be an individual’s name (for example, the home owner), or a company name.
- Job Address: Enter the job address. If the customer is already in the system, the address will automatically populate. If you are creating a new customer, ServiceM8 will suggest addresses as you type. For the best experience, always confirm and select a suggested address from the dropdown.
- Job Status: Select the current Job Status: Quote, Work Order, Completed, or Unsuccessful. New jobs should start as a Quote (if the customer needs to see and accept a quote first), or Work Order (if the job’s confirmed to go straight ahead).
- Job Category (optional): This field provides an additional way to categorise and filter your jobs. Default categories are After-Hours, Standard, VIP, and Warranty, but you can customize categories to meet your needs in Account > Settings > Job Categories.
- PO Number (optional): Enter the customer’s purchase order reference here, if applicable.
- Job Description: Enter the scope of work so that your team knows what needs to be done. This is for your internal reference.
- Checklist (optional): To ensure a job is done properly, add a list of job requirements or tasks for field technicians to check off in the app while on site. If you include the word “Photo” in a checklist item, such as “Take a photo of the installation”, the camera in the app will automatically open when the technician taps the checklist item, then save the photo to the Job Diary.
- Contacts: Hovering over the Job Contact section lets you choose Job Contact, Billing Contact, or Property Manager. (The default is Job Contact, which is the typical selection for a home owner/occupier.) Enter as much contact information for your customer as possible. You can add one or more contacts.
- Job Notes / Attachments (optional): Use this field to add any notes about the job that don’t belong under the Job Description or Checklist fields. You can also click the paperclip to upload an attachment. Field technicians will see these notes and attachments in the app.

3. Close the job card.
At any point, you can click Close to close the job card. The new job will now be visible from the Dispatch Board on the Jobs List, in lists such as Action Required, Unscheduled Jobs, and All Jobs. That’s it, you have created a new job! When you are ready, you can either schedule the job or build a quote.- From the ServiceM8 iOS app
1. Create a new job.
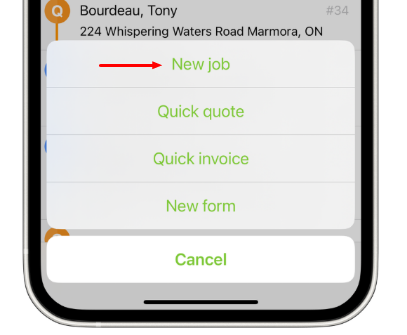
From the ServiceM8 iOS mobile app, tap Jobs, then tap +.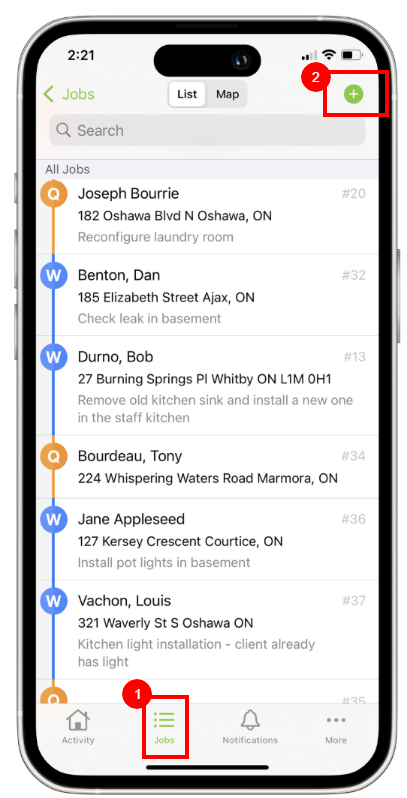


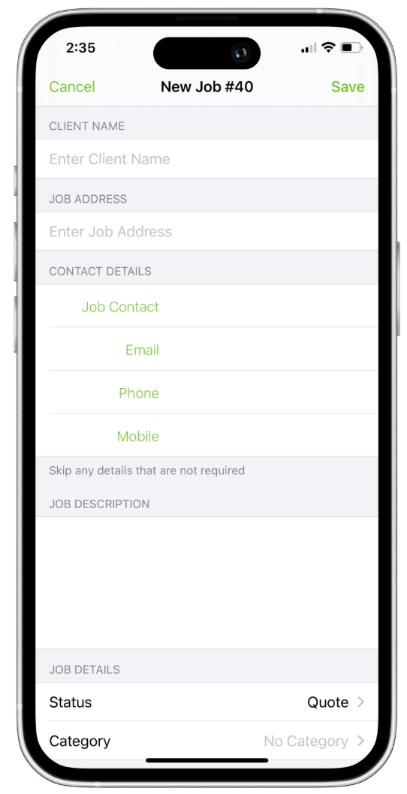
2. Complete the job card fields.
- Client Name: Use to search for existing customers, or to enter a new customer name. This can be an individual’s name (for example, the home owner), or a company name.
- Job Address: Enter the job address. If the customer is already in the system, the address will automatically populate. If you are creating a new customer, ServiceM8 will suggest addresses as you type.
- Contact Details: Enter the Job Contact information.
- Job Description: Enter the scope of work so that your team knows what needs to be done.
- Job Status: New jobs should start as a Quote (if the customer needs to see and accept a quote first) or Work Order (if the job’s confirmed to go straight ahead).
- Category (optional): This field lets you organize your jobs any way you’d like. Default categories are After-Hours, Standard, VIP, and Warranty, but you can customize categories to meet your needs.

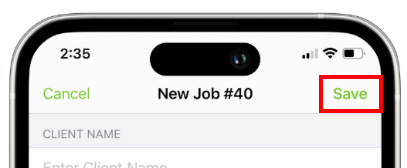
3. Tap Save.

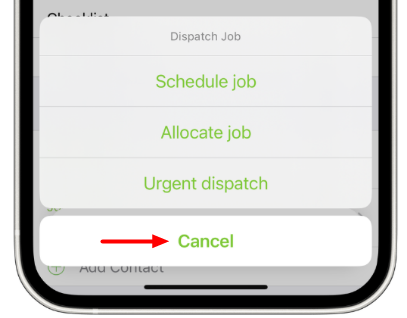

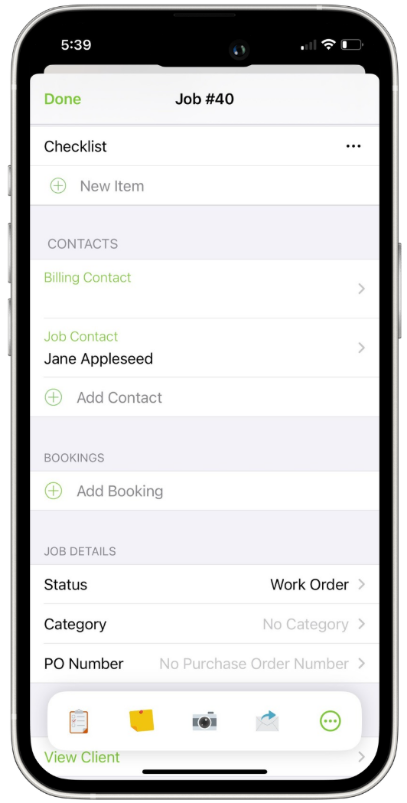
4. Complete any additional fields.
- Checklist (optional): To ensure a job is done properly, add a list job requirements or tasks for field technicians to check off in the app while onsite. Under Checklist, tap New Item to add a new task. If you include the word “Photo” in a checklist item, such as “Take a photo of the installation”, the camera in the app will automatically open when the technician taps the checklist item, then save the photo to the Job Diary.
- Billing Contact (optional): Complete if the job’s billing contact is different than the job contact (for example, if you are billing a landlord but the tenant is the job contact)
- PO Number (optional): Enter the customer’s purchase order information here, if applicable.
- Job Notes / Attachments (optional): Use the Job Actions bar at the bottom to add any notes about the job that don’t belong under the Job Description or Checklist fields.