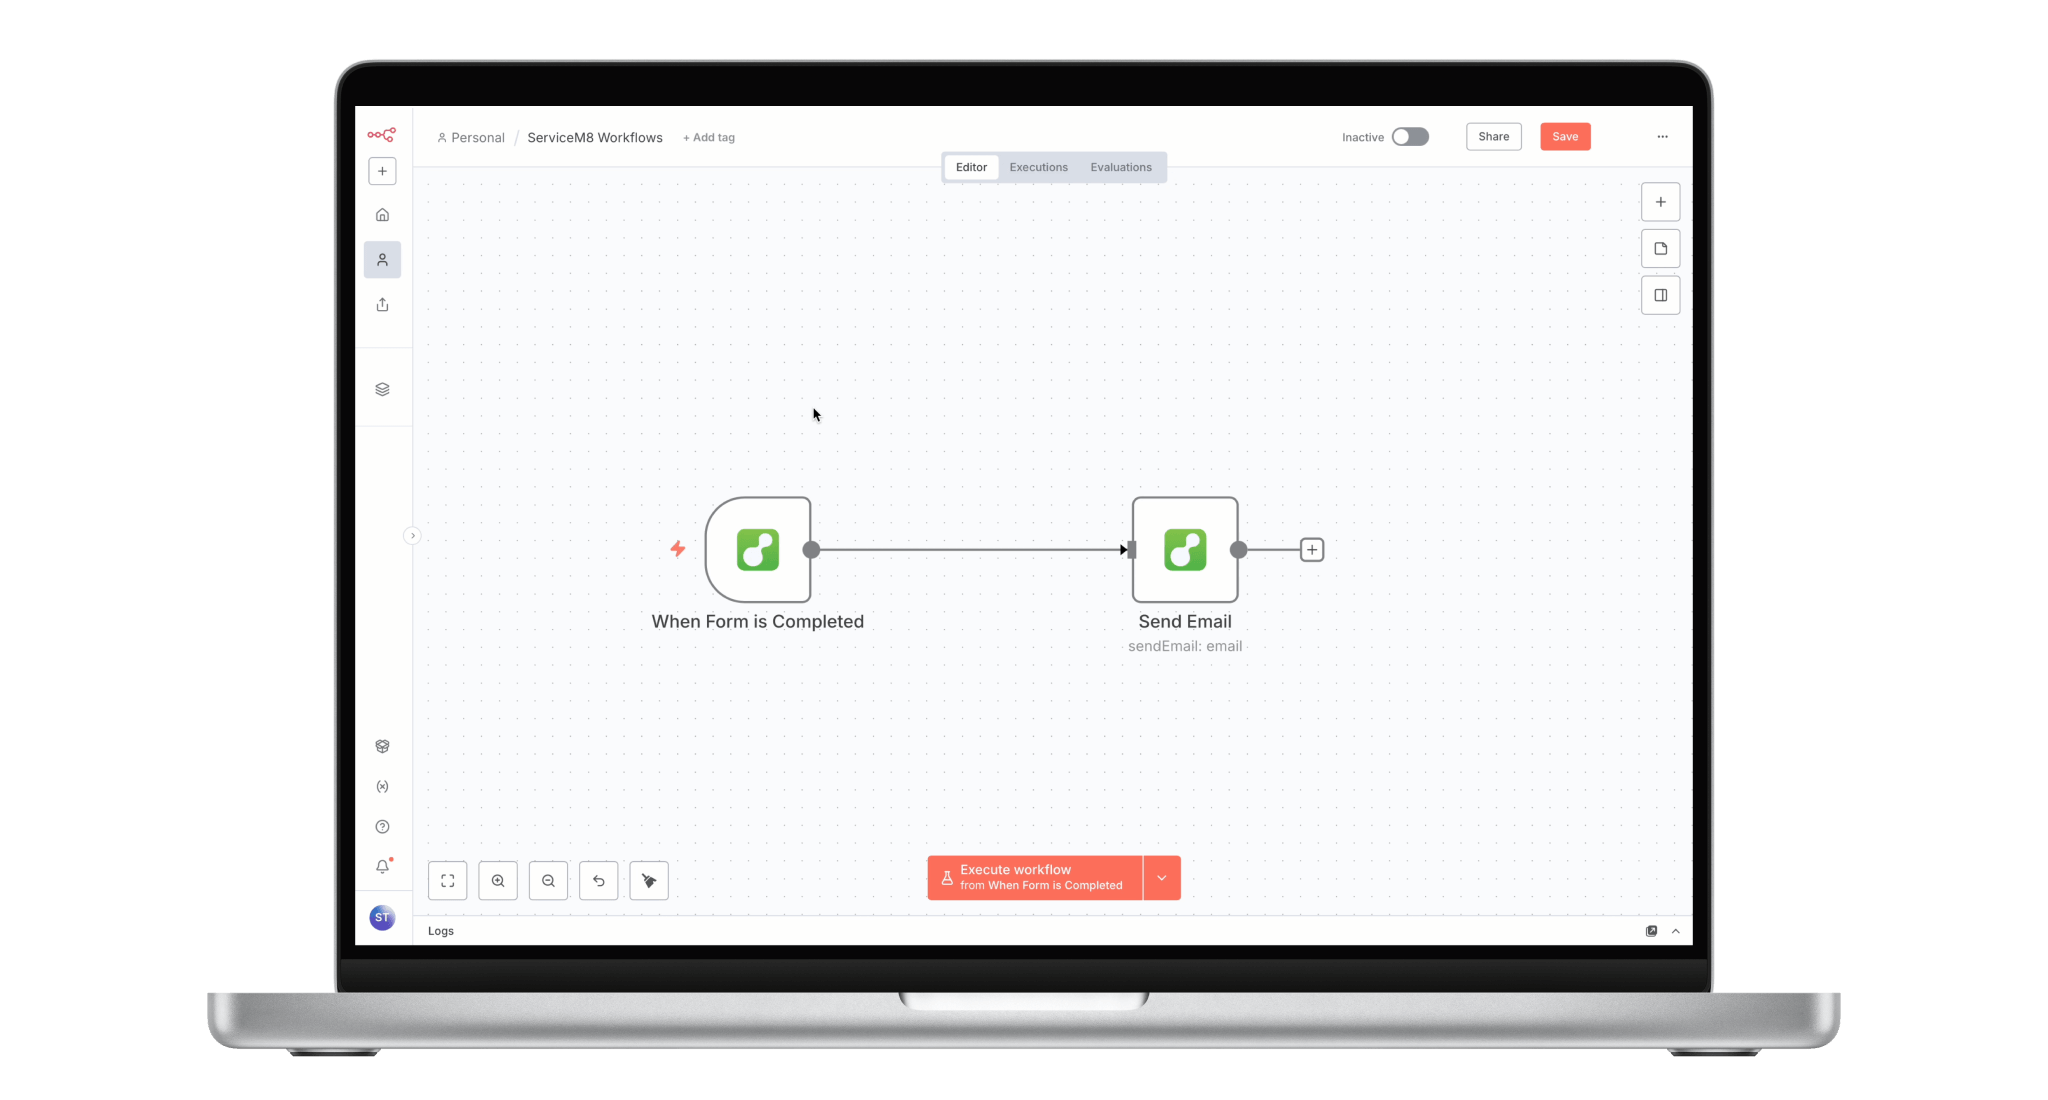
 In n8n, each trigger, action, or step in your workflow is called a “node.” ServiceM8 is available as a node, with a range of triggers and actions you can use. This means you can plug ServiceM8 into a workflow and set it up to:
- Trigger a workflow when something happens in ServiceM8 (for example, when a job’s Status changes), or
- Perform an action in ServiceM8 as part of a workflow (for example, add a job note).
Triggers
- Badge added to job
- Badge removed from job
- Customer accepted the quote
- Customer details updated
- Customer review submitted
- Form response submitted
- Full payment received for invoice
- Invoice sent to customer
- Job added to queue
- Job details modified
- Job marked as completed
- Job status changed
- New customer added
- New job created in the system
- New message received in inbox
- Note added to job
- Photo attached to job
- Proposal sent to customer
- Proposal viewed by customer
- Quote sent to customer
- Staff member arrived at job site
- Staff member ended shift
- Staff member left job site
- Staff member started shift
- Video attached to job
Actions
Client Actions- Get customer details
- Get multiple clients
- Add job note
- Create new job
- Create job from template
- Delete job
- Get job details
- Get multiple jobs
- Queue job
- Update job details
- Search everything
- Search specific type
- Send email
- Send text message
How to connect ServiceM8 to n8n
To get started with n8n, you will need an n8n account. ServiceM8 works with both n8n Cloud (i.e. where your automations are hosted by n8n) and n8n Self-hosted. 1. In n8n, start a new workflow, and search ‘ServiceM8’ in the nodes pane.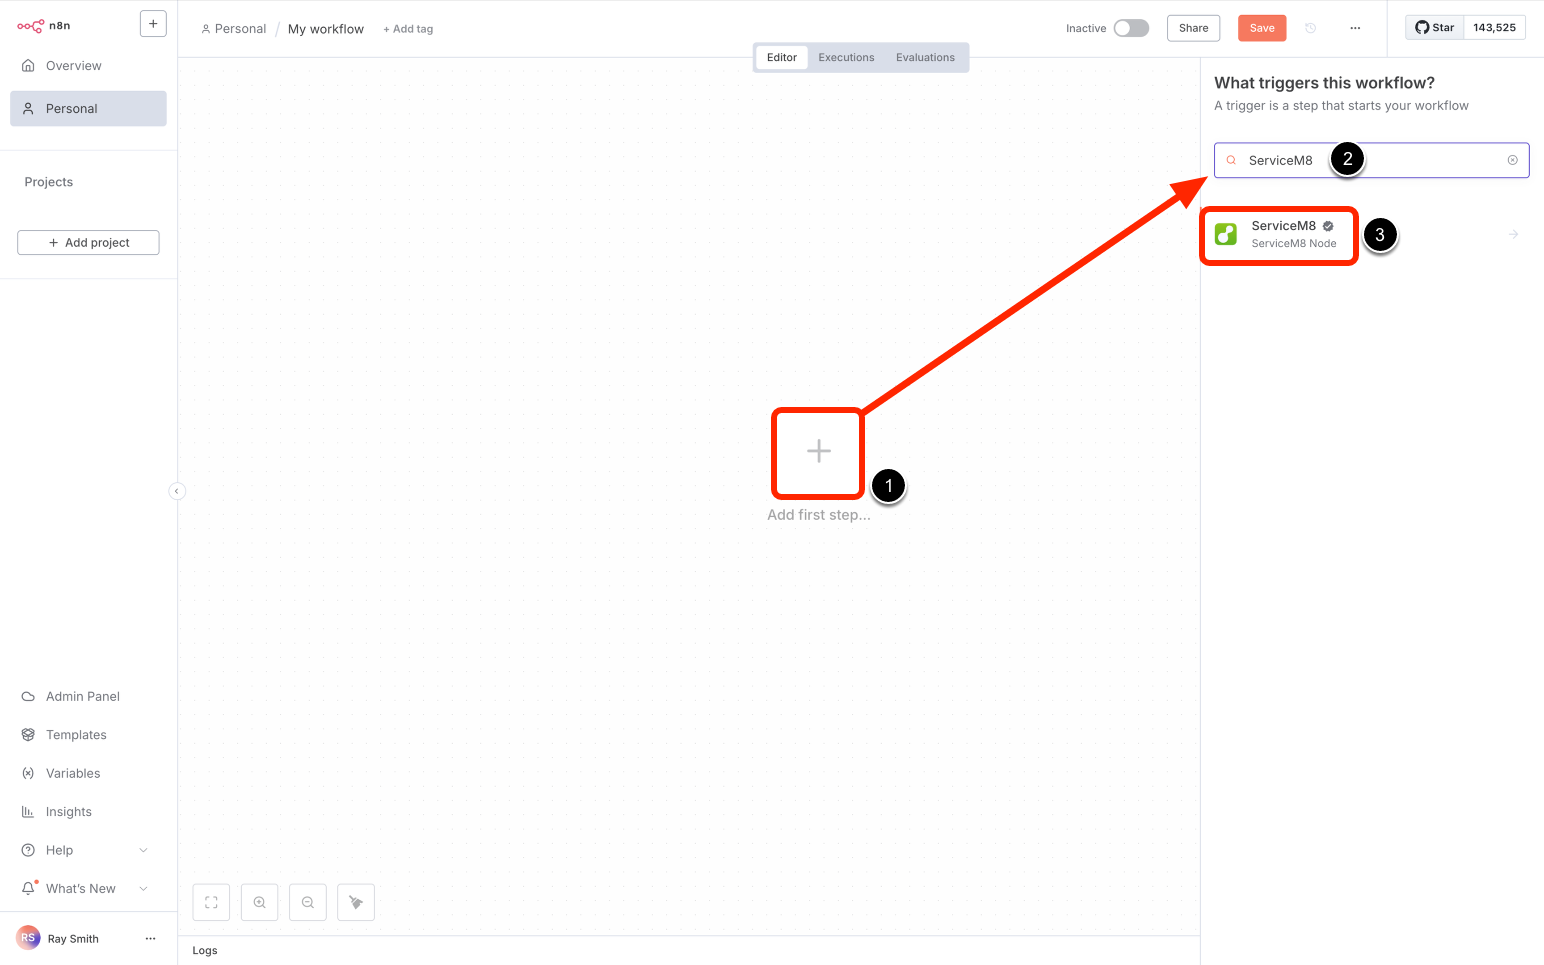 2. Select ‘ServiceM8’ then click ‘Install node’.
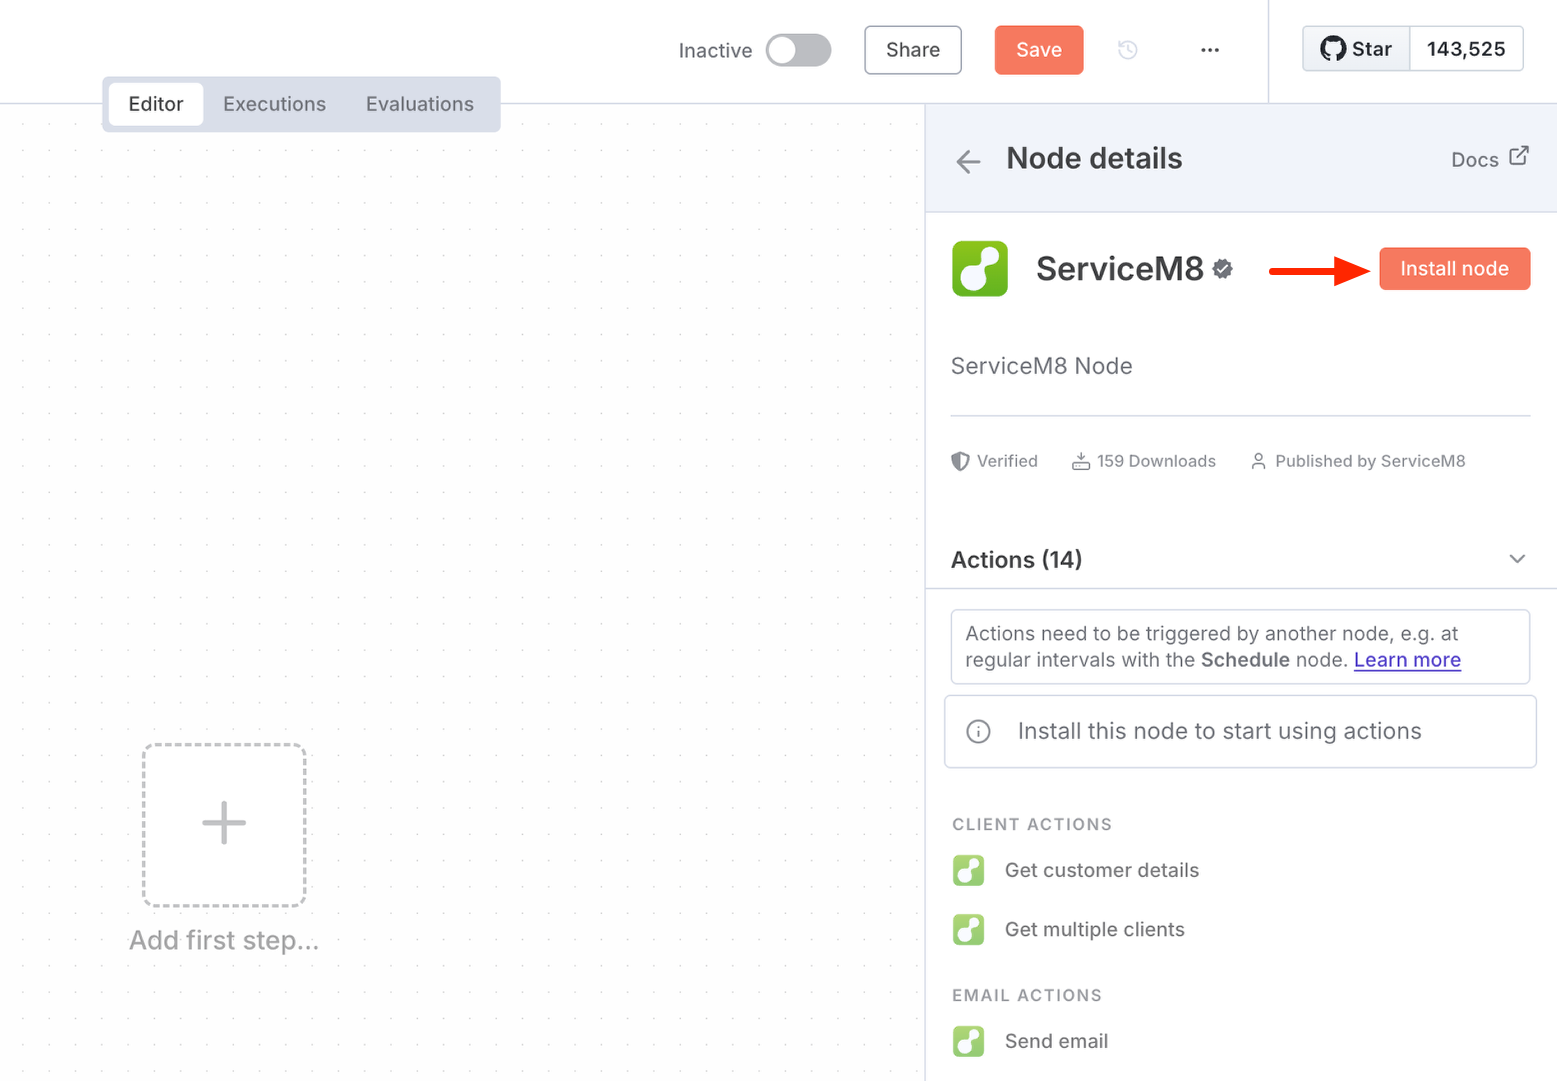
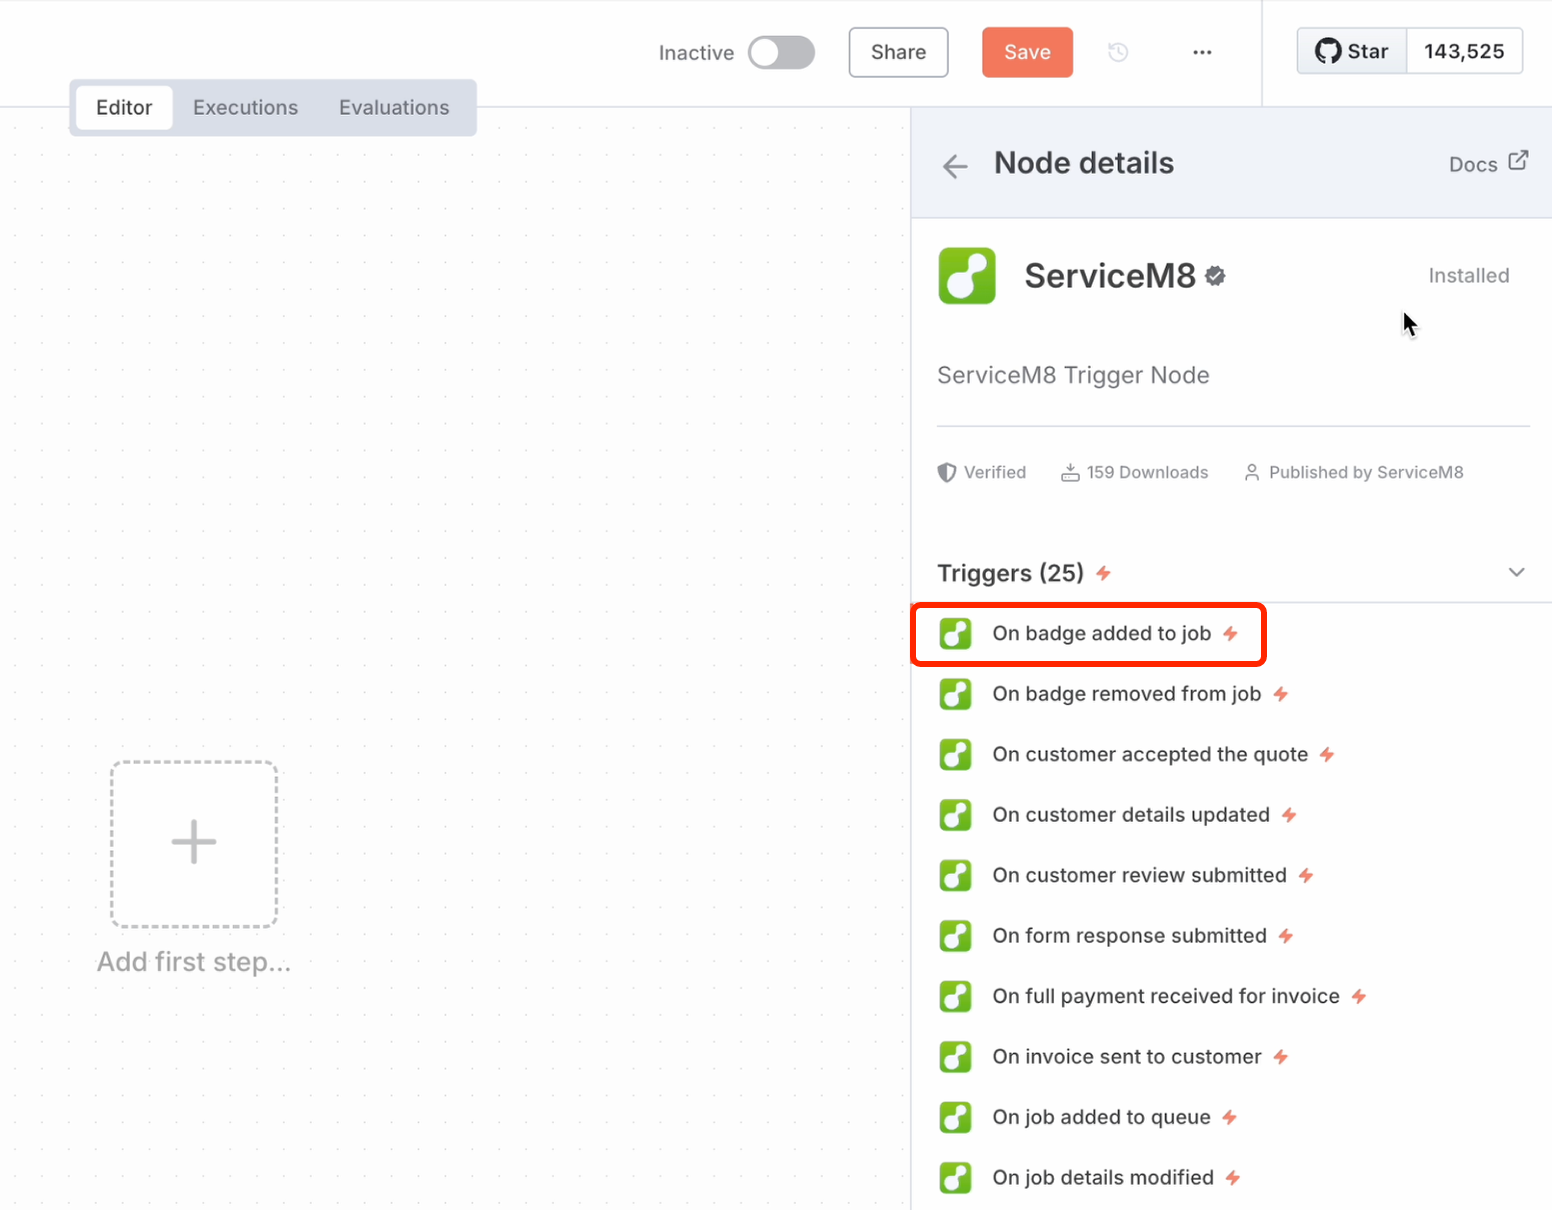
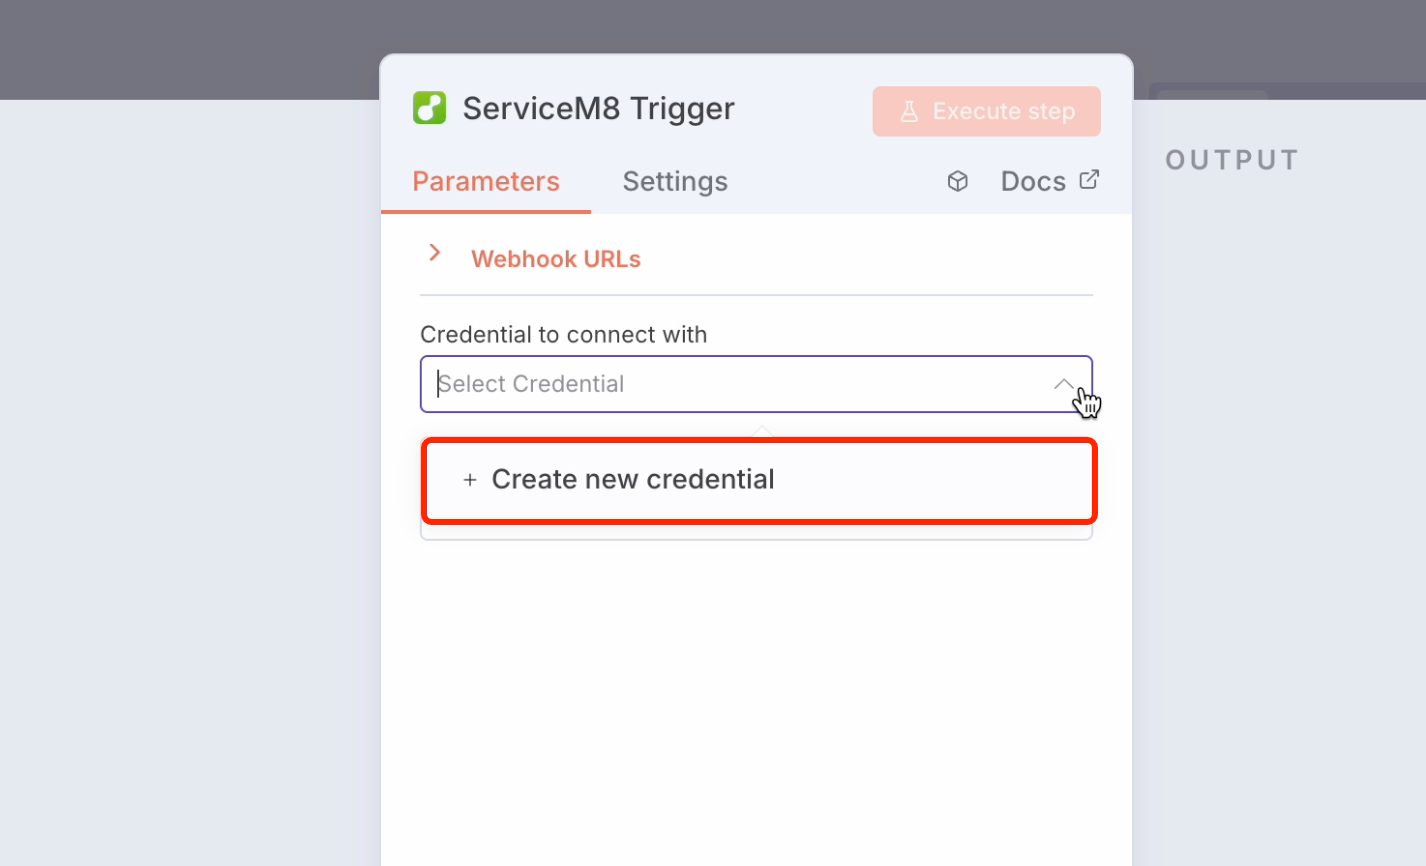
 3. Click a ServiceM8 trigger as your first step e.g. “On badge added to job”
 4. In the ‘Credential to connect with’ field, select ‘Create new credential’.
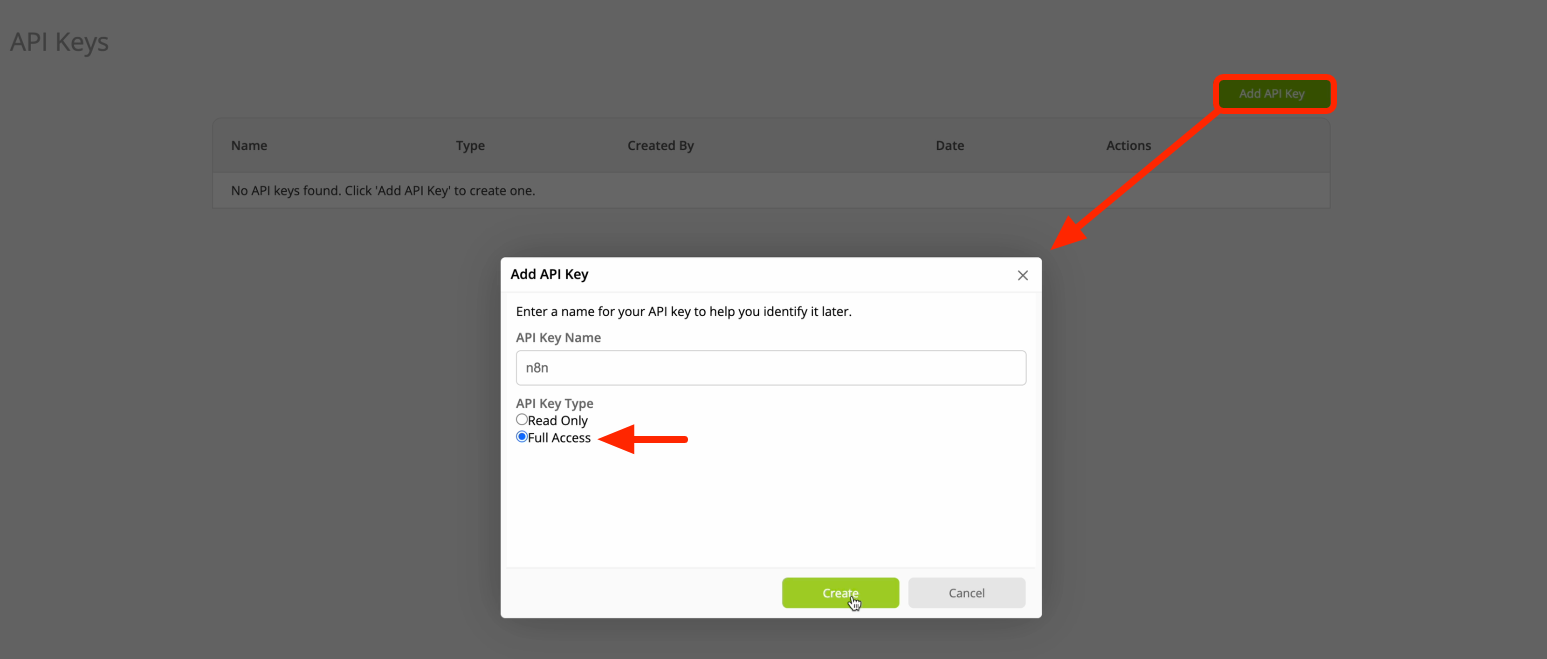
 5. In ServiceM8, go to Account > Settings > API Keys > Add API Key, and create a new API Key for n8n:
- API Key Name: Note that the ‘API Key Name’ will be the name attributed to actions in ServiceM8 e.g. if your API Key Name is “n8n” and your n8n workflow adds a Note to a job card, it will say ‘by n8n’ next to the Note in the job’s Diary.
- API Key Type — Read Only: use this if your workflow only reads data from ServiceM8 (no changes or updates).
- API Key Type — Full Access: required if your workflow creates or updates records in ServiceM8 (e.g. add a Note, create a job).
- Keep your API Key private — never share it with anyone.
- Treat it like a password: if it’s ever exposed, delete it and create a new one.
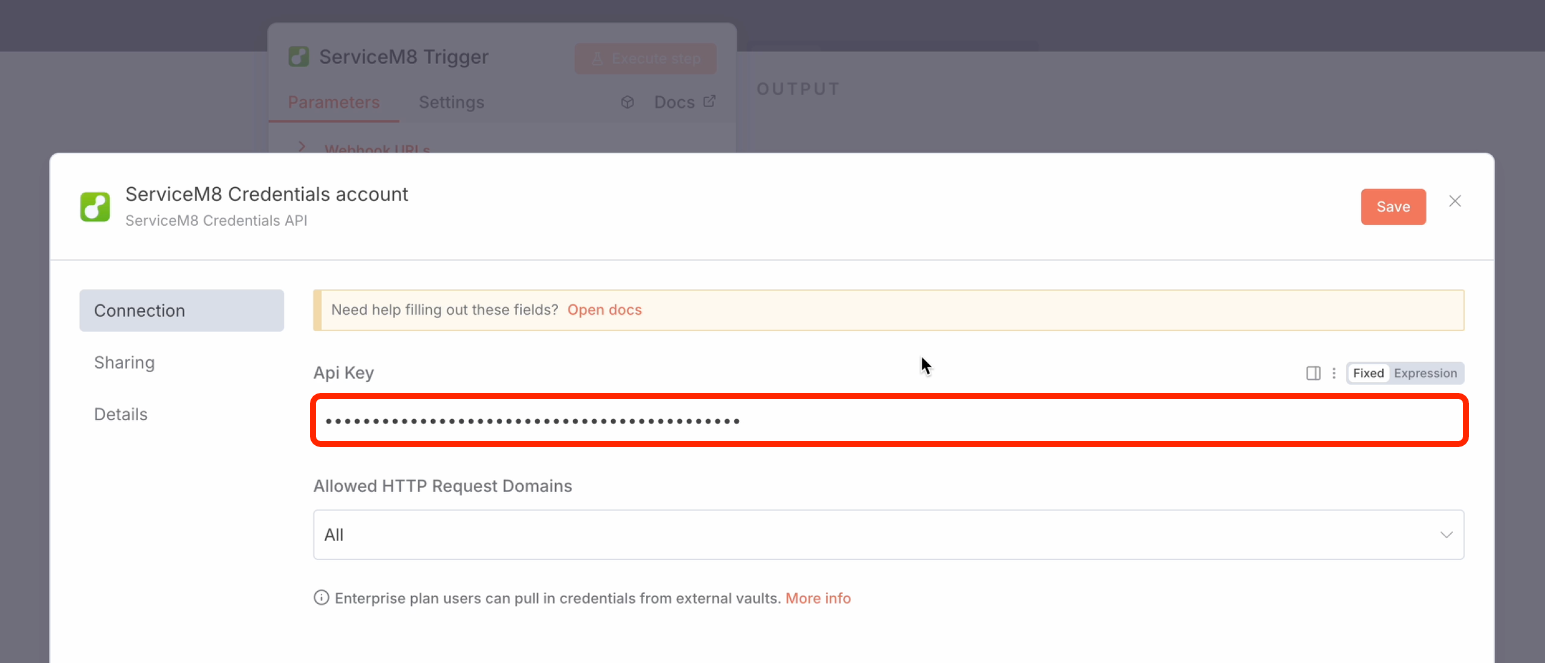
 6. In n8n (after clicking ‘Create new credential’, as seen in Step 4), enter your API Key, then Save, to authenticate and connect your ServiceM8 and n8n accounts.
 7. Done! You can now use ServiceM8 trigger and action nodes in n8n workflows.
Getting Started & Support
For guidance on getting started with n8n, see the n8n Learning Path, the n8n Community Forum and/or the n8n YouTube channel. If you believe an aspect of a ServiceM8 node isn’t working as it should, please contact ServiceM8 Support. However, please note that we can’t provide support for:- Designing or building your n8n workflows
- Troubleshooting custom workflow logic or errors
- Advising on how to connect or configure other apps in n8n