- Bulk-importing the assets into ServiceM8 (covered in this article, below); and
- Completing the setup of each asset on site, by linking the saved Asset to a new QR code label (covered separately, here).
How to Bulk-import Assets
To get started, you will need the assets you are importing to be formatted into a .csv spreadsheet. If needed, you can download a sample CSV in Step 2 of the import process, to help format the asset data you have. Please note you can only import one Asset Type, for one Client, at a time e.g. if you want to import a portfolio of assets for a client, comprised of 5 different types of assets, you will need to separate them into 5 x spreadsheets and bulk-import them separately using this process. When ready, 1. Go to Account > Settings > Assets > Bulk Import. 2. Search and select the client you want to save the assets against, and set the Asset Type.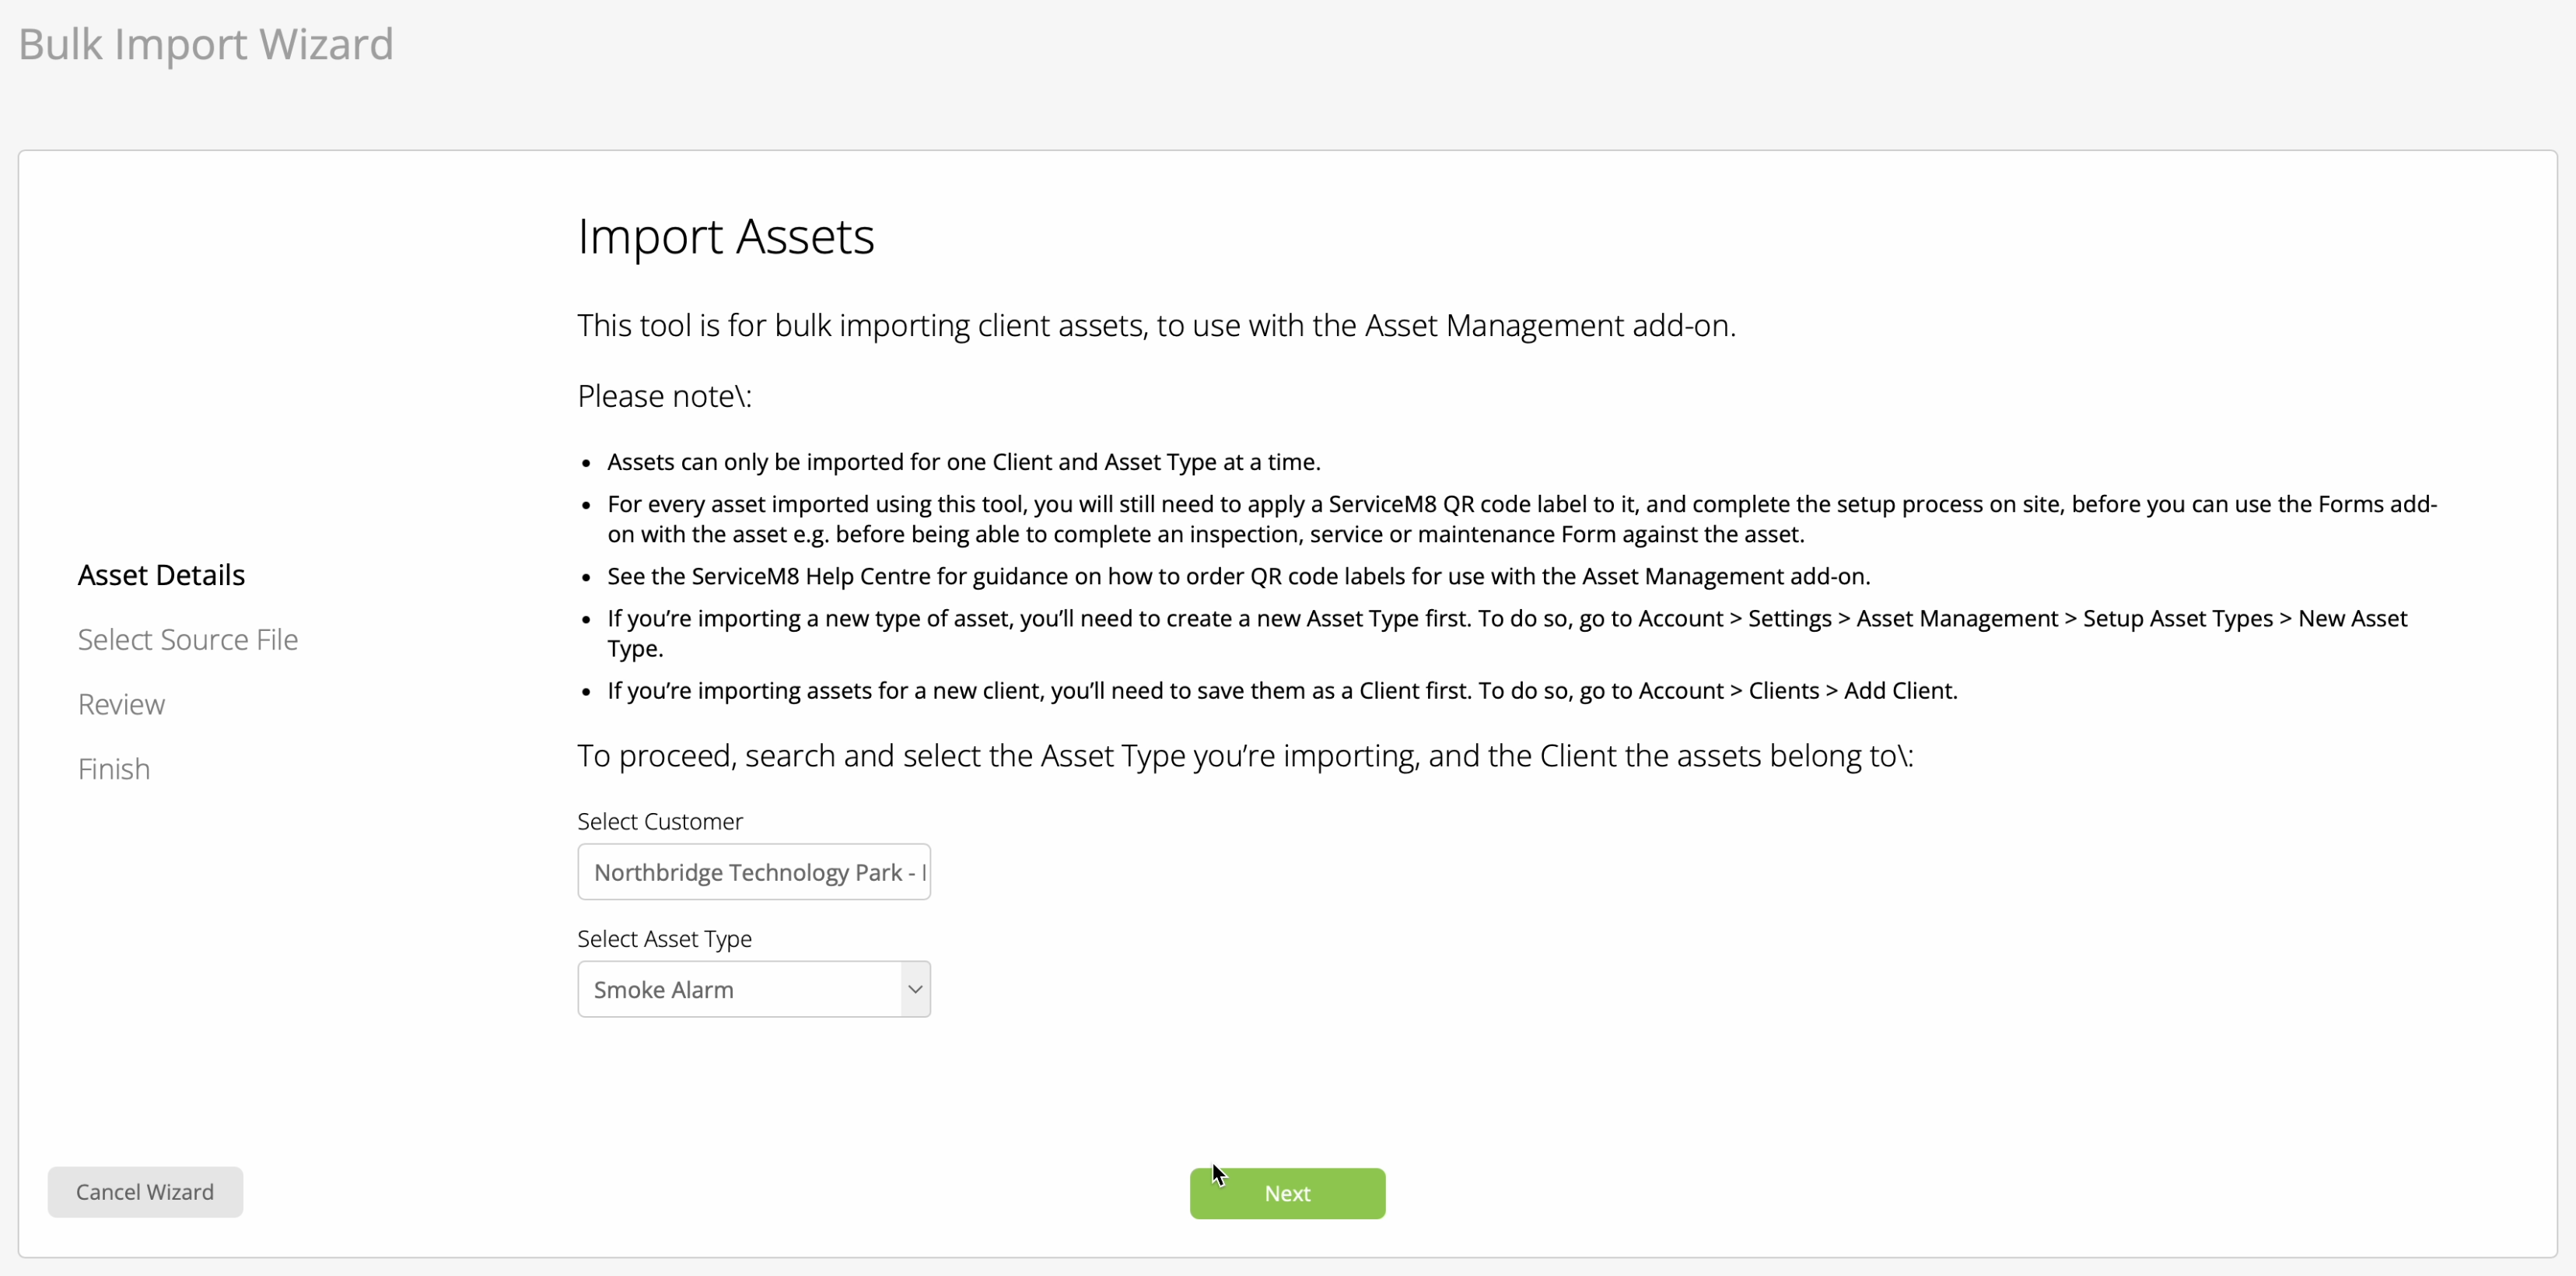 3. Upload your CSV, ensuring they contain only assets for the single selected Asset Type, for the client selected.
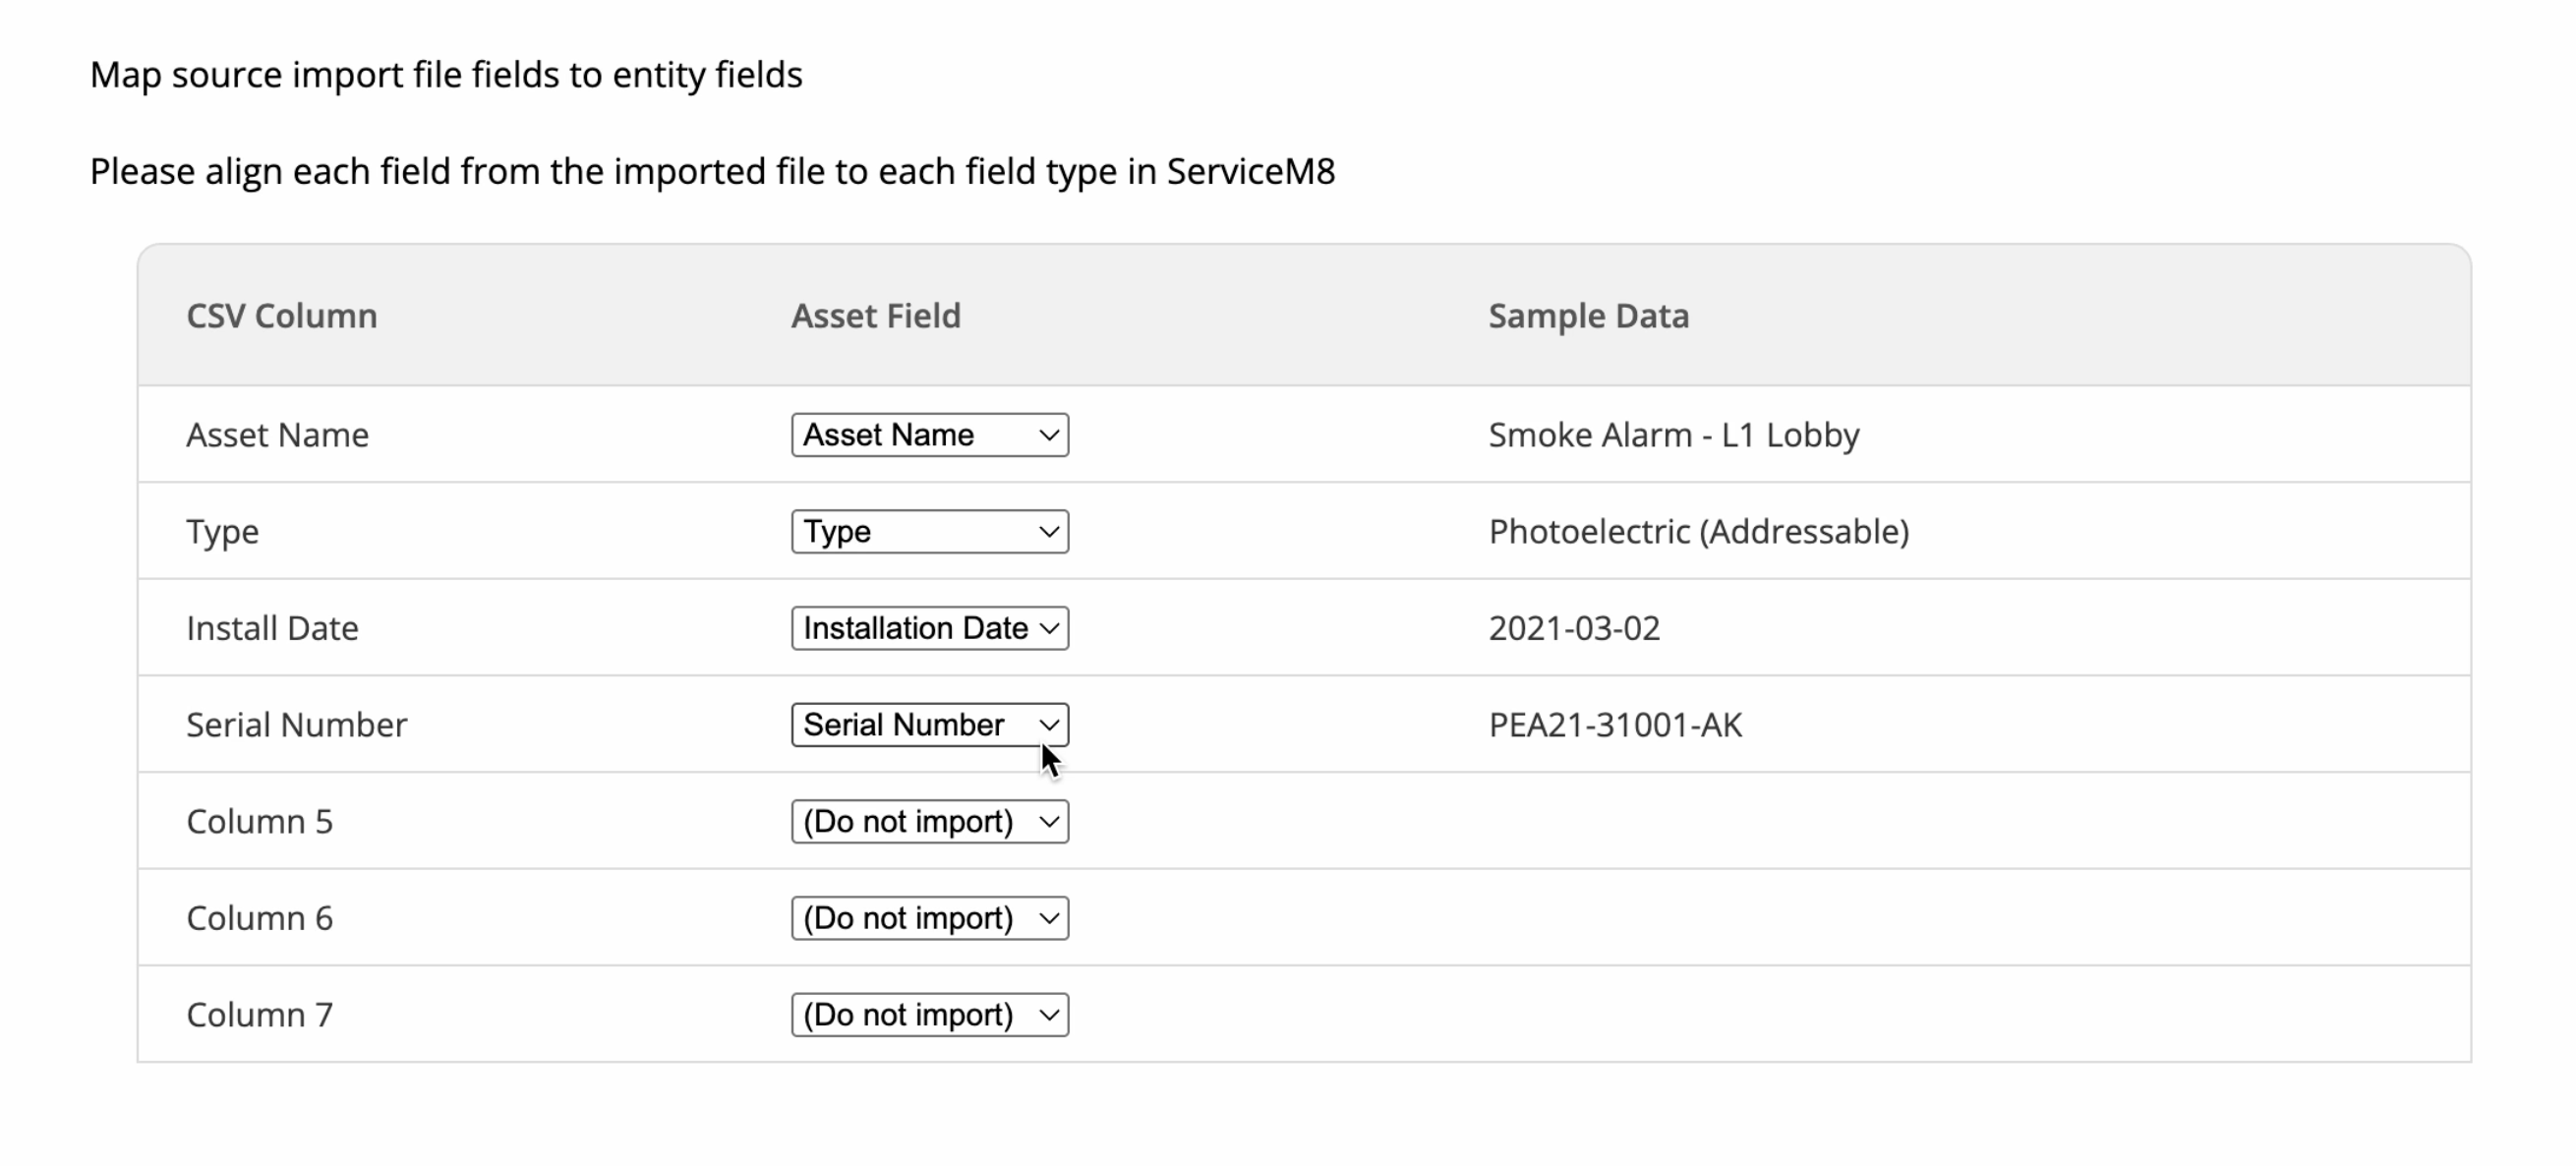
 4. Review the table to ensure the data from your spreadsheet is mapped to the correct fields for the selected Asset Type:
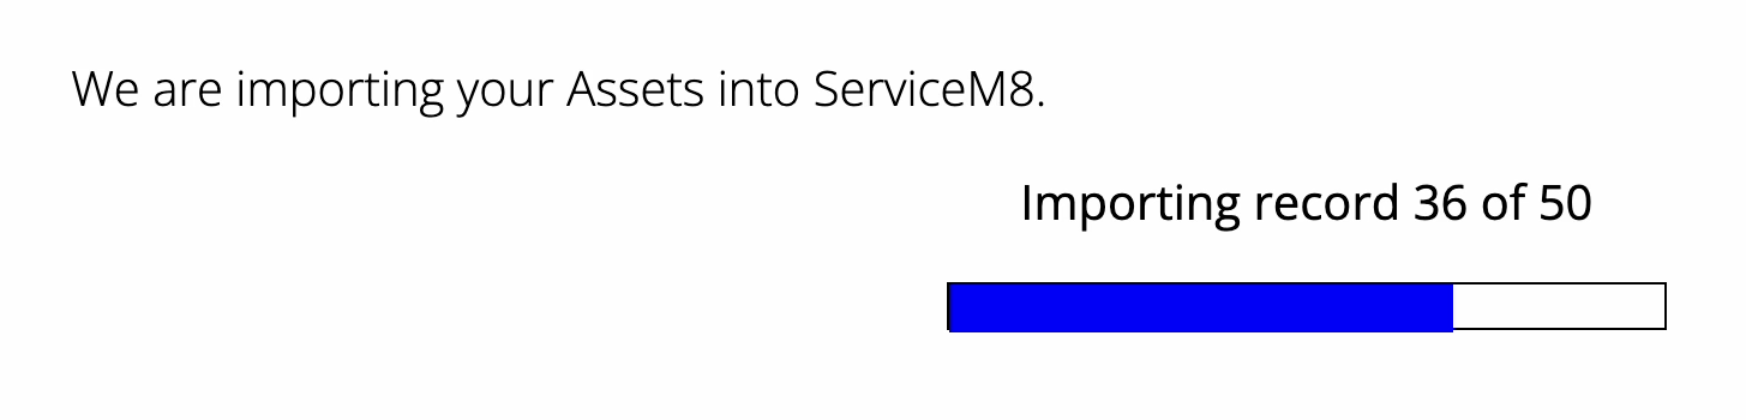
 5. Proceed to import the assets:
 Some important notes:
- Assets can only be imported for one Client and Asset Type at a time.
- For every asset imported using this tool, you will still need to apply a ServiceM8 QR code label to it, and complete the setup process on site, before you can use the Forms add-on with the asset e.g. before being able to complete an inspection, service or maintenance Form against the asset. See How to order QR code labels.
- If you’re importing a new type of asset, you’ll need to create a new Asset Type first. To do so, go to Account > Settings > Asset Management > Setup Asset Types > New Asset Type.
- If you’re importing assets for a new client, you’ll need to save them as a Client first. To do so, go to Account > Clients > Add Client.