Create a ‘Business Hours’ allocation window
In Settings > Allocation Windows, ensure you have an allocation window which includes the exact words ‘Business Hours’, and review the window’s Start & End Times.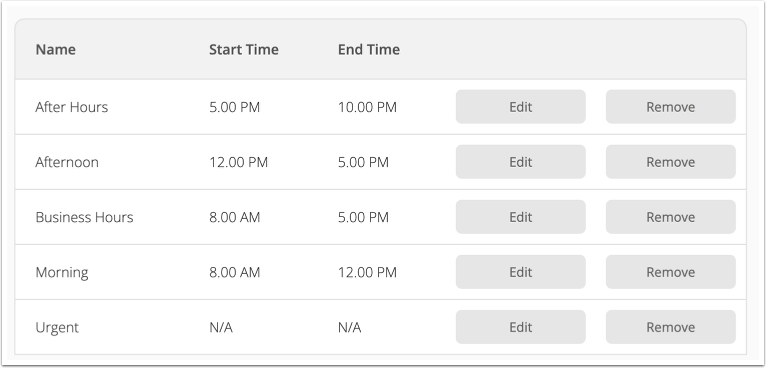
Show allocated jobs in Staff Schedules
In Settings > Preferences > Job Allocations, set ‘Show allocated jobs in Staff Schedules’ to Yes. This way, these allocated jobs will display alongside fixed-time bookings in the Staff Schedules view of the Dispatch Board.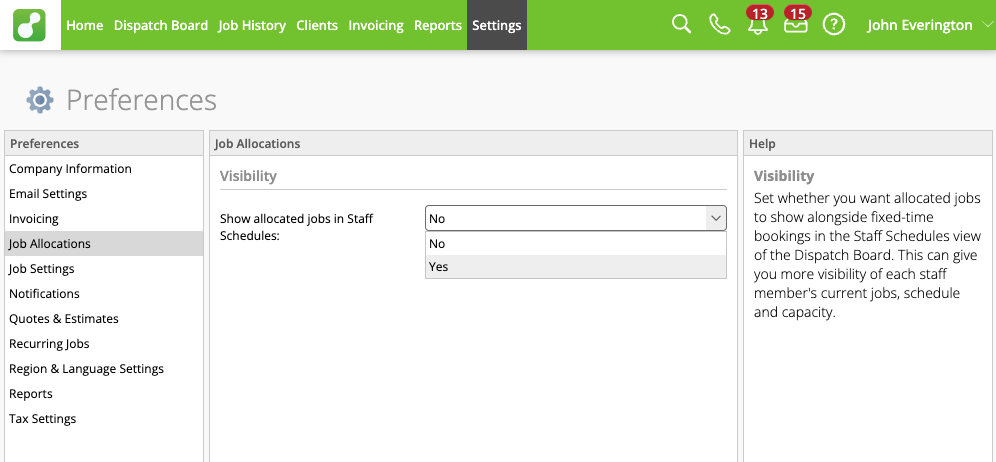
Drag-and-drop jobs onto the shortcut box
To allocate jobs to staff in your ‘Business Hours’ allocation window, simply click and drag a job, hover over the relevant staff row in the Staff Schedules tab, and drop it onto the ‘Business Hours’ shortcut box.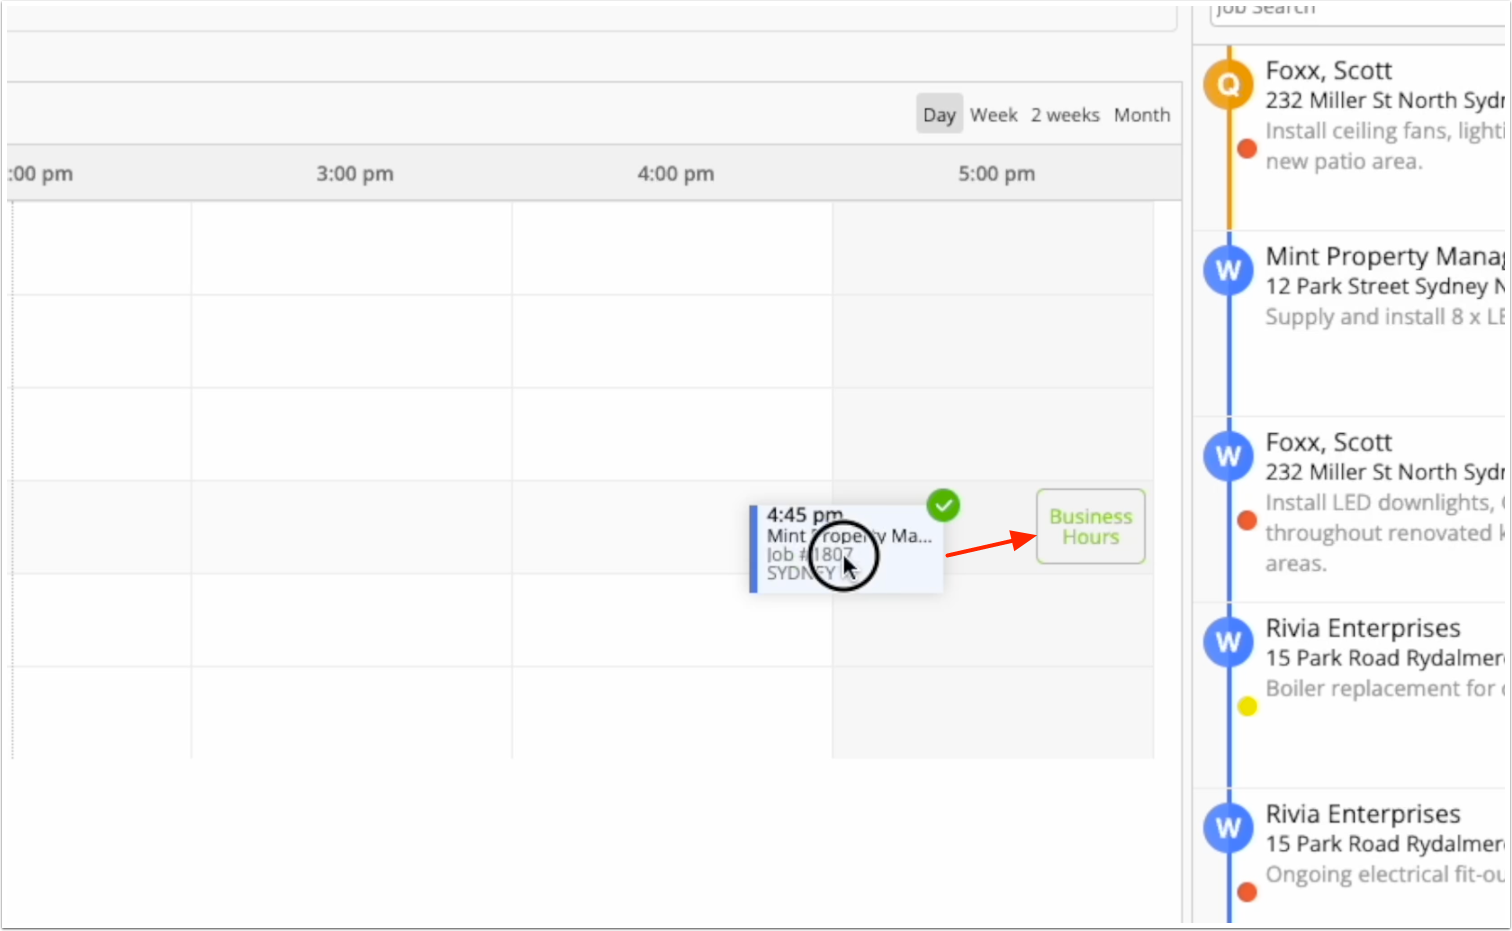 Note:
Note:
- These allocated jobs will show on the Staff Schedule, just like fixed-time bookings, giving you the full picture of a tech’s schedule & capacity.
- Allocated jobs automatically stack and shuffle around fixed-time bookings on the Staff Schedule, to keep themselves visible.
- You can drag allocated jobs left and right on the Staff Schedule, to prioritize a staff member’s schedule, which will update the display order in the app.