With the ServiceM8 iOS app, you can take mobile payments on site, in person with your client, generate an invoice, and approve it through to your accounting software, before you even drive away to your next job. This is great for job completion, efficiency, cash flow, reconciliation, and the customer experience.
Accepting card payments on site is possible with ServiceM8 Pay, our payment solution which lets you receive payments from your customers through ServiceM8, without having to set up a merchant account with your bank.
You will need to activate and complete the set up of the ServiceM8 Pay add-on, in order to accept card payments through ServiceM8. If you haven’t done so already, see How to get started with ServiceM8 Pay.
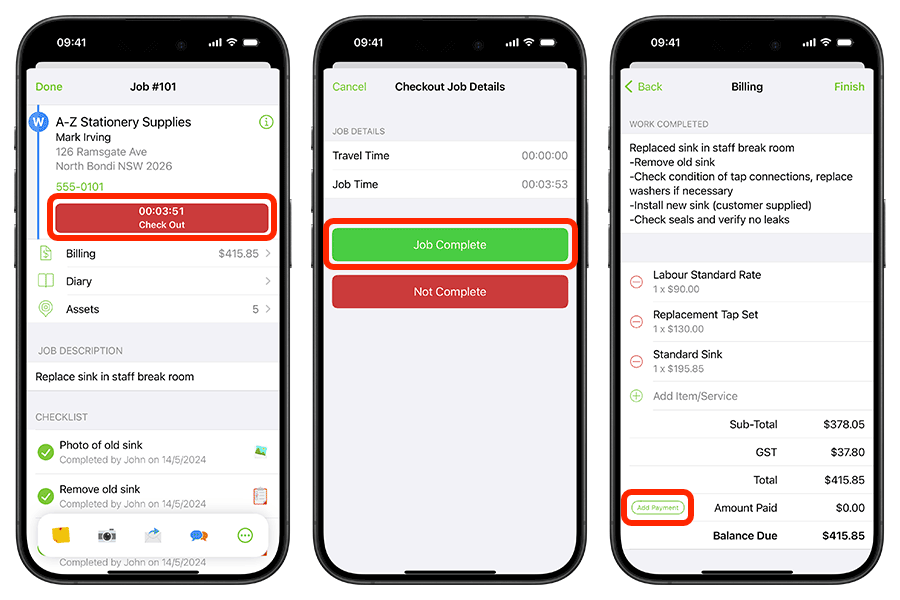
To accept a payment, when you Check Out of a job, mark the job as completed, then once you arrive in the Billing view, tap ‘Add Payment’:
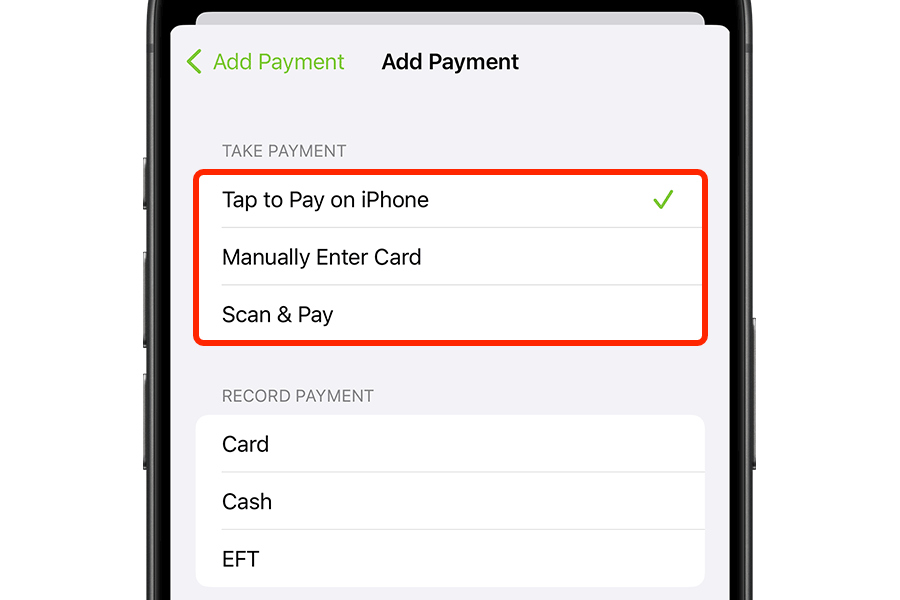
 You can process the card payment by Scan & Pay, Manual Card Entry, and if available in your country, Tap to Pay on iPhone:
Tap to Pay on iPhone
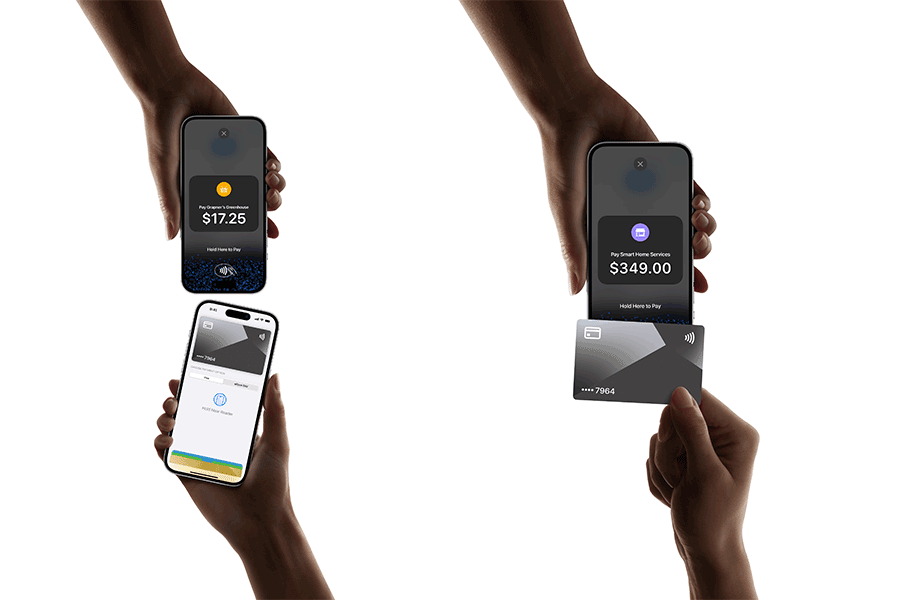
With Tap to Pay on iPhone in the ServiceM8 app, you can accept in-person contactless payments, with only your iPhone — from clients with physical debit and credit cards, to Apple Pay and other digital wallets — no extra terminals or hardware needed. Note that Tap to Pay on iPhone needs to be enabled by the ServiceM8 account owner on their own iPhone, followed by all field staff individually. For guidance, see Tap to Pay on iPhone. Once you’ve enabled Tap to Pay on iPhone on your device, you’re ready to start taking payments! To do so: 1. In the ServiceM8 iOS app, follow the steps above to Check Out of a job, and finalise the billable items, tap ‘Add Payment’, then ‘Tap to Pay on iPhone’: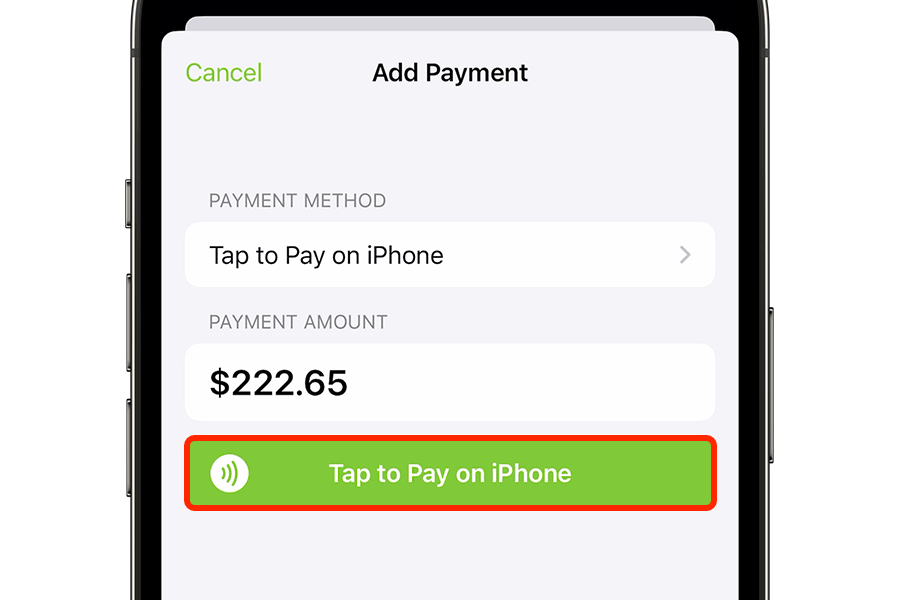 2. Present your iPhone to your client, and ask them to hold their physical card, mobile device or wearable over the contactless symbol for a few seconds:
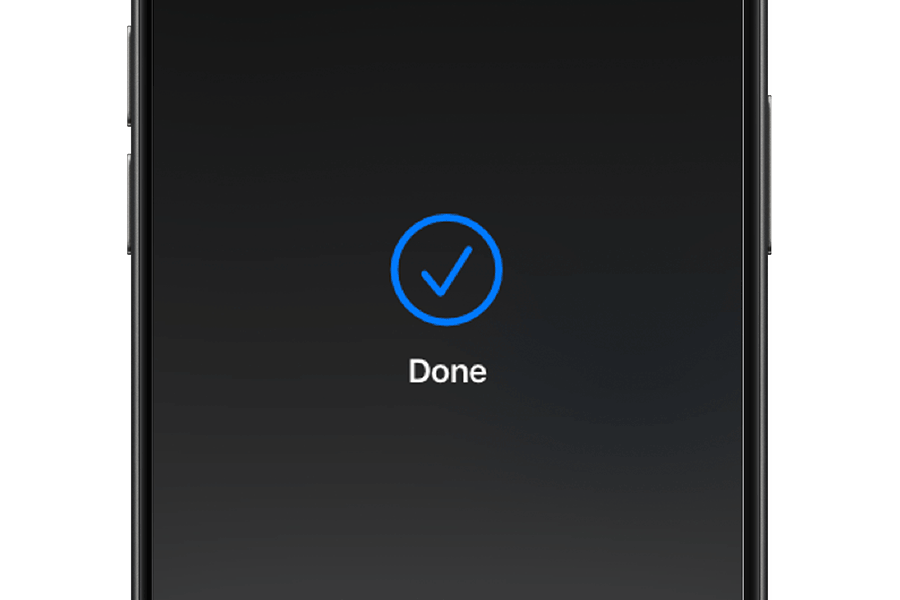
 3. Wait for the ‘Done’ checkmark & the transaction is complete!
Scan & Pay
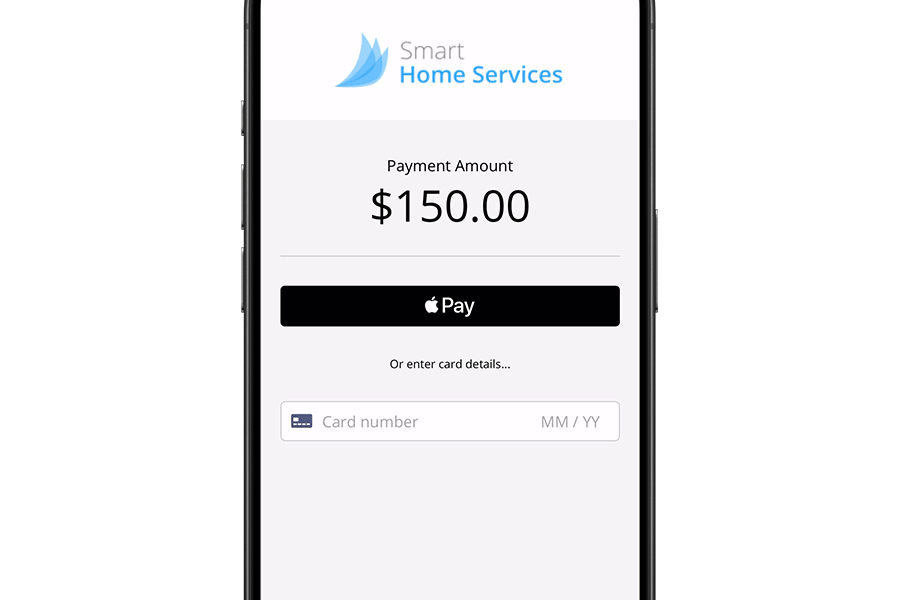
Scan & Pay lets you present a unique QR code on the ServiceM8 app for the client to scan with their own phone, taking them directly to a special payment page for that job, to instantly pay on their own device using Apple Pay or Google Pay, or manually enter their card details on their own device. 1. To take contactless payment this way, follow the steps to Check Out of a job, finalise the billable items, tap ‘Add Payment’, then ‘Scan & Pay’: 2. Hold your device up for your client to scan the code with the camera on their mobile device. The QR code will open to a payment page in their device’s browser, for the specific job, where the client can pay by Apple Pay, Google Pay, or enter their card details manually themselves:
 The ServiceM8 app will detect when the payment is processed and update the job’s payment status immediately, and you’ll be able to tap ‘Finish’ to generate a paid invoice to email and/or SMS the client.
Scan & Pay is available on both the iPhone & iPad versions of the ServiceM8 app.
The ServiceM8 app will detect when the payment is processed and update the job’s payment status immediately, and you’ll be able to tap ‘Finish’ to generate a paid invoice to email and/or SMS the client.
Scan & Pay is available on both the iPhone & iPad versions of the ServiceM8 app.
Manual Card Entry
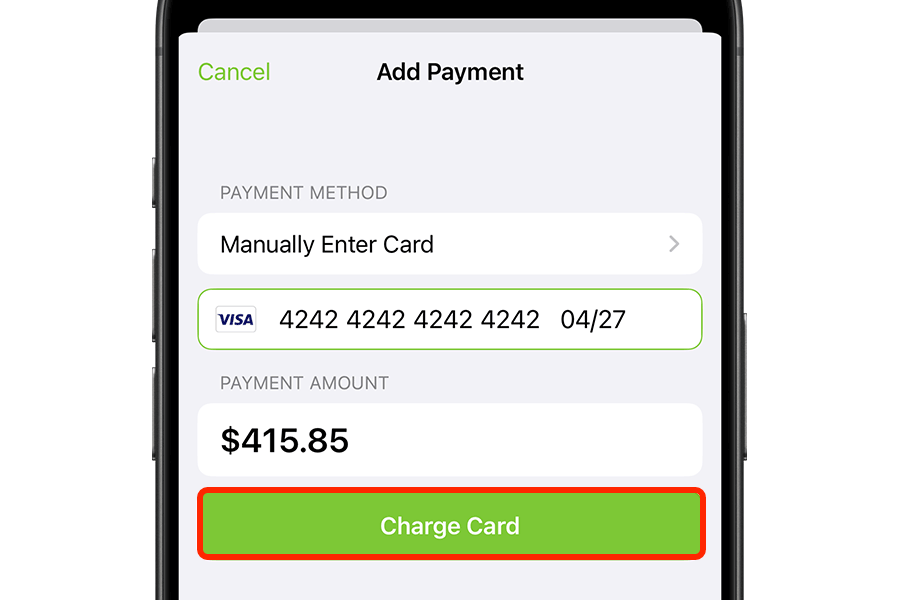
If a client wishes to pay with a physical credit or debit card, you can manually enter their card details to process a payment. 1. To do so, follow the steps to Check Out of a job, finalise the billable items, tap ‘Add Payment’, then ‘Manual Card Entry’: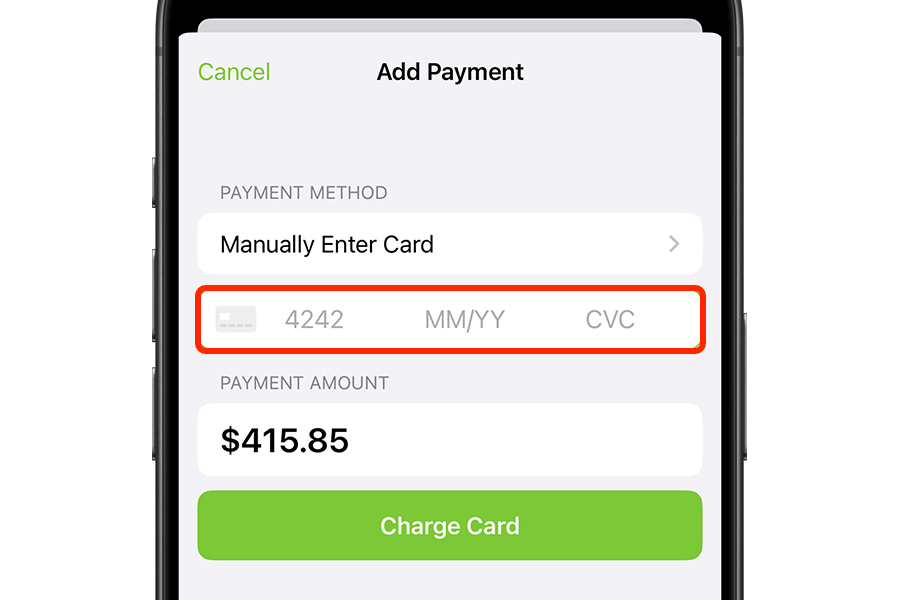 2. Enter the client’s card number, expiry date (MM/YY), and the 3-digit CVC security code (often found on the rear side of the card), then tap ‘Charge Card’:
 Manual Card Entry is available on both the iPhone & iPad versions of the ServiceM8 app.
INVOICING TIP!
If you have access to Approve invoices to your accounting software, you can automatically Approve invoices as part of the Check Out process, on site — this is great for streamlining and automating your invoicing and reconciliation workflow. To do so, toggle the ‘Approve Invoice’ switch to ON at the bottom of the Billing view, before you generate the invoice: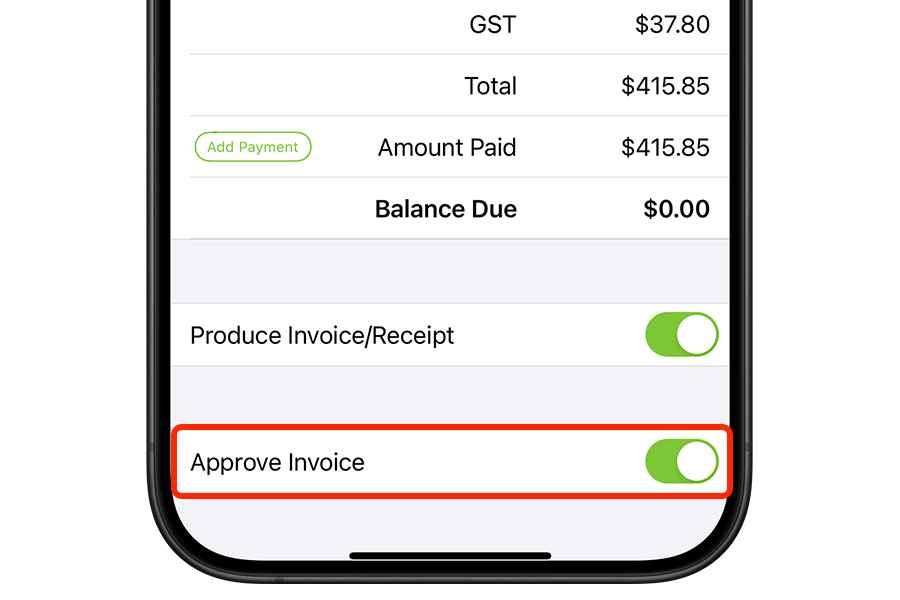 This is a ‘per staff member/per device’ setting, and will remain ON for other jobs you complete until such time as you switch it off. With the switch set ON, proceed to tap ‘Finish’ as you usually would, to generate the PDF invoice to email and/or SMS to the client:
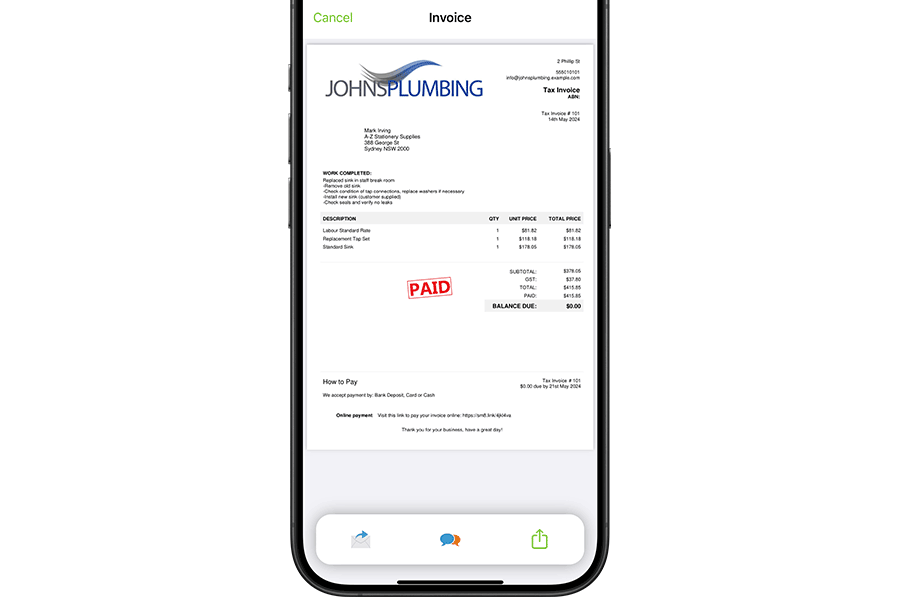 With the ‘Approve Invoice’ switch ON, the invoice’s details, including the client, description, items and payment status, will be automatically sent through to your accounting software.