- Downloading the template for modification
- Adding new fields
- Adjusting formatting
- Uploading the modified template back to ServiceM8
To download a template for modification:
- From the Online Dashboard, go to Settings > Document Templates and find the template you’d like to modify. (For more information about choosing a template, go to Selecting new invoice or quote templates.)
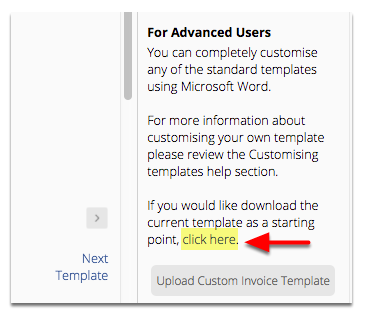
- From the Help pane on the right, click click here to download the template.

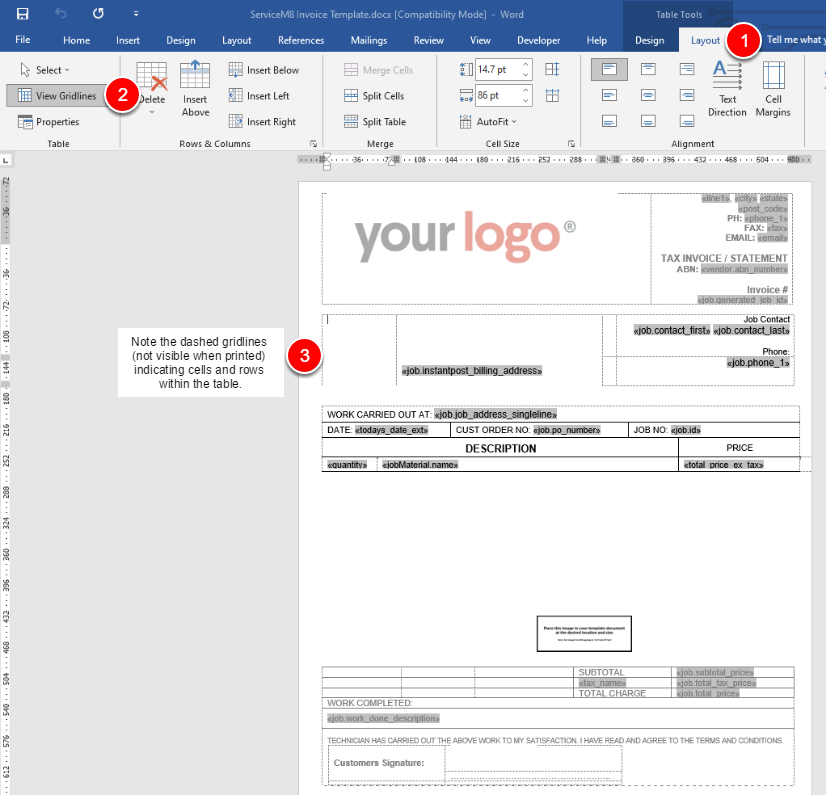
- Open the template in Word (if asked, click Enable Editing).


- Go to Table Tools > Layout and click View Gridlines. This lets you see how all template content is structured within hidden tables in Word.

To add fields to a template:
- Highlight the row above where you will be adding new fields.
- Right-click and click Insert > Insert Below.
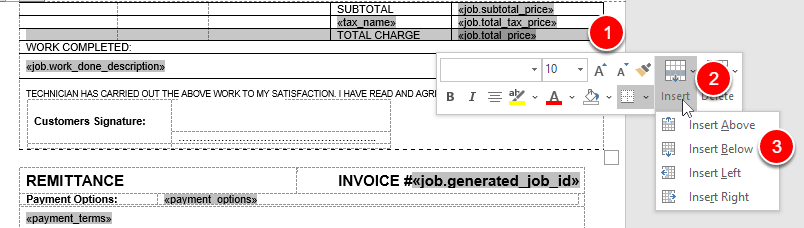

- Repeat once so that you have two new rows below Total Charge.
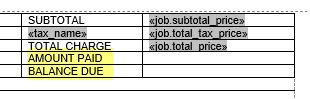
- Type in your new field descriptions (Amount Paid and Amount Due) below Total Charge.

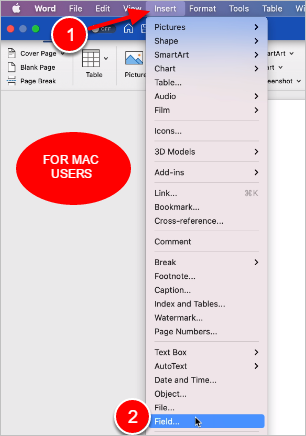
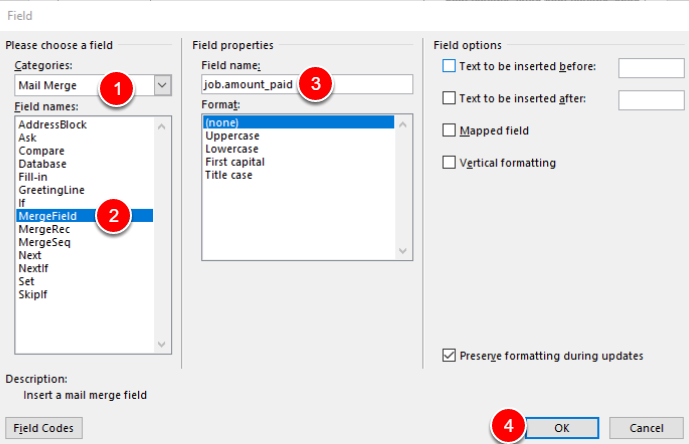
- Insert your cursor in the cell to the right of Amount Paid and go to Insert > Quick Parts > Field. (For MacOS users, go to Insert > Field per the second picture below.) The Field window will open.
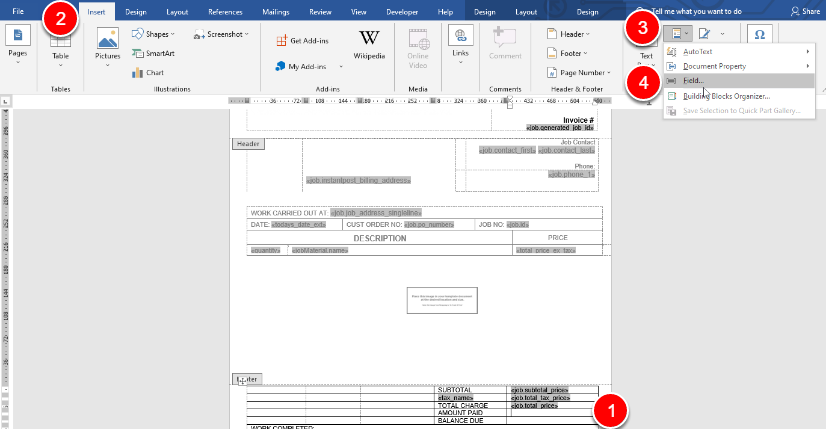


- Under Categories, select Mail Merge, then select MergeField as the field name.
- Under Field properties, enter job.amount_paid as the field name (or copy and paste it from the list of available fields). (For MacOS users, enter the field name in the MergeField text box per the second picture below.)
- Click OK.


- Place your cursor in the cell to the right of Balance Due and, using the same process, insert another field. This time, use job.balance_due as the field name in the field properties.
Adjusting formatting
You should now have two new fields in two new rows in your invoice template. However, adding rows and fields can sometimes impact the appearance of a template. To ensure a professional, consistent presentation, always check formatting and alignment before uploading back to ServiceM8. In the example below, the two new fields are formatted in a different font than the others. To correct the issue, simply highlight the fields and change the font as needed to match the rest of the invoice.

Uploading a modified template to ServiceM8
- From your ServiceM8 Online Dashboard, go back to Settings > Document Templates.
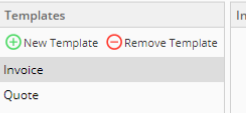
- From the Template pane on the left, select the type of document you are uploading (Invoice or Quote).

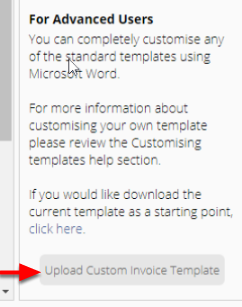
- From the Help pane on the right, click Upload Custom Invoice Template.

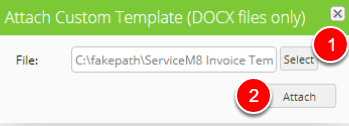
- Click Select and find your saved template.
- Click Attach.